How to make a bed for a child
For children, parents always try to choose the best, including furniture, but looking at completely childish prices for wooden beds, or on beds - cars, boats, etc. Inevitably, you will wonder whether it is worth buying such a thing for several years ... Buying, maybe not, but you can do it yourself. A do-it-yourself children's bed can be assembled from several boards and bars in a few days. No particularly complicated work or special tools are required. Basically, you need hands and desire.
The content of the article
Wooden bed
This is an ordinary bed without any tweaks. In the presented version, it is suitable for middle school age and adolescents, but then it can be completed for children from 3 years of age (second photo report). Assembled from wooden parts (planks and bars). The project can be used as a basis, then add design ideas.
You can argue about the color, but as a basis - a great option.
Materials and tools
No special tools are required for manufacturing. All that is needed:
- a saw (hand-made for wood or disk - whoever has what, maybe - end-saw, you can cut it with a grinder with a disk on wood);
- Desktop;
- drill with drills and countersink;
- sander (if you do not have to work with sandpaper manually);
- roulette.
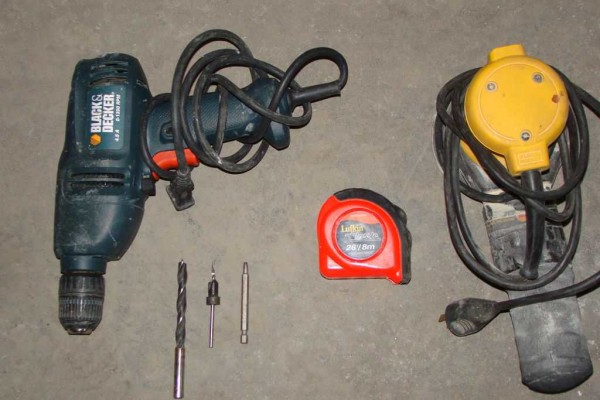
Tools you need to work

Materials needed are:
- timber - 50 * 100 mm;
- board 25 * 100 mm and 25 * 75 mm;
- glue for wood;
- putty for wood;
- sandpaper.
Count the number of planks based on the planned size. Requirements for wood - low moisture content (not higher than 16%) and the absence of knots or their small number.
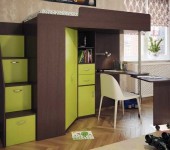
Children love to sleep higher. Read how to make a loft bed here.
Making legs
A do-it-yourself children's bed begins with the manufacture of legs. We cut blanks from a bar of 50 * 100 mm - for the headboard it is longer, for the footboard it is shorter. 4 pieces of each length required. We glue the blanks in pairs. We take one, coat it with wood glue, lay the second one, check whether they are evenly set, twist it with self-tapping screws. In principle, you can use a beam of 100 * 100 mm and do not bother with glue, but the price for it really bites.
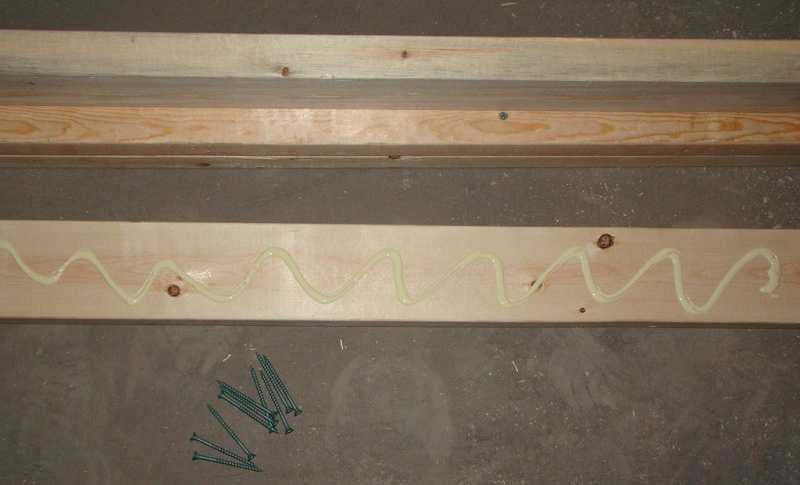
We coat the boards with glue and fold in pairs
We sink the screw heads into the wood, then we seal it with putty on the wood. After drying, sand to a smooth state (with medium to fine sandpaper).
Finished legs before putty
We also use sandpaper to bring the joint to an ideal state - everything should be smooth and even.
Dowel holes
For the backs, boards with a groove 25 mm wide will be needed. If you have a router, you can make it yourself or grind it in the carpentry shop. Dowels can also be bought ready-made; choose a drill according to their diameter.
We drill holes for the dowels at the ends of the slats with grooves. Determine exactly their distance from the edge - they should be strictly at the same level on all planks.
Also, the holes should be of the same depth - half the length of this piece of wood. In order to be able to navigate when drilling, a marker is attached to the drill - a strip of masking tape. With its help, the depth of the hole is controlled.
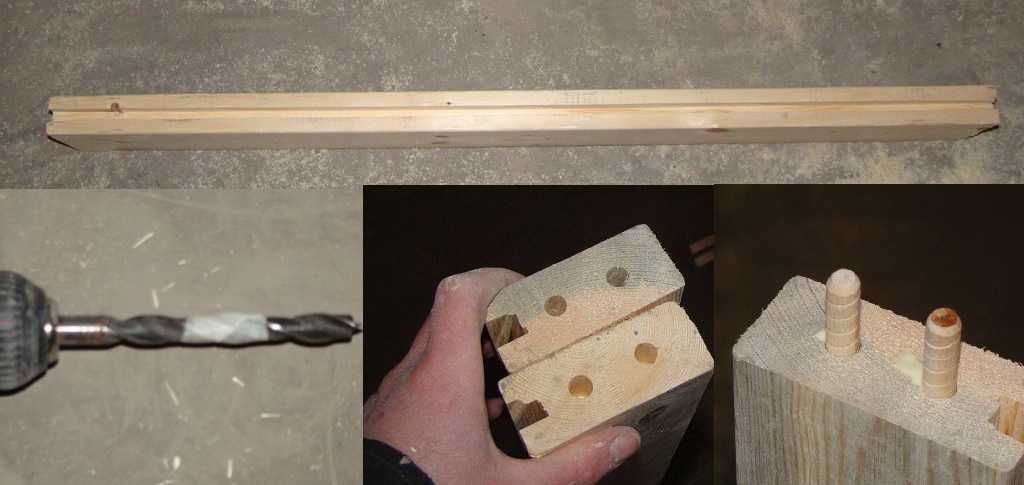
Dowel holes
Assembling the headboard and footboard
Planks of the same length are cut from a board of 25 * 50 mm to fill the headboard and footboard. They are inserted into a groove pre-coated with glue.
We also drill a hole in the leg for the dowels. First, we find the middle, draw a line along it (with a pencil).Attach the assembled back, align it along the upper edge, put the dowels on the line and mark the places where you need to drill holes for them (two at the top, two at the bottom). Pour some glue into the holes and put the backrest. It is necessary to plant tightly, without gaps. You can knock with your fist or mallet (don't damage the wood).
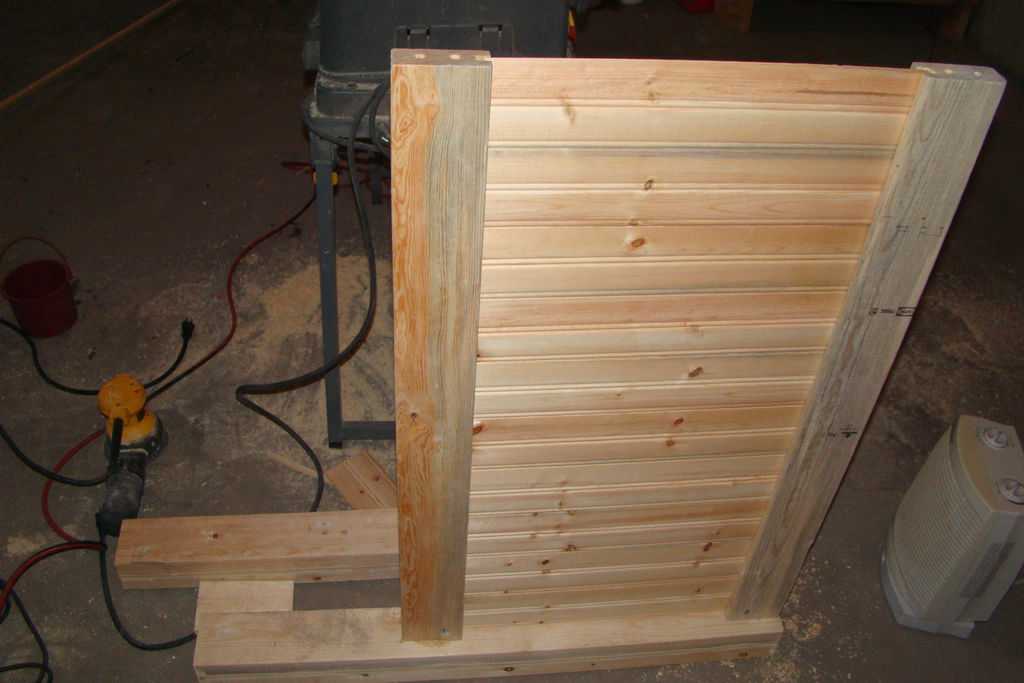
We attach the back to the leg of the bed
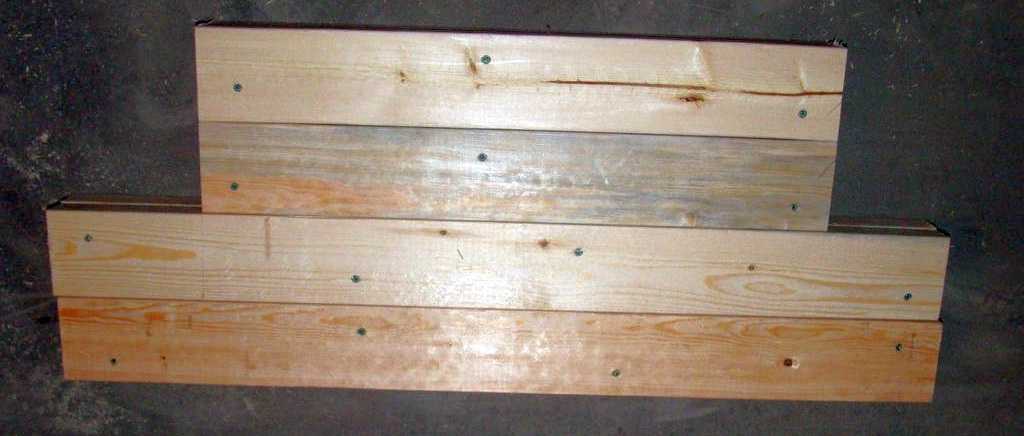
We repeat the same operation with the other leg. A not very beautiful joint at the top can be closed with a board, placing it on self-tapping screws and covering up the holes. As a result, this is what happens.
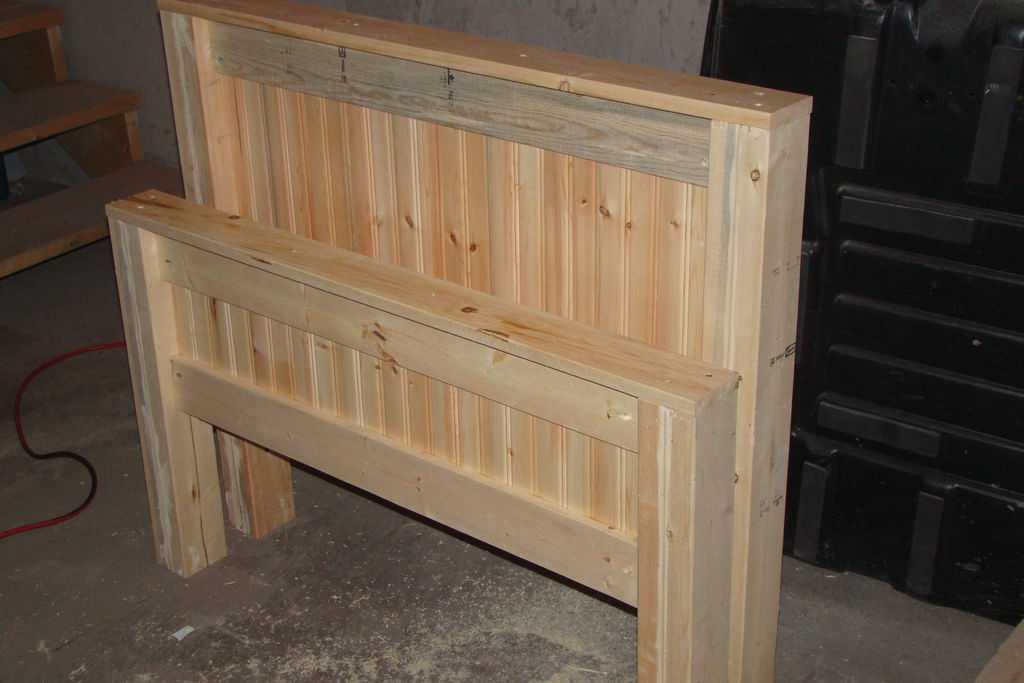
The footboard and headboard are ready
One important point when it comes to gluing parts. Until the glue is cured, the joints are mobile and the parts can be skewed. Therefore, having set the angles at 90 °, the part is fixed (with clamps or in some other way) and left until the glue dries. Work continues after drying, and, as a rule, it begins with grinding the joint, which has just been glued.
Read how to make a sports corner for children here.
Making the base for the mattress
We take two boards 50 * 100 mm long, equal to the length of the mattress (or a couple of centimeters more to fill it up more conveniently). Along the edge, we plant a strip of 25 * 50 mm on glue and self-tapping screws. It is 10 cm shorter in length - we leave 5 cm from each edge. When screwing on the bar, make sure that the edges are set exactly. We drill a hole for each self-tapping screw - close to the edge so that the wood does not burst. In addition, we make a hole of a larger diameter along the cap - they must be hidden.
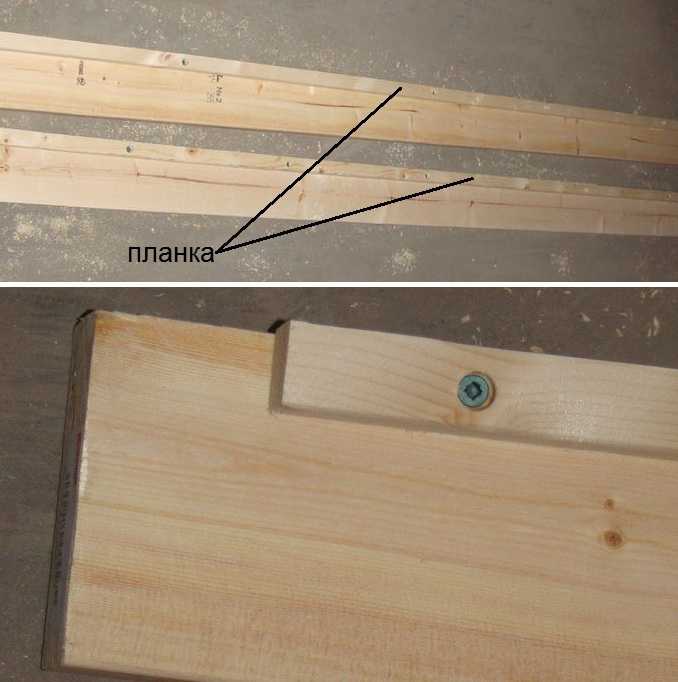
Installing the planks
Since the glue joint in this case is rigidly fastened, there is no need to wait for the glue to dry.
From a board 25 * 100 mm, we cut the slats to the width of the mattress (you can add 1-2 cm again). They are attached to the strips just made with an emphasis. The installation step is 10 cm, for each plank there are 2 self-tapping screws on each side. A hole is pre-drilled for each self-tapping screw (the diameter of the drill is 1-2 cm less than the diameter of the self-tapping screw), the head should go into the wood.

We fasten the transverse strips
Holes for fasteners are covered with putty, after drying they are sanded. Cutouts are made in the extreme slats for the installation of the legs.
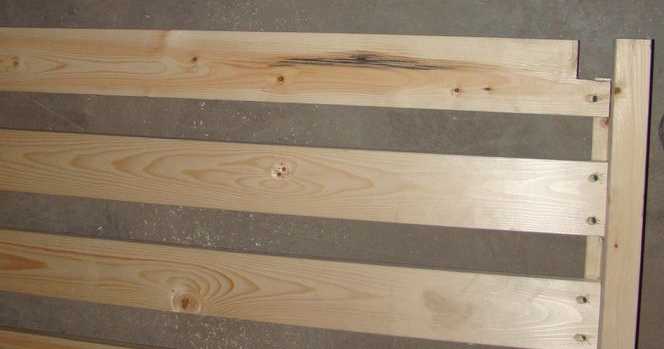
Leg cutout
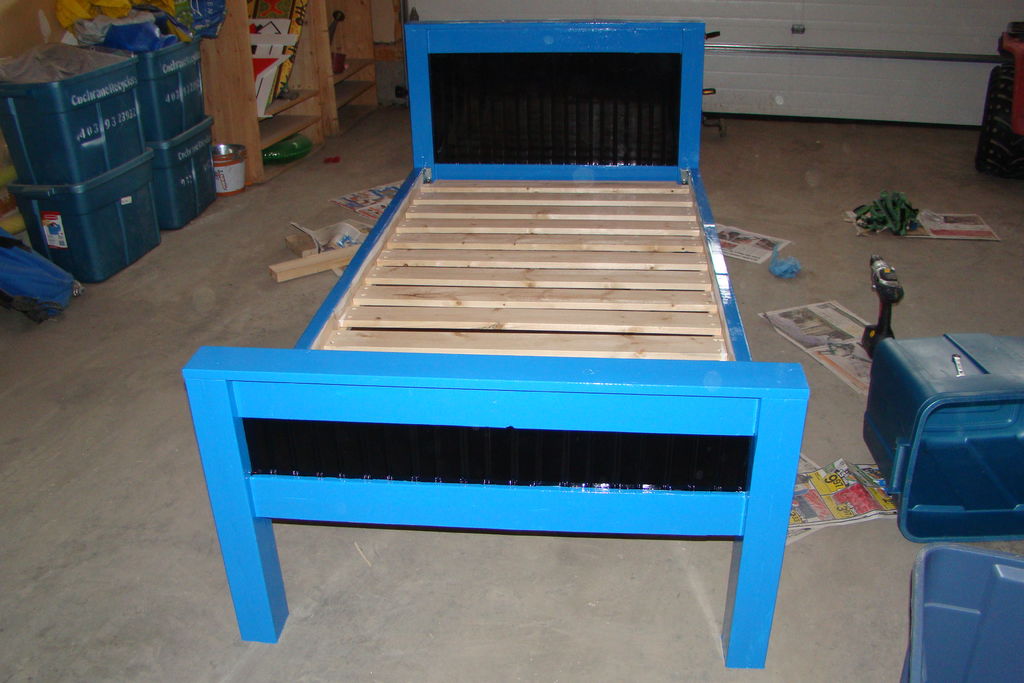
DIY children's bed: assembly
Finally, we seal all chips and defects on the visible parts of the bed with putty, after it dries, we grind it to smoothness. Then we prime and paint in the chosen color. After painting, it remains only to connect the backs and the base under the mattress and we can assume that the baby bed is ready with our own hands.
You can connect the parts with the help of special fittings - brackets and curtains, or in a simple way - by nailing a corner, a bar on which to support the assembled mattress shield.
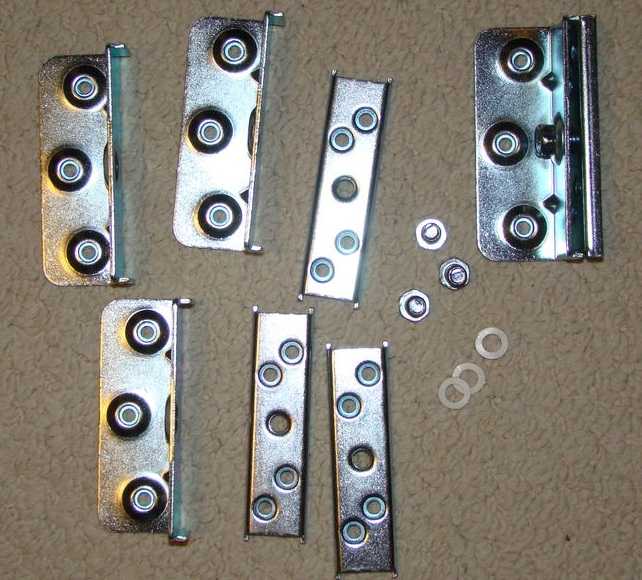
Fittings for installing the bottom of the bed
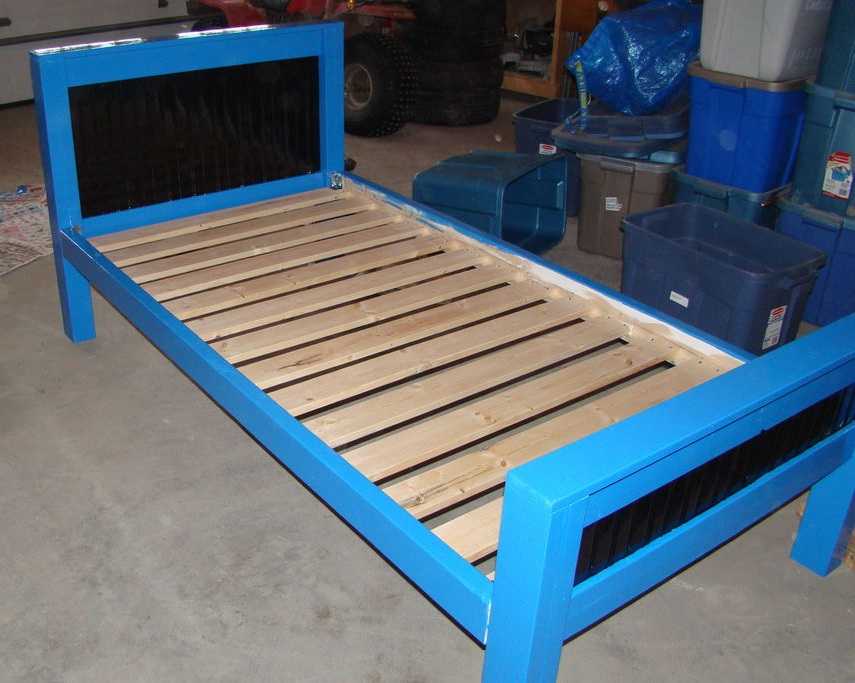
Do-it-yourself children's bed
How to make a two-story children's bed, read here (there is a photo report).
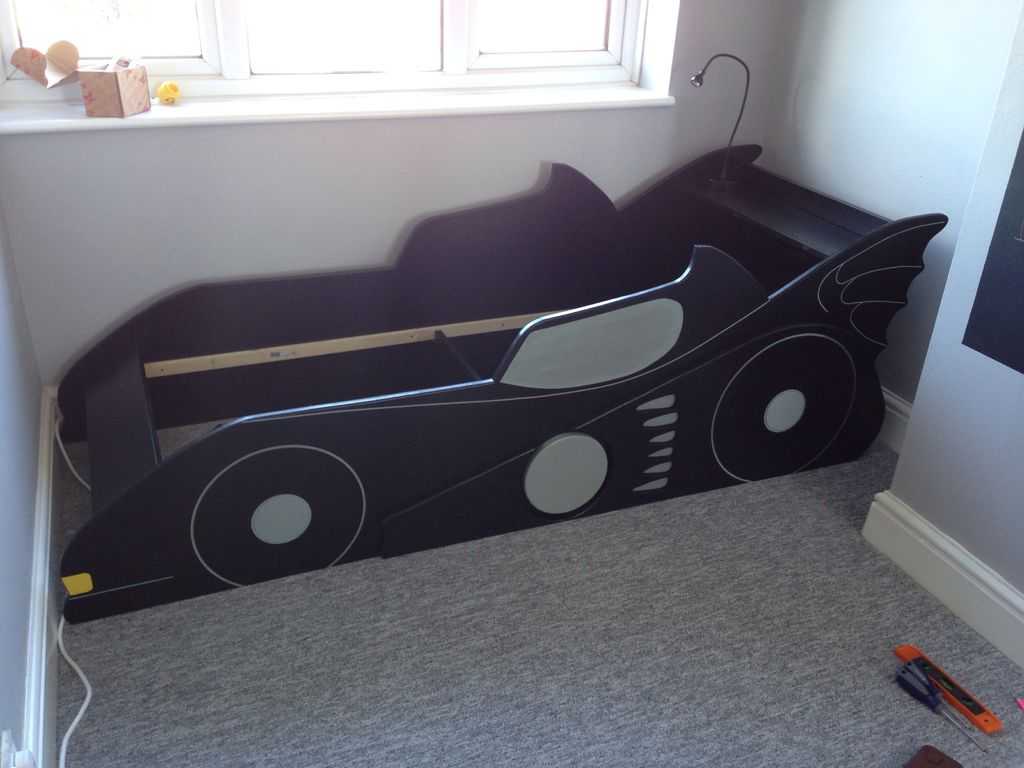
Homemade car bed
Few boys will give up a car bed. And to please the child it is not at all necessary to go to the store. With the help of plywood or MDF sheet, water-based paints and varnish, an ordinary sleeping place turns into a dream come true: a do-it-yourself baby bed in the form of a Batmobile (or any other car) is realized in a week of leisurely work in the evenings.
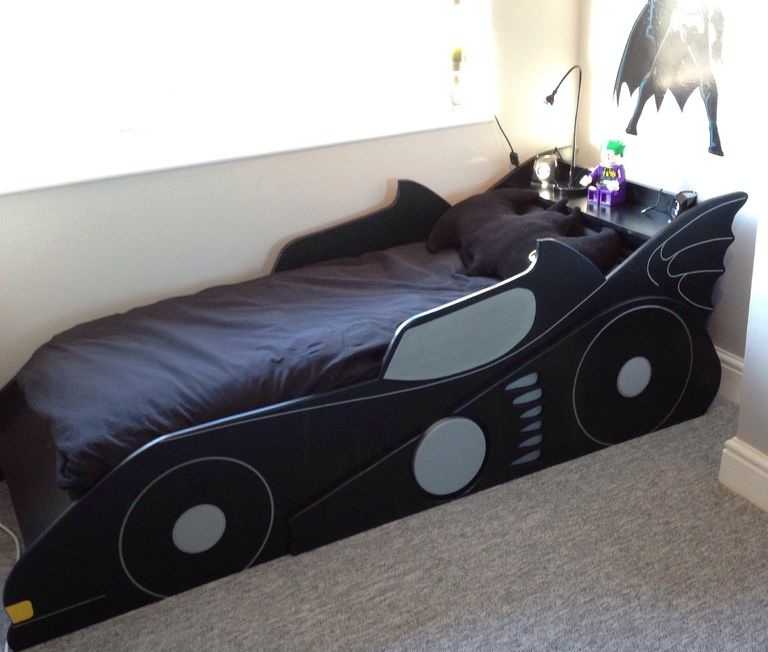
We make such a children's car bed with our own hands
First, find an image of a car that suits you, find a program with the ability to render drawings. Having transferred the image, it can be divided into squares with a side of 100 mm - so that later it would be easier to translate it into a real scale. Most conveniently, if the whole part fits into the plywood or MDF sheet you bought, it is even better if it turns out to make two sidewalls from one sheet ... In general, you select the dimensions, change the outlines. After you are satisfied with the result, you can transfer the design to the sheet.
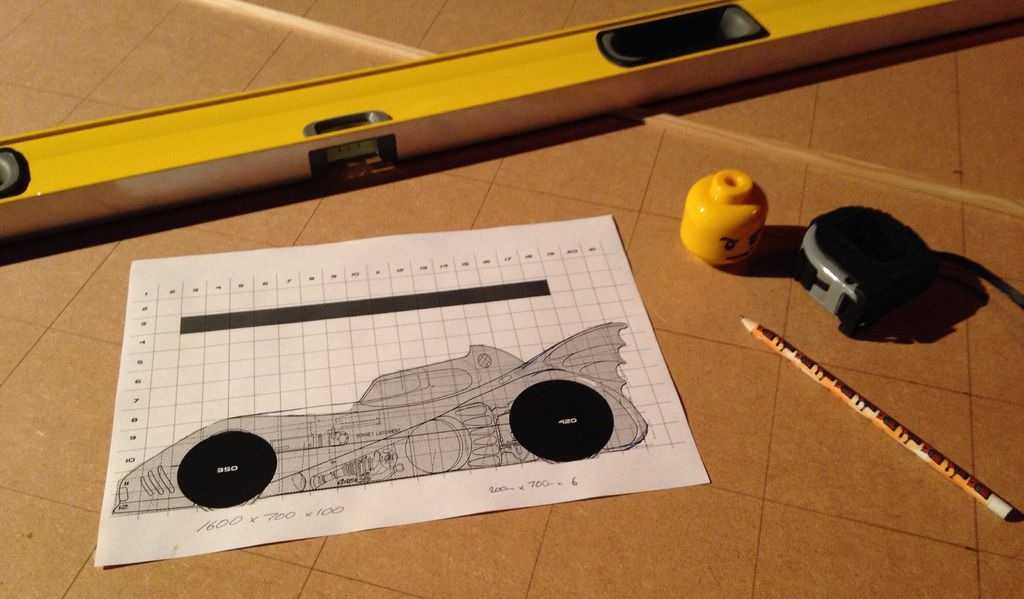
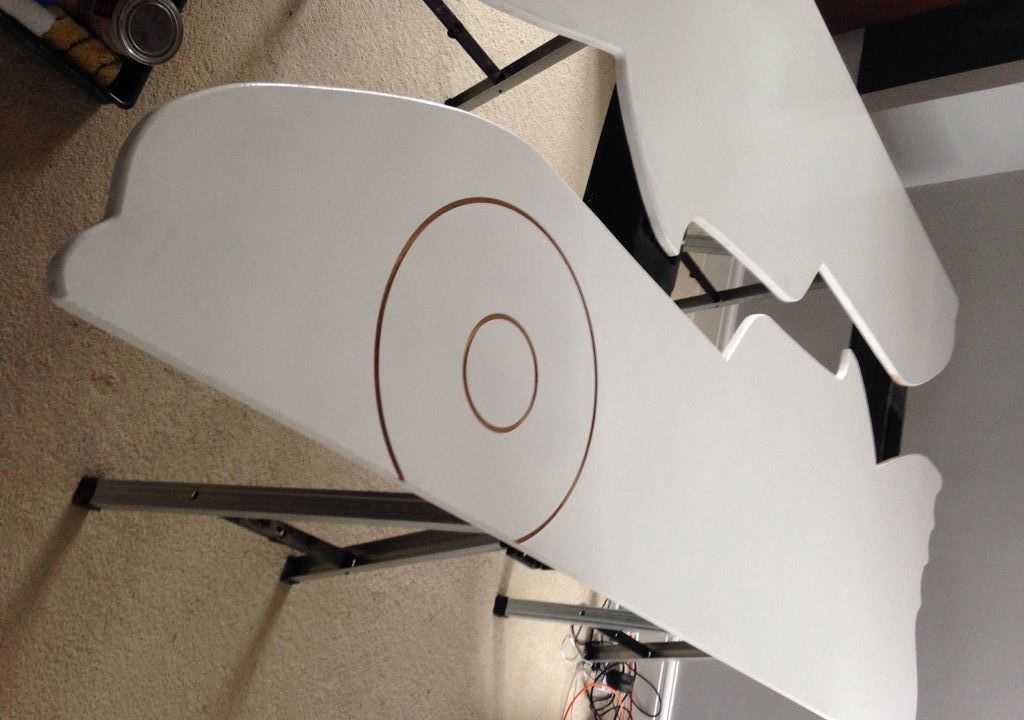
Sketch ready to work with markup
It all starts with drawing the sheet into squares with a side of 100 mm.
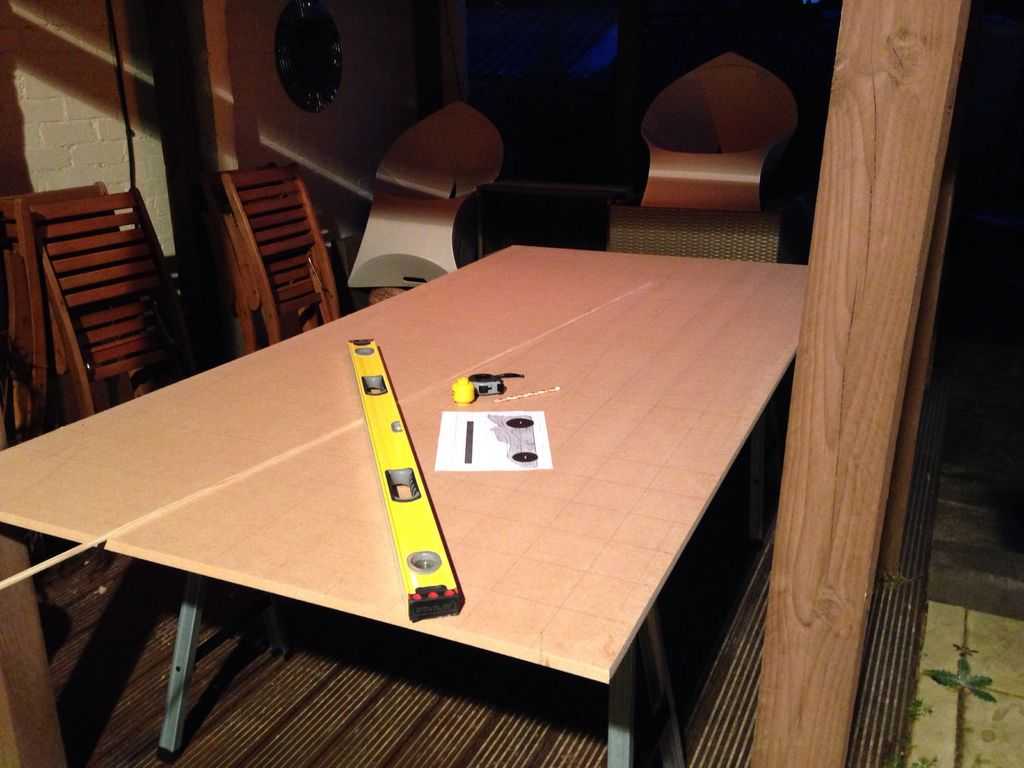
Draw the sheet into squares
Referring to the provided sheet, transfer all lines from paper to plywood.At first, the lines are thin, after everything is more or less drawn, you can outline the resulting contours with a bold line - it will be easier to cut. Although the details are needed in a double copy, it makes no sense to draw the second one: having cut out the first one, we will circle it and get the second one.
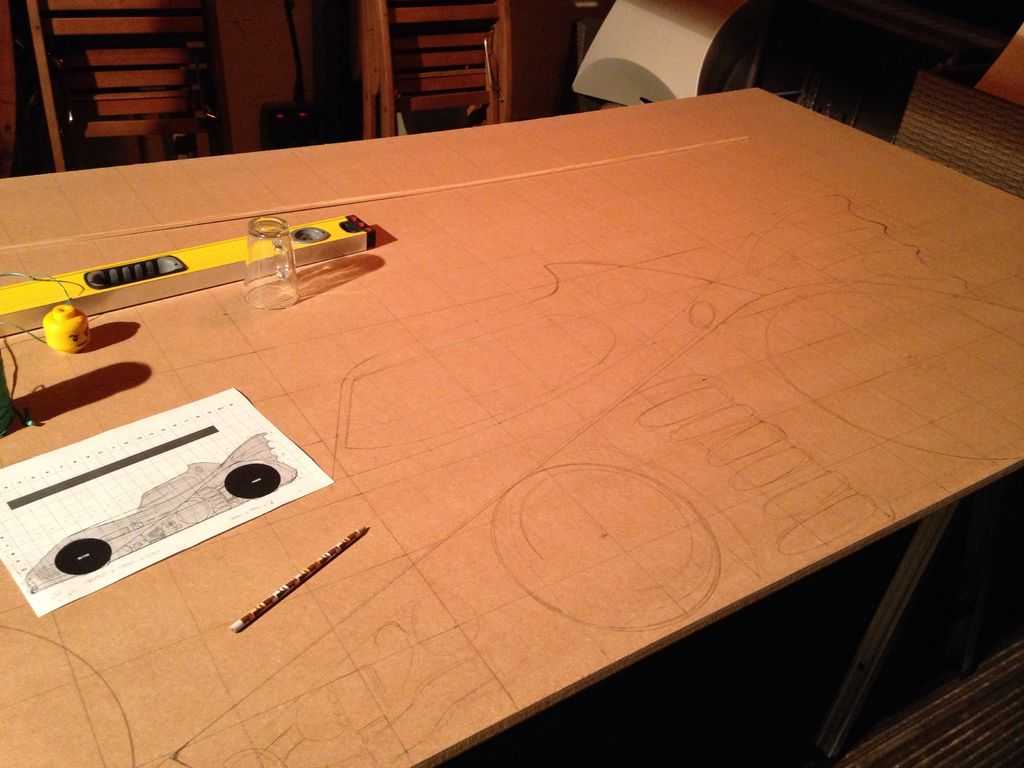
Transferring the drawing to a large surface
In this project, there are also overhead parts - we draw them separately. When everything is ready, we take a jigsaw and cut out along the contours.
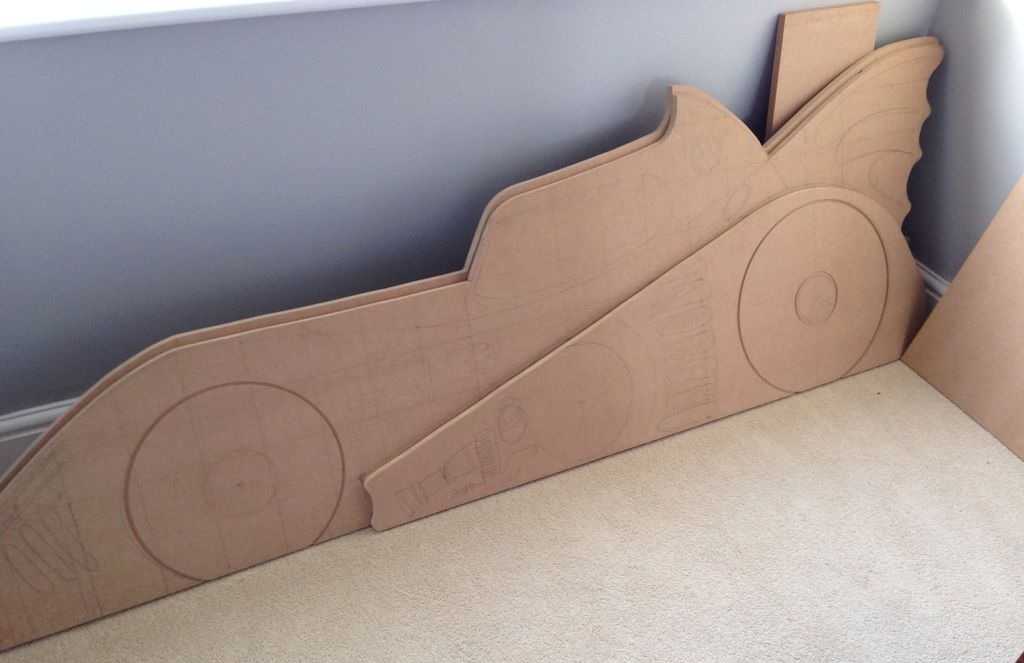
Cut parts
The edges are far from perfect, so we grind them well with a machine or by hand. Then we start cutting out recesses, holes, etc. The technique is traditional - we use a drill, drilling one hole next to another, then we cut the jumpers. We grind the uneven edge in any available way, rounding it, and everything should be even and smooth both from the outside and from the inside.

Working out design elements
After working through all the details, here's what happened.
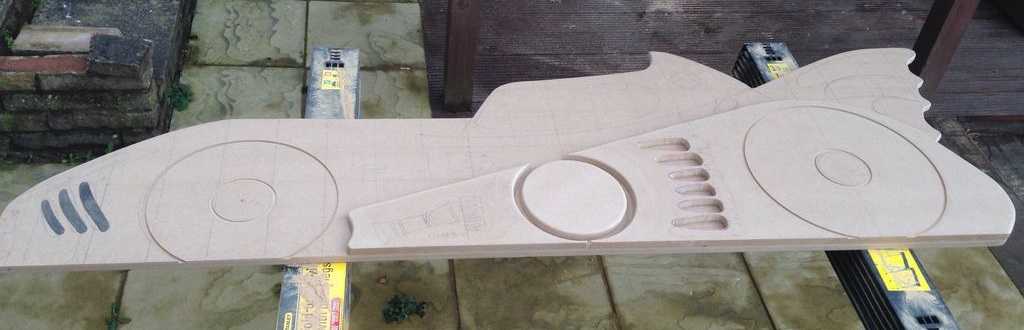
Parts are ready for painting
Read about making a play house for an apartment or a house here... how build a house for children in the country or near the house is described here (with photo reports)
Priming and painting
For painting, you must choose safe materials. Water-based latex is best, and a water-based varnish is suitable to protect the paint from scratches and abrasion.
If the parts are made of MDF, it is highly desirable to prime everything, and preferably twice. This material can absorb paint very strongly, especially at the ends. The primer significantly reduces the absorbency, and the paint also lays down in a more even layer.
Parts are primed and dry
After the soil has dried, the first to paint over the areas that should be gray. The design also features thin gray stripes. In order not to paint them on black, a thin strip of masking tape (3 mm) is glued in faithful paint, removing which we will then get the required drawing.
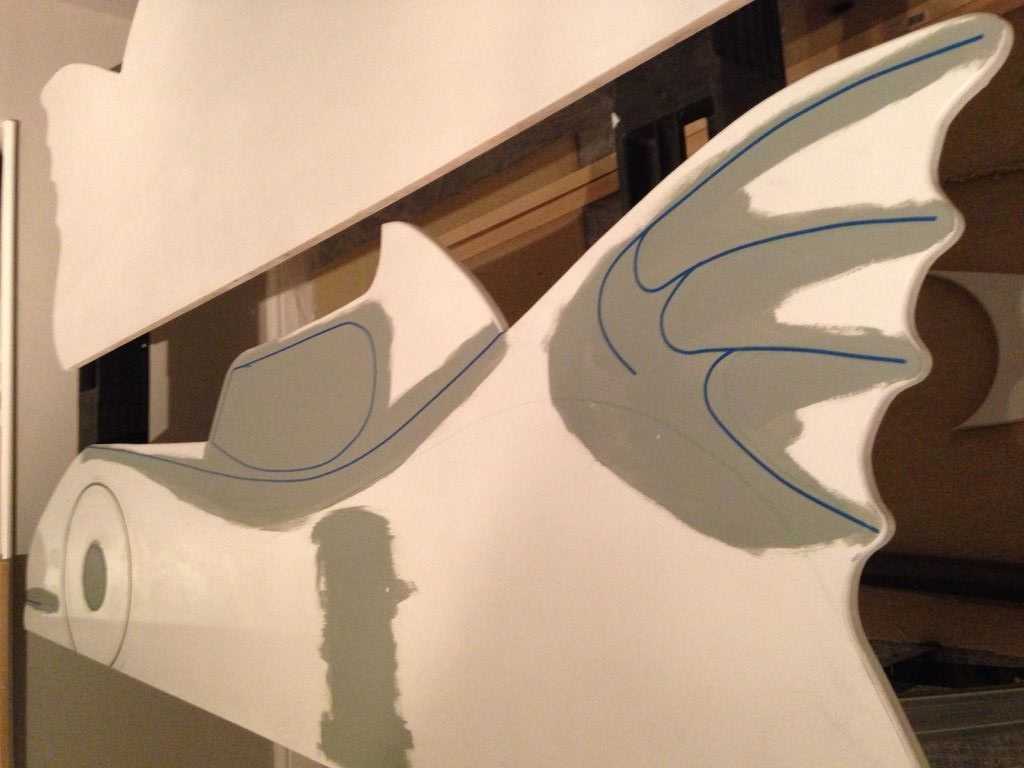
First, paint over with gray, after drying, we glue a thin strip of tape on it
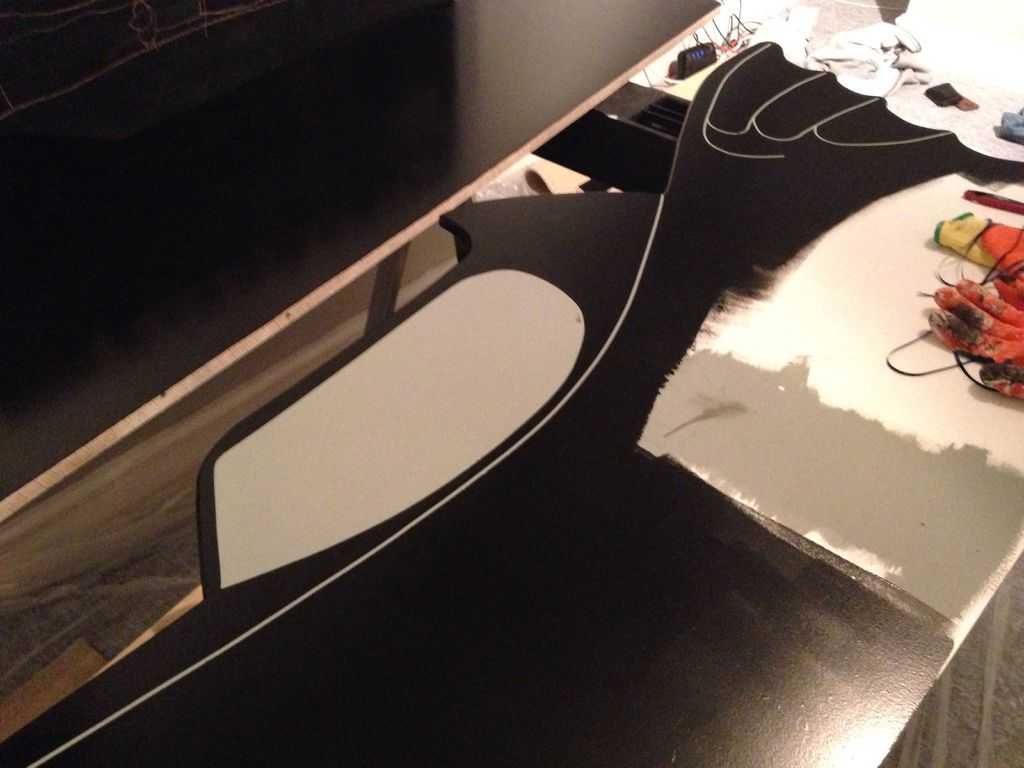
Painting is almost over
Putting together a car bed
We take one sidewall, fasten a wooden strip 25 * 25 mm minimum to it with self-tapping screws. We install the self-tapping screws every 20-30 cm. In front of the end of the plank we attach the board-limiter. We repeat the same operation on the second part (be sure to fix the planks at the same height).
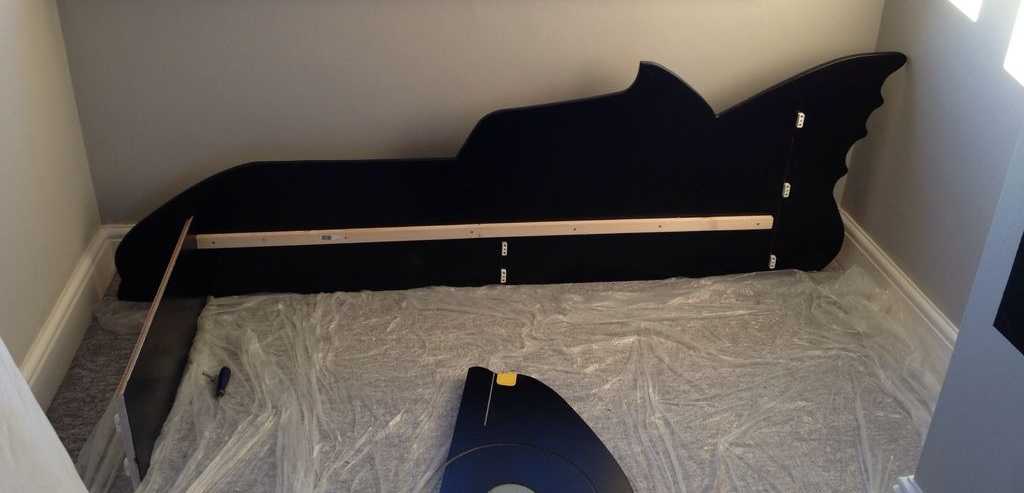
We nail the strips, put stoppers with magnets for attaching the headrest and shelves
Having installed the second part, we twist the structure. In the middle, you need to install a stop bar, which will firmly hold both sides and prevent them from moving apart.
Approximately in the middle we set a stop - a bar that fixes the required width of the bed
On the slats attached to the sides, like on a frame, cut boards are placed, serving as a support for the mattress. They can be fixed with self-tapping screws (two on each side), or you can just put them on. In this case, the bed will quickly disassemble. In this option, the second method was chosen - the slats were not fixed, a mattress was laid on them.
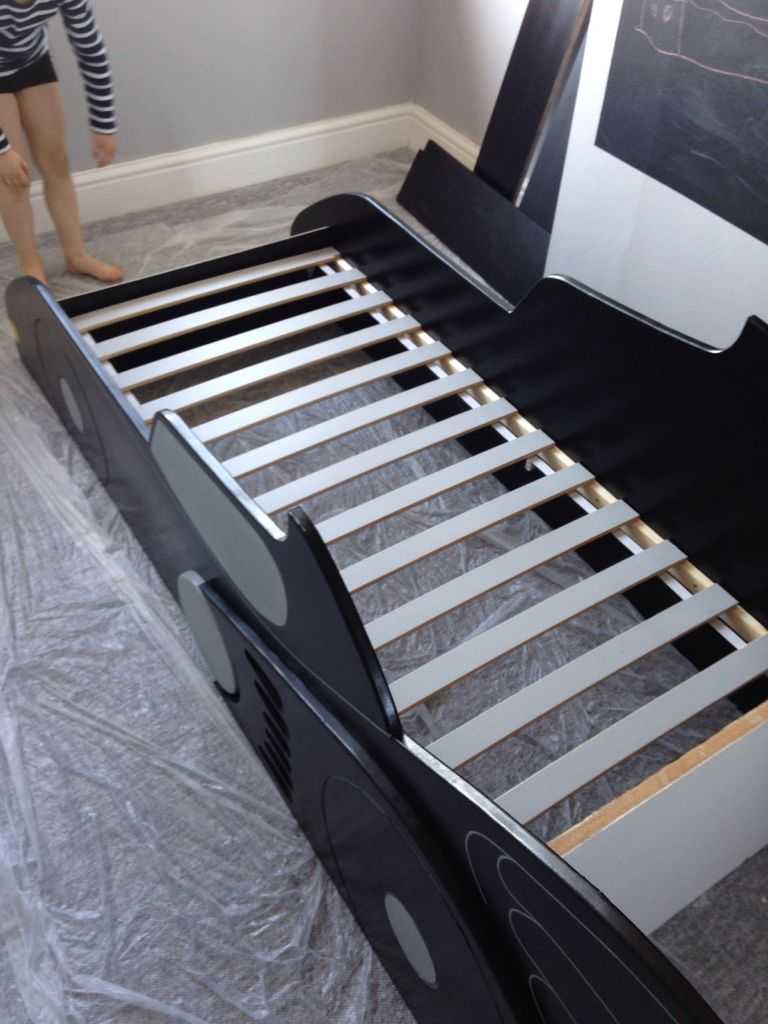
We lay the planks
A girl's bed is made on the basis of the same design. The shape of the railings is simpler, there is less work with them, but more difficult with painting. So there are some moments too.

DIY children's bed for a girl
Read how to make a play house for an apartment here.
Related Videos