How to make a wall hanger
You can do without a hanger in the hallway or corridor only if there is an extensive closet, and even then not always. In private houses, it is more convenient to have "duty" clothes at hand - to jump out into the yard. More convenient are those that are mounted on the wall: they take up less space. One thing does not please: the prices for worthy copies are considerable. Therefore, we will tell you how to make a wall hanger with your own hands. The models are different, different techniques are used, but one thing unites them: they are easy to make, especially with detailed photos of the process and explanations. There are also diagrams and video tutorials.
The content of the article
From planks in the form of a tree
Our small hallway needs a coat rack. I don’t want to buy the usual one in the form of a bar with hooks - I don’t really like them, and even my little daughter will not get it. Other options with a set of parallel boards don't inspire either. There is a switch on this wall, so it will not work without fitting, and what the view will be at the same time is not clear. Therefore, it was decided: I make a wall hanger with my own hands in the form of a tree - a trunk, branches. It fits into the interior. I will treat the wood with water-based stain and varnish, the color should be close to the color of the front door.
So, two unedged boards 25 mm thick were bought on the sawmill. They have markings - on one trunk, on the other - branches.

The contours of the future hanger were applied to the wall in the corridor
We take an electric jigsaw and cut out the blanks along the applied contours. Then it is a turn of very dusty work - we grind the wood, while adjusting the thickness of the joint with the “branches”. Used a drill with a rubber attachment and sandpaper. First coarse grain, then medium and fine.
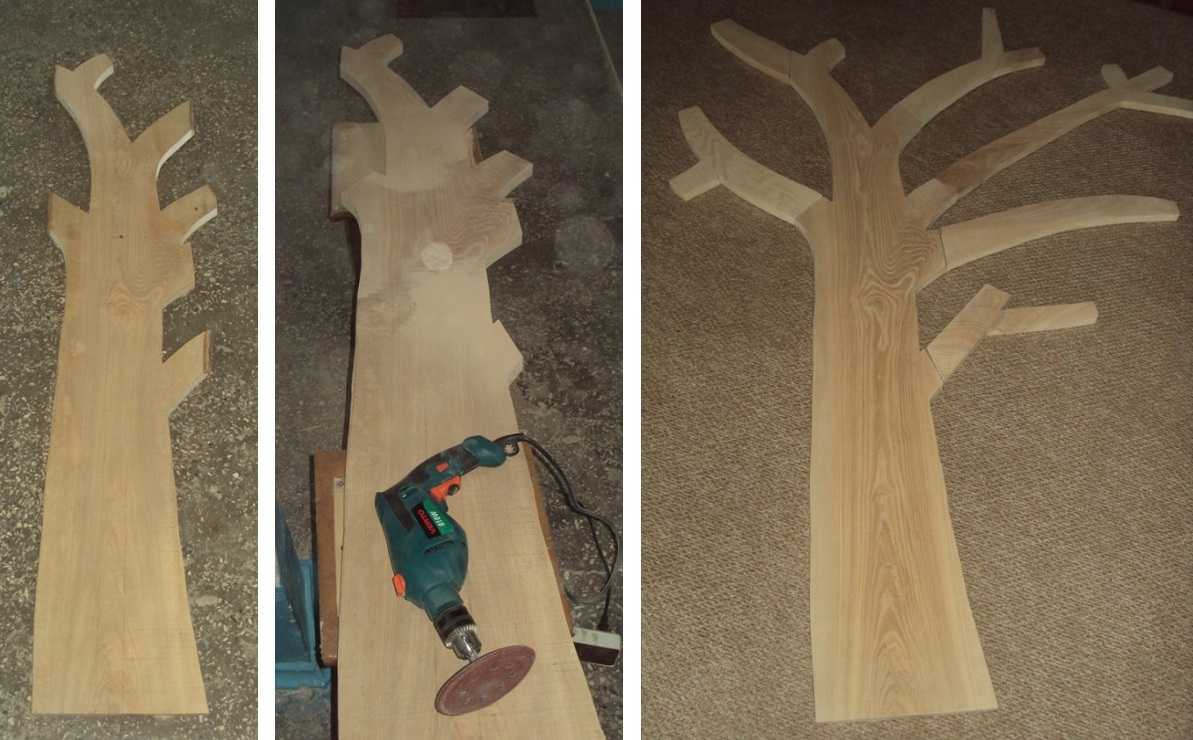
Grinding is dusty
After the result was satisfied - it became smooth and the wood pattern stood out well - it was the turn of the stain. It is a mahogany color applied in four layers. After drying, they covered everything with a water-based varnish. Three coats were applied at intervals of three hours.
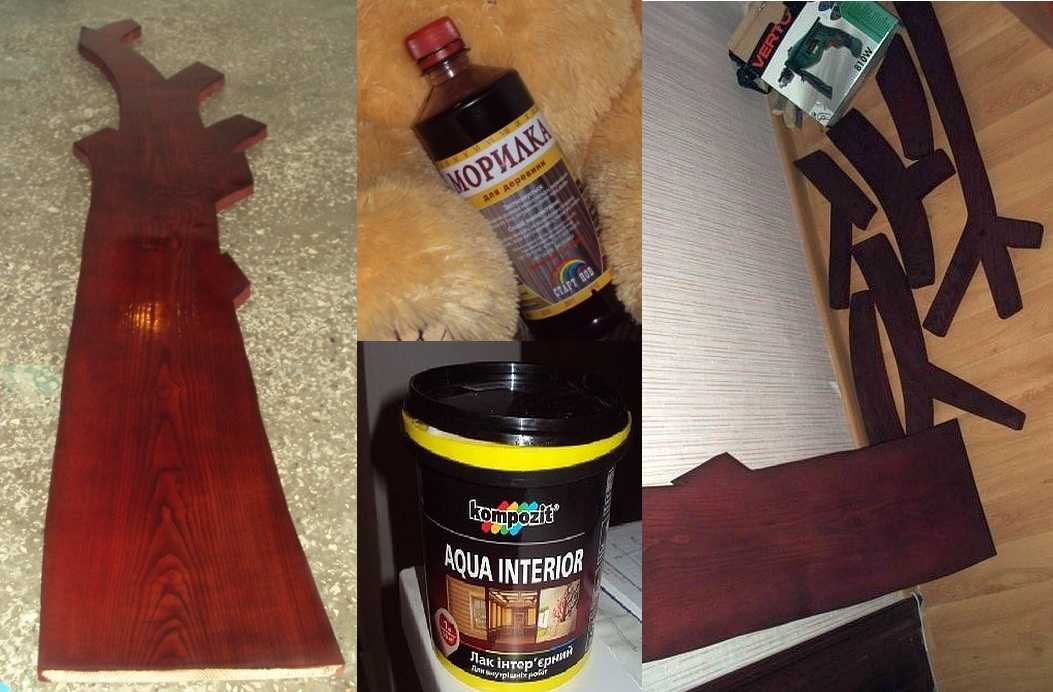
Painting and varnishing of hanger parts
Nails 200 mm were used as hooks. They were cut to the desired length (different - longer for the top of the hanger, shorter for the bottom). The hats and the rod were sanded for smoothness, the bottom part was threaded to the thickness of the board (25 mm). Holes were pre-made in the "branches", "hooks" were screwed into them.
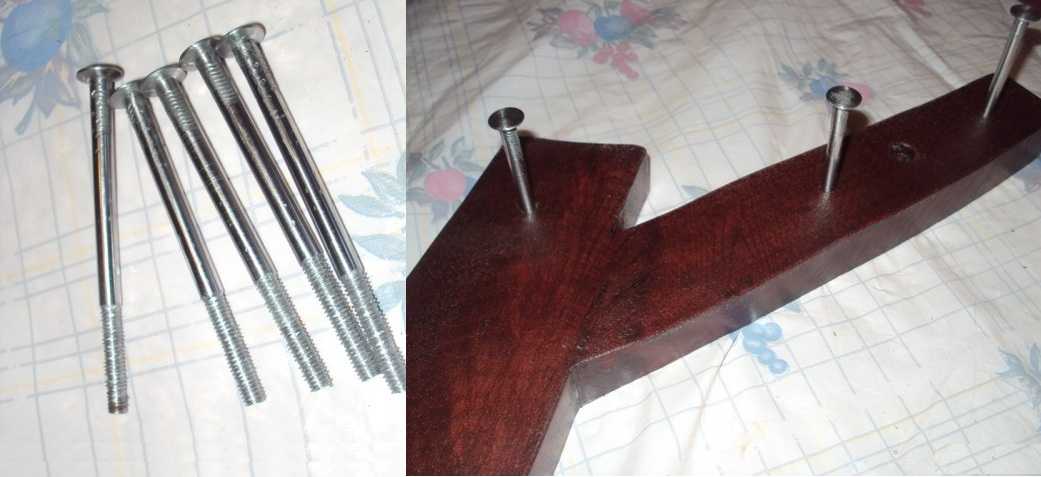
DIY hanger hooks
Now it remains to fix all the details on the wall. The walls are concrete, so we fix them with dowels. First, we attach the barrel, drill holes through it. We set aside the wood for now, insert plastic plugs for the dowels into the holes. Putting the "trunk" in place, fasten it. Using the same technology, we fix the "branches".
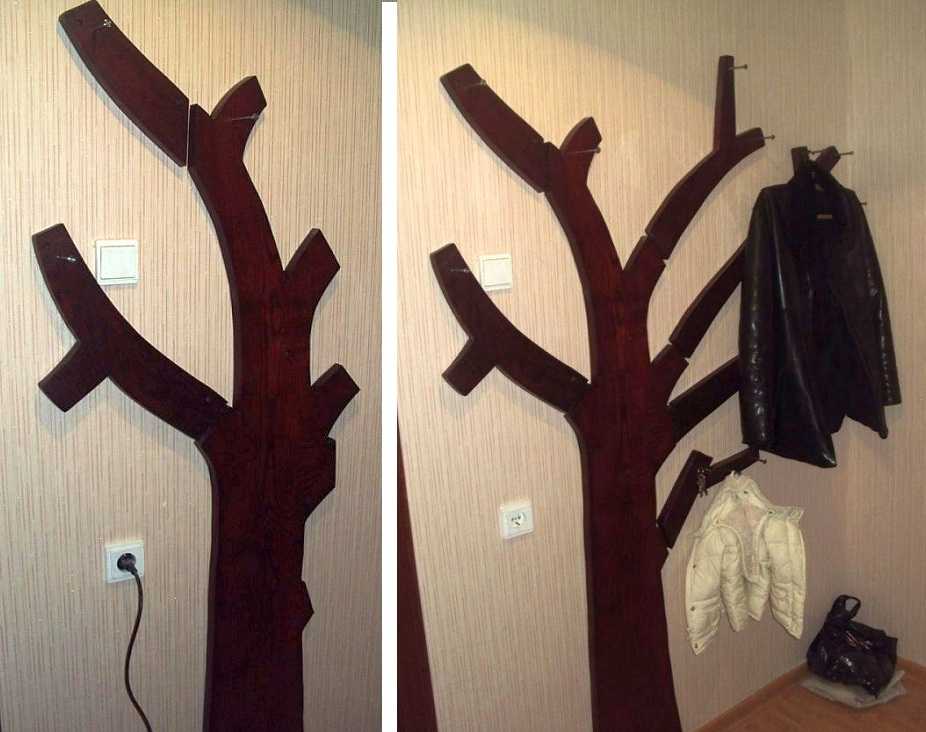
Homemade wall hanger in the corridor (hallway) is ready
It worked out well, and the color almost exactly matches the door. There are plans to build a small shelf for shoes and bags. All the costs for making this hanger are about $ 6 for boards and $ 2 for nails, about the same was spent on dowels. Stain and varnish were, and the expense was small.
Simple wall-mounted chipboard hanger
The task is to make a cheap clothes hanger (for a rented apartment) on the wall. Two boards made of laminated chipboard (Chipboard) under the name "furniture board". Two, because the price turned out to be low, and in the accessories department, where they were looking for hooks, they found good brackets for very little money. We use them for the second board - we will make a shelf for little things.

What you need to make a simple hanger in the hallway
From the tool you will need a screwdriver or screwdriver, a drill, a set of drills. Also - a tape measure and a pencil - mark the attachment points of the hooks and brackets.
After unpacking the boards, glue spots, some other, incomprehensible stains were found on them. You can eliminate all this with a solvent. We take a soft white (not colored) rag and wipe everything well.
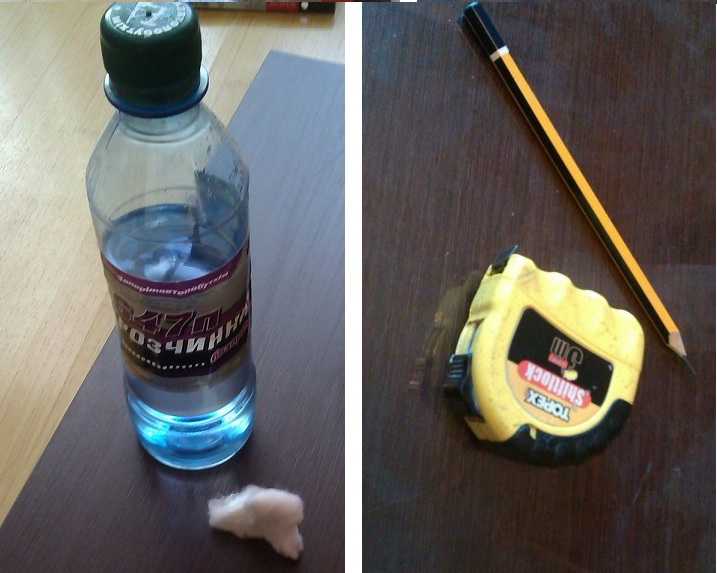
Simple tool
Next, we lay out the purchased hooks in a checkerboard pattern. This is where a tape measure and a pencil are needed - we measure out the same distances and mark.

Hooks laid out
Next, mark with a pencil the places for the screws. We remove the hooks, drill holes. Drill - 1-2 mm smaller diameter than the diameter of the self-tapping screw. The hole is necessary so that the work goes easier, and also so that the surface does not crack when twisting. We put the hooks in place.
It was the turn of the shelf. I set aside equal distances on one and the other side, attached brackets, marked holes for fasteners. I drilled holes, installed brackets. All.
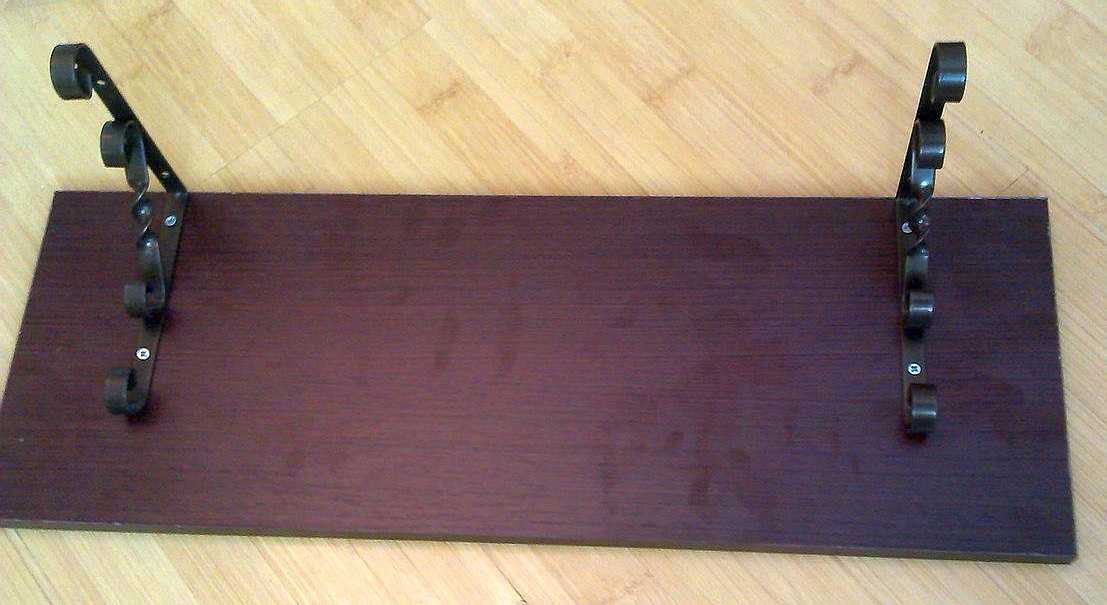
The shelf is also ready
Now we attach it to the wall. The technique is the same, but with dowels: we apply, mark the attachment points, drill. Drill - the size of the dowel. We insert the plug of the dowel into the hole, put the hanger / shelf on the wall, fasten it.
It all took 2 hours
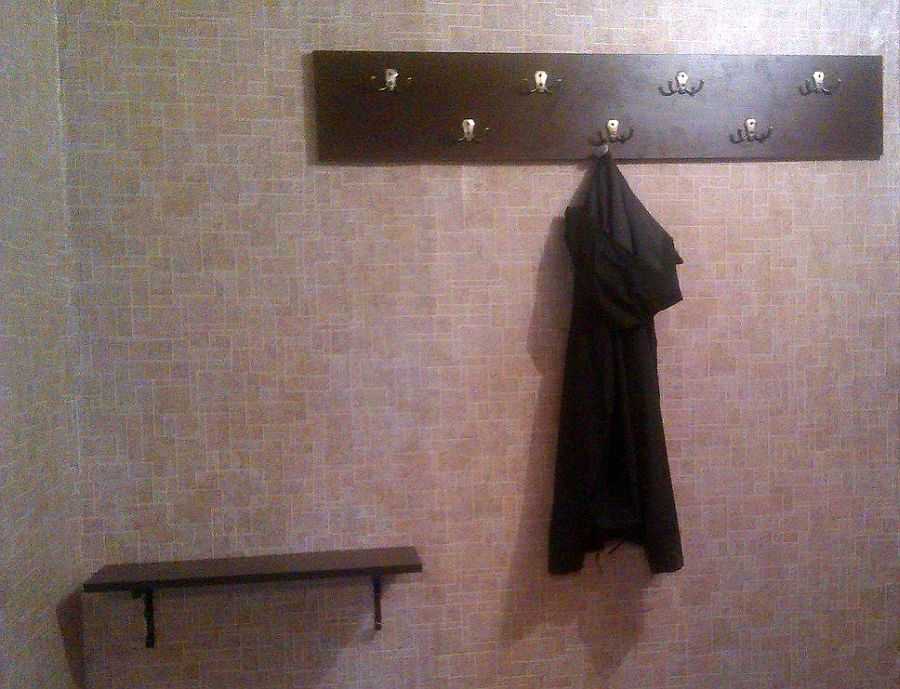
This DIY wall hanger was made in two hours (including the shelf).
Hanger with shelf
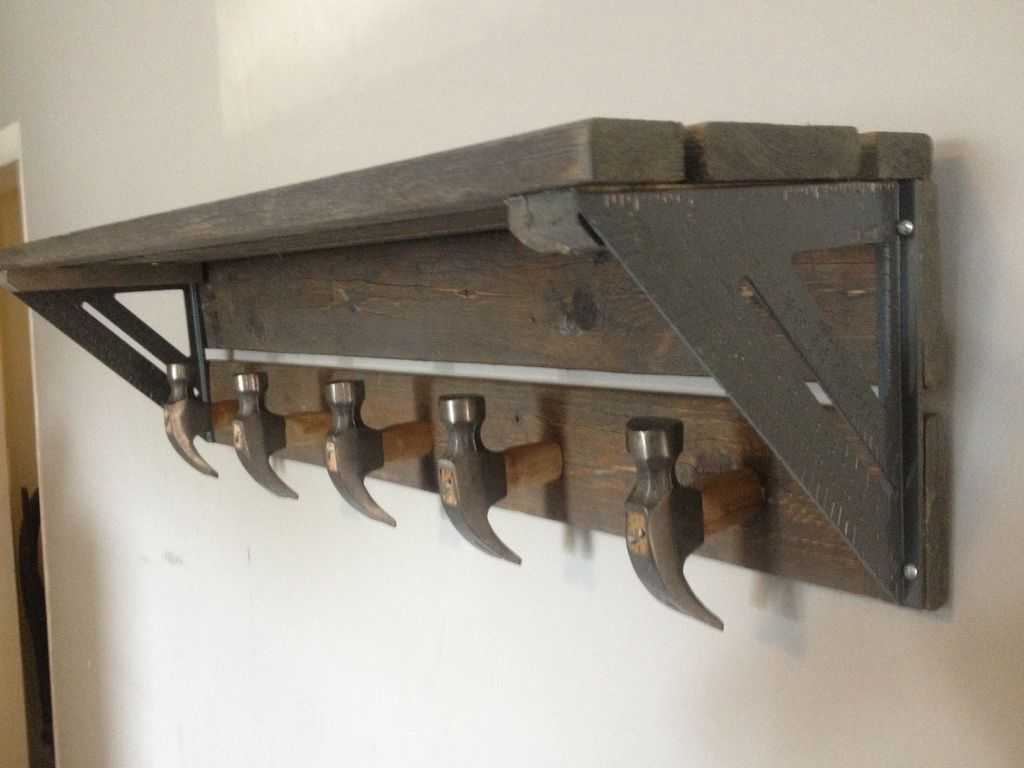
You can take the idea as a basis, use any other "hooks" and stops. This DIY wall hanger is made of two 25 mm thick planed boards, two joinery squares and five hammers.

This is what happened
The wood needs to be dry, otherwise cracks can go. Instead of squares, you can even use triangular pieces of a similar board. An important condition is the presence of a right angle. And instead of hammers, you can even fix knots or, for example, cut wooden hangers, and any hooks. It's just that this option is a gift.
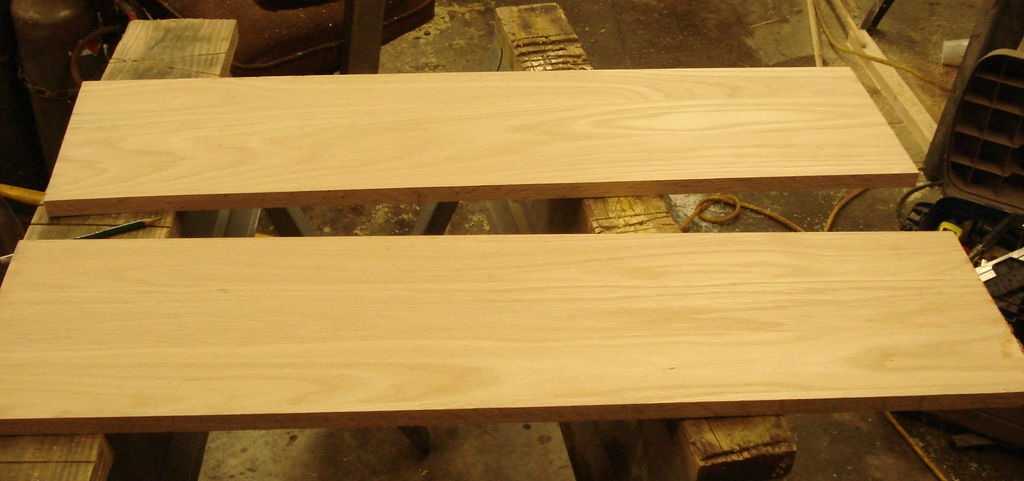
Two dry planed boards
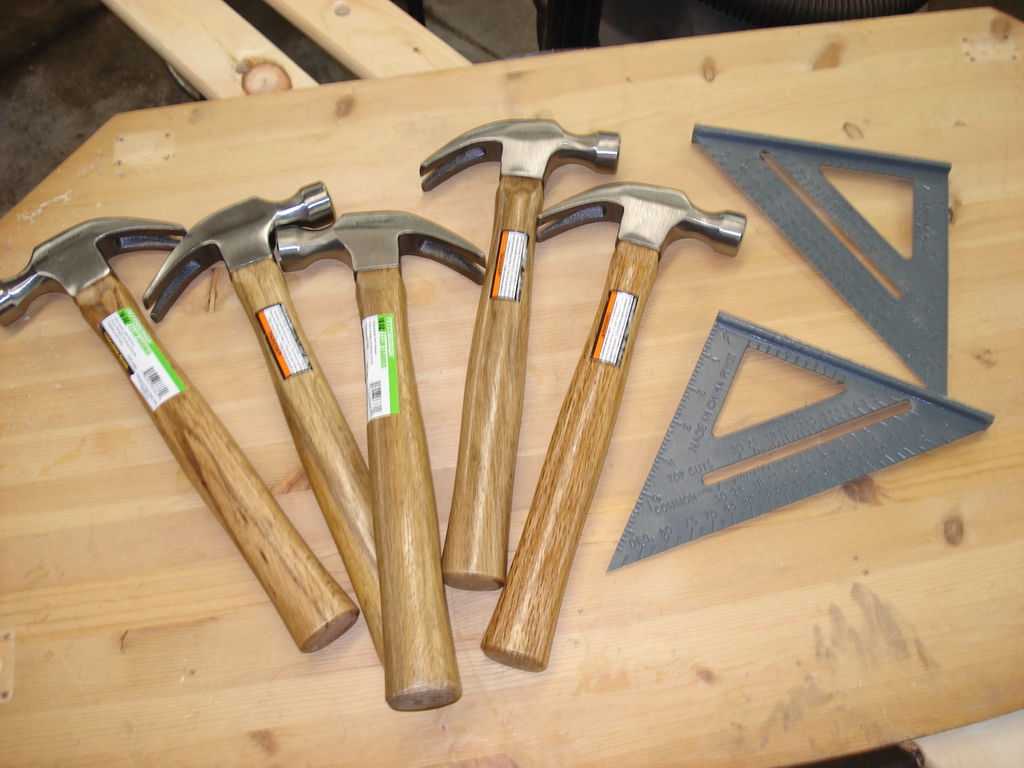
Spare parts - hammers and squares
The two boards must be the same length. An exact match is important. Having adjusted the length, we process the edges with sandpaper. There is a drill - we take a nozzle, fix the emery and grind first with a large grain, then with a medium one. Then we proceed to the markup. First, we mark where the stops will be attached. We divide the remaining distance by six, put marks - there are five of them. Just by the number of "hooks".
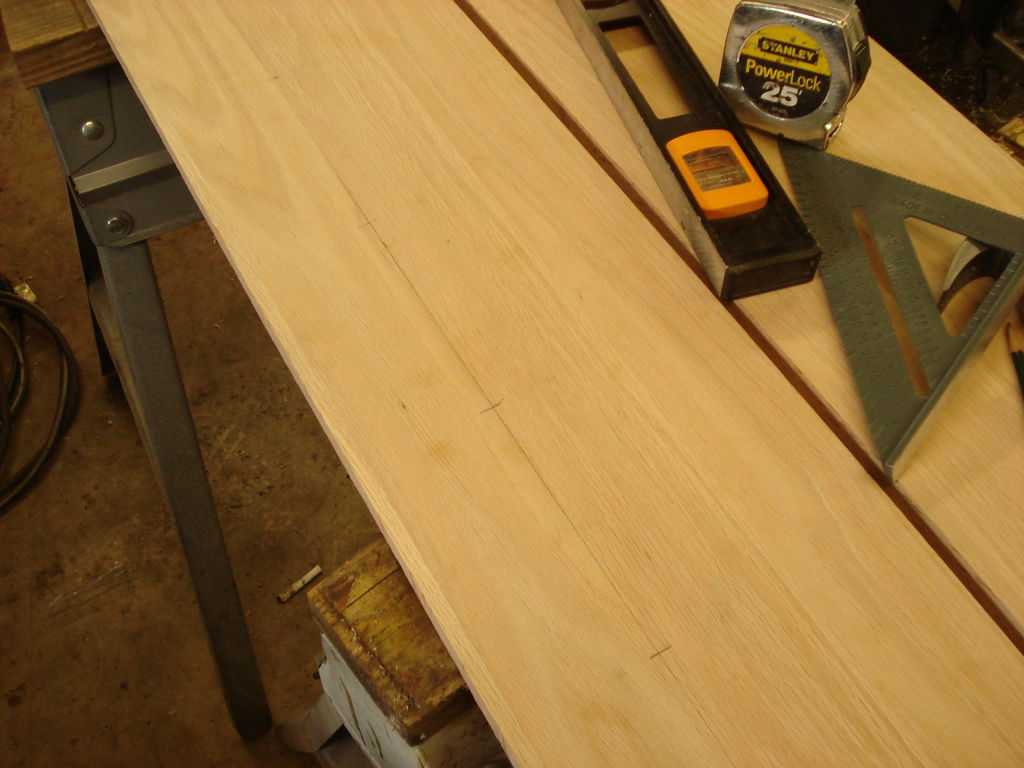
Marking the installation of stops and hooks
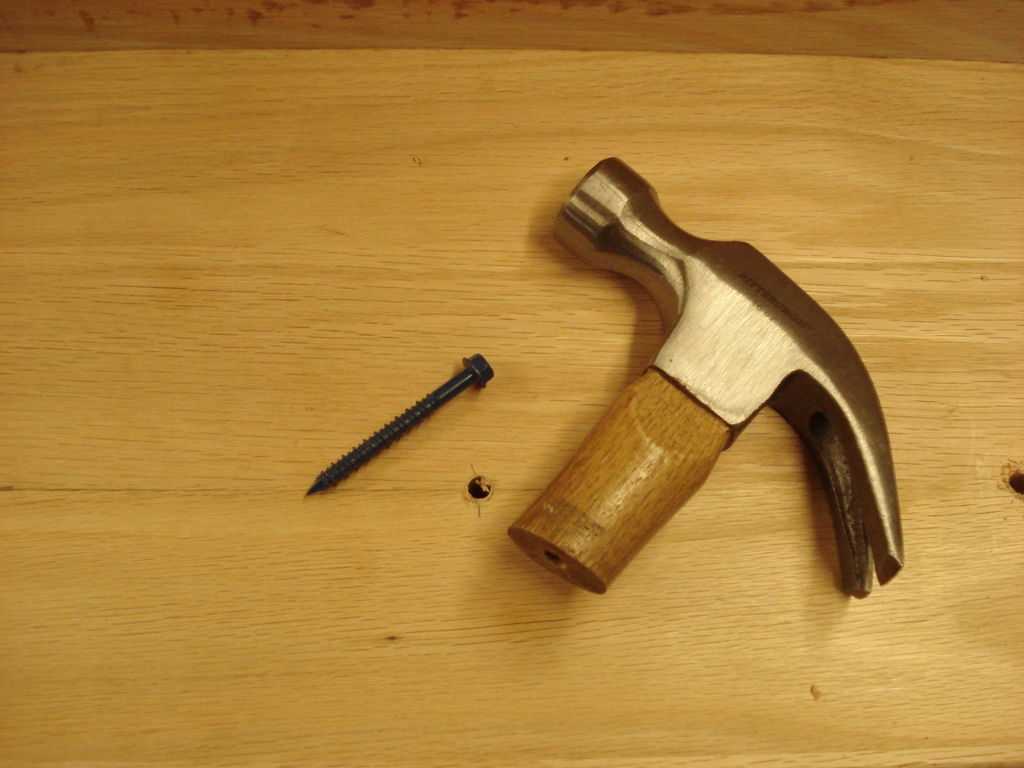
We cut the handles on the hammers mercilessly. Cut slightly obliquely to create a slight slope.
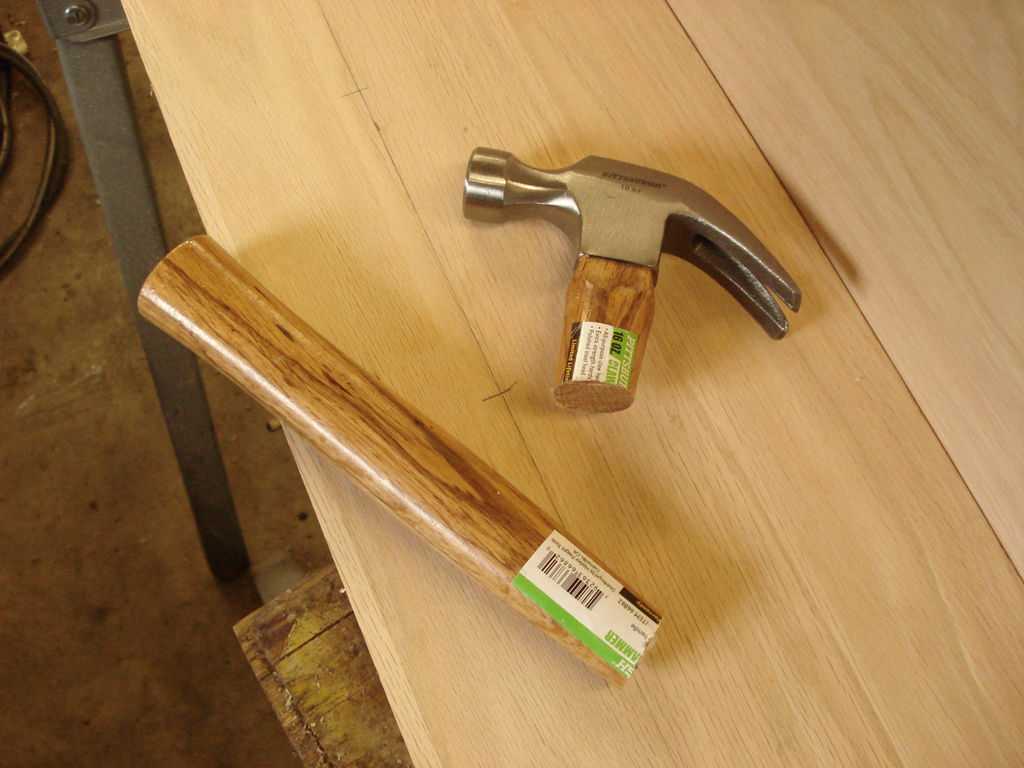
Sawing off handles from hammers
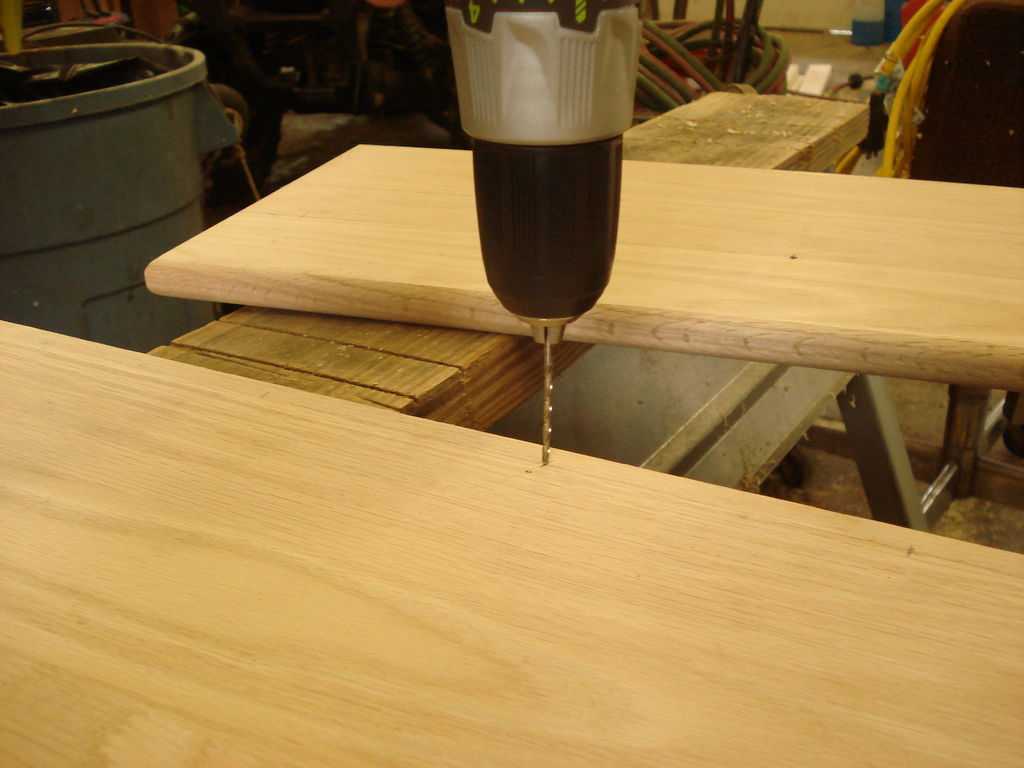
Using a drill, make holes in the center. Drill diameter - 1-2 mm less than the used fasteners, hole depth - not less than the length of the screw.
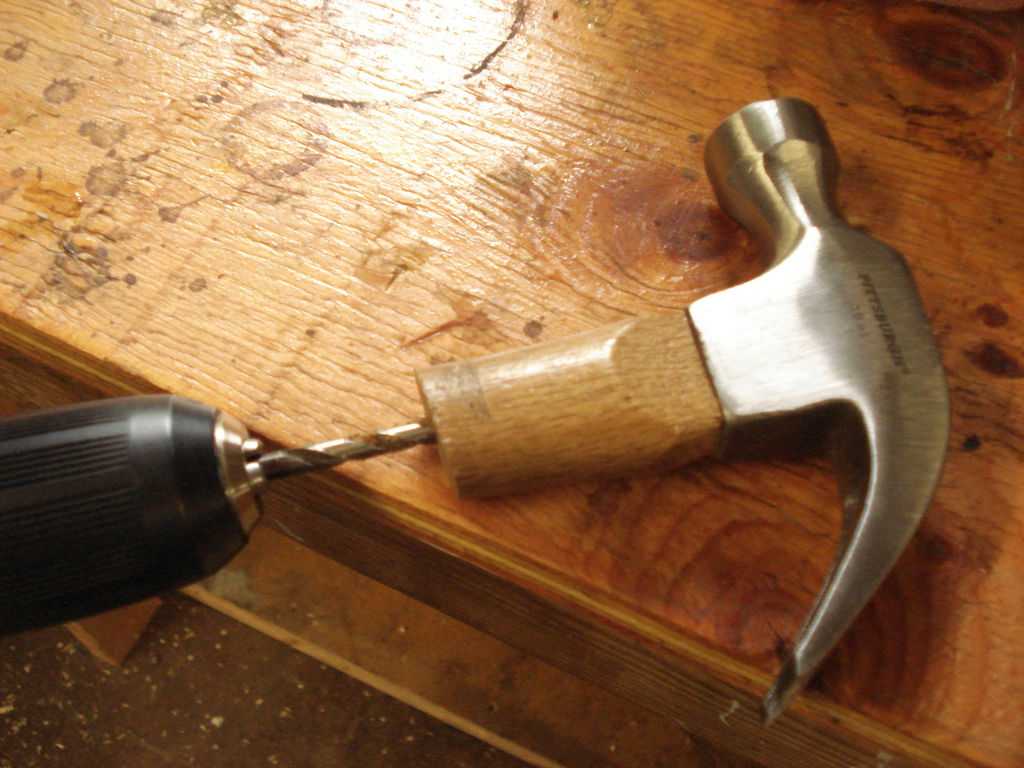
We drill holes for self-tapping screws
Two boards must be connected at right angles. The step of installing the screws is 10-15 cm. We mark the places on the sidewall, transfer them to the end. The accuracy is required high. We apply one to the other and transfer the marks with a finely honed pencil. We make holes according to the marking.
Drilling holes
We fold the boards at an angle of 90 °, connect with self-tapping screws. First we twist the two extreme ones, then one in the middle, and then all the rest. The length of the screws is at least 75 mm (three times the thickness of the board).

Bonded boards
Drill holes for hooks according to the marking.
We drill holes for hooks
We install angle stops. Since the carpentry squares were used, there were no holes in them. They were drilled - two at the top and bottom on each plank. On one stop, 8 screws are obtained. We take small ones - more than 20 mm, so as not to puncture the wood. Therefore, a large number of them are required.
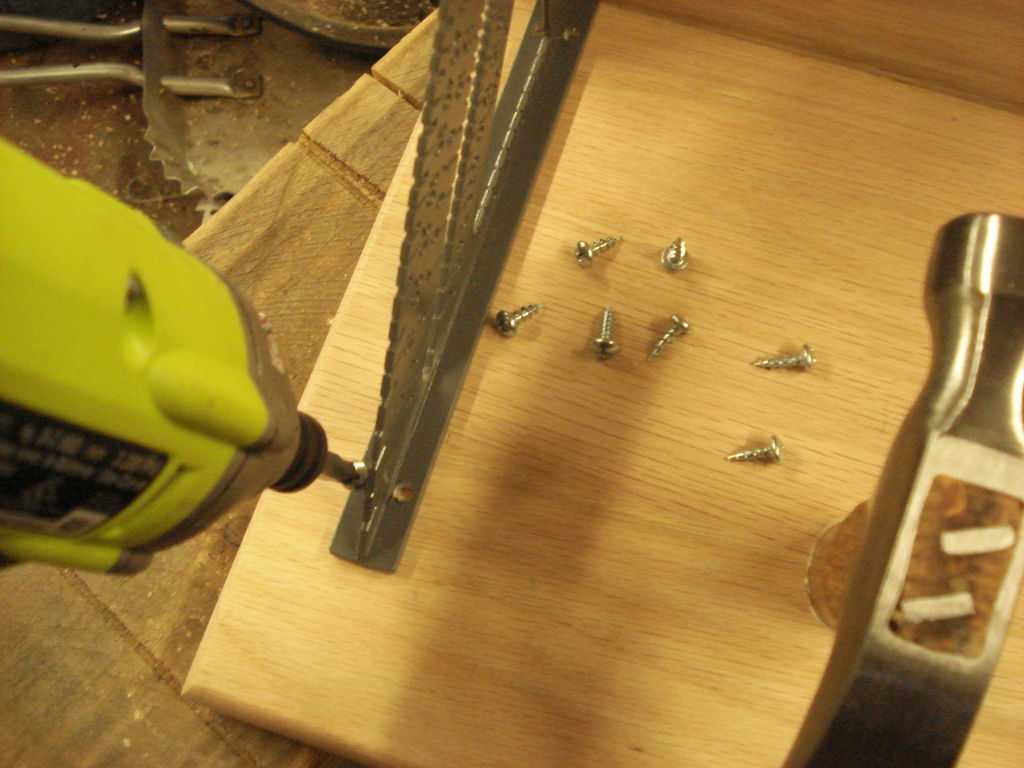
Installing stops
The wooden wall hanger is ready. It remains only to paint and hang on the wall.
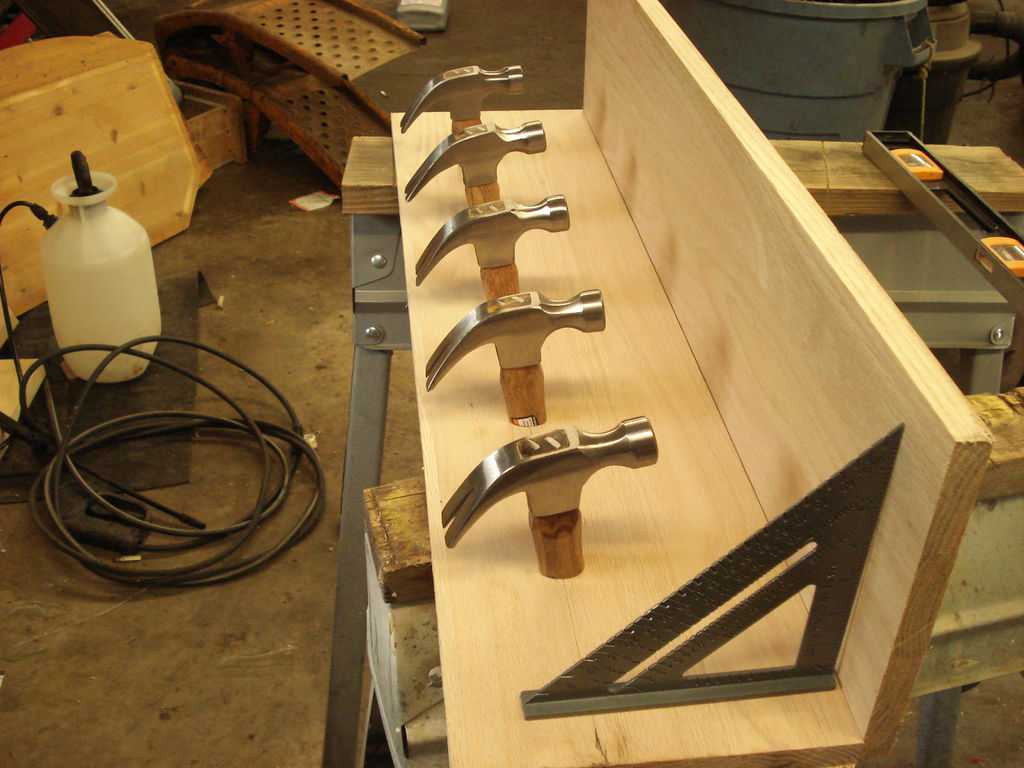
Ready option
Other options were made based on this homemade hanger.
The boards are narrower

With more voluminous shelves
Video lessons
Several simple homemade hangers for "hand" in video format.
Drawings and ideas for DIY
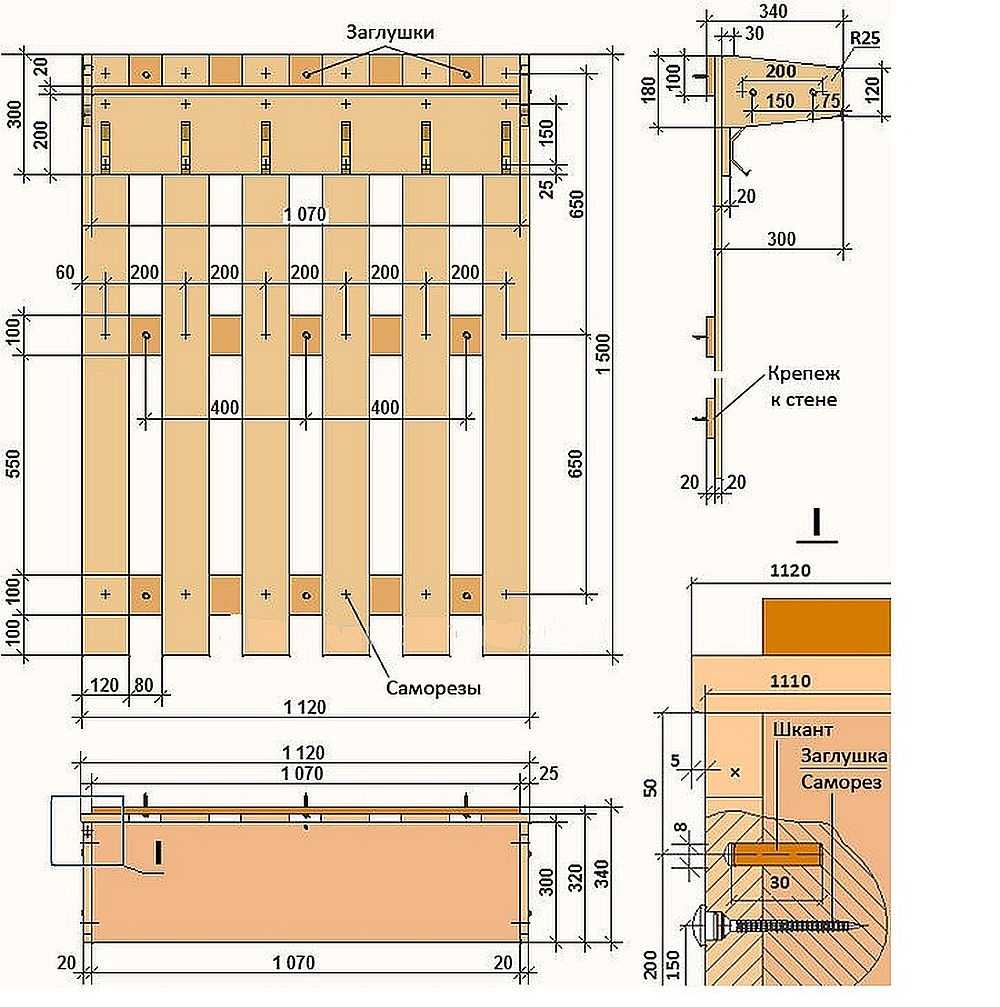
Wall hanger drawing with dimensions
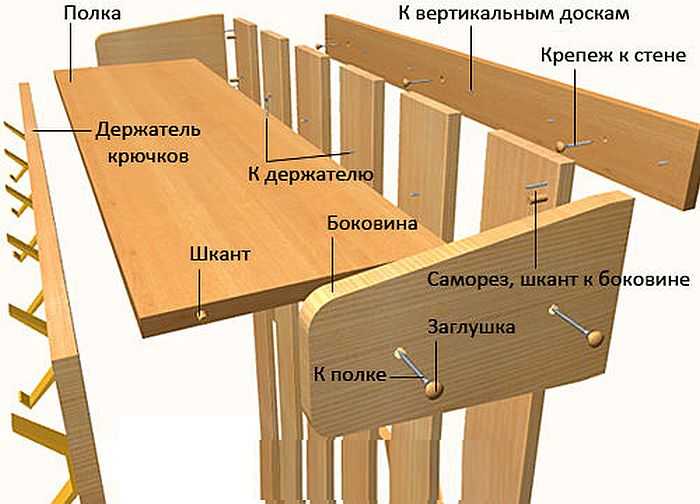
Assembly order
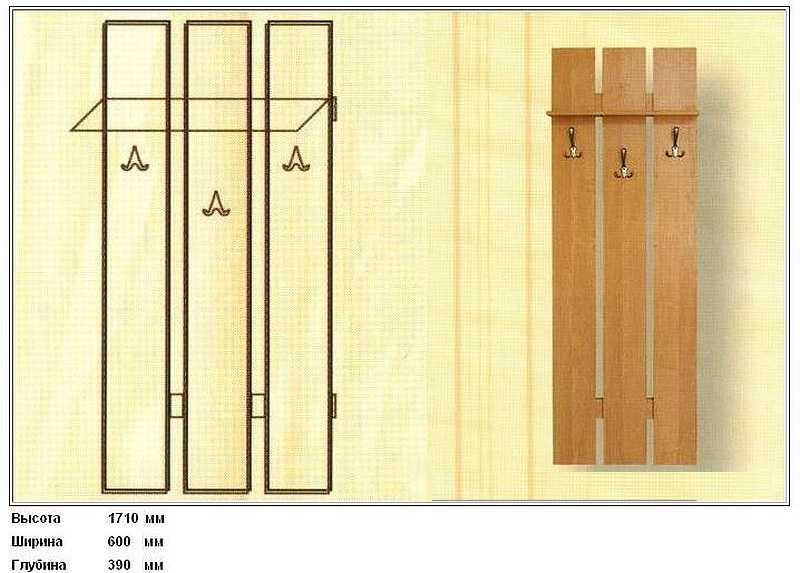
Simple hanger option for DIY
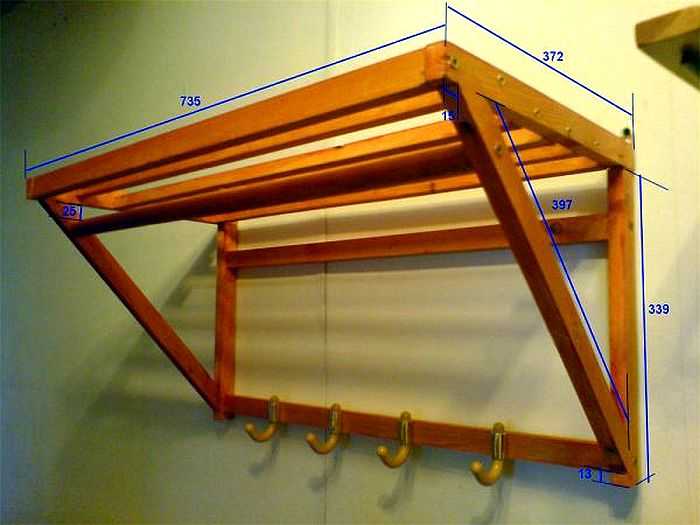
Hanger dimensions with shelf

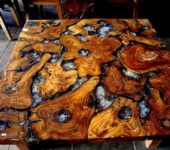


It turned out very cool with the shelf! (light wood)