Bunk beds for children
A children's room with a bunk bed is convenient. There are several advantages. First, it saves space. And it's not even always the case in a small area, although this is a common problem. Indeed, even in a spacious room, it is advisable to leave as much free space as possible for outdoor games and toys. Secondly, you can organize the space in a more orderly way: make drawers at the bottom, attach or attach a cabinet to the side. Thirdly, the kids like this environment. And both girls and boys. Moreover, a do-it-yourself children's bed is built in a couple of days.
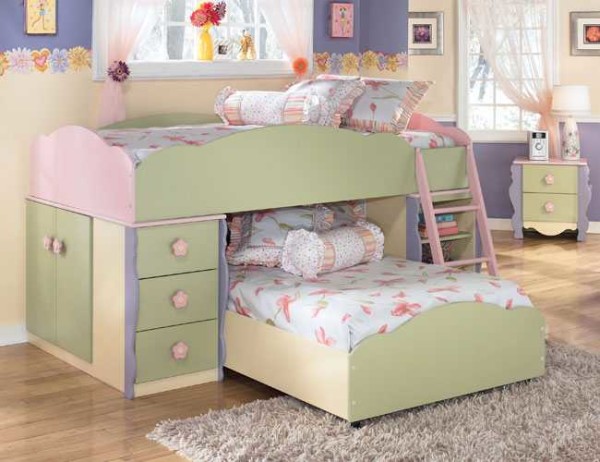
Children's room with bunk bed
The content of the article
Constructions
There are many types of children's bunk beds. And it's not about the size, but about the designs. Let's start with the construction principles:
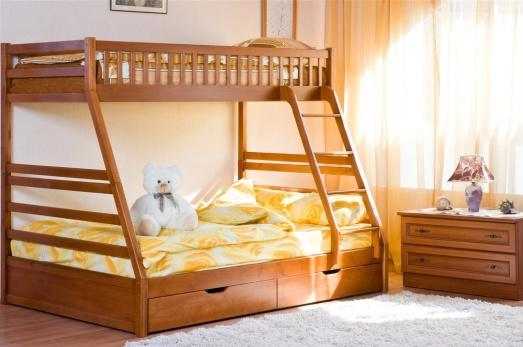
- The basis of the structure is a frame made of timber, to which all other parts are attached: sides, railings. The bars should be higher than the level of the upper lounger to the height of the back or sides. To ensure safety, the height must be at least 40 cm from the top of the mattress.
The design is based on four vertical beams, to which all other parts are already attached
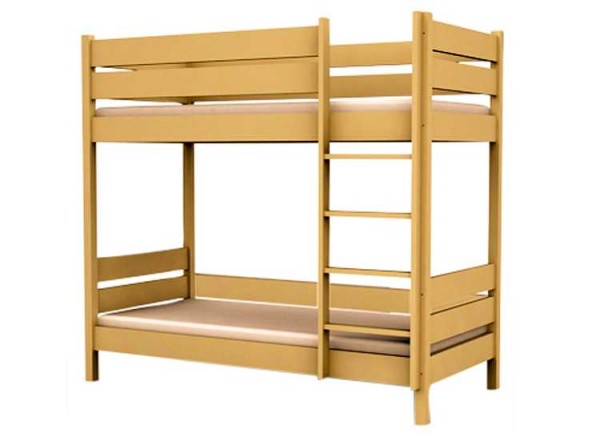
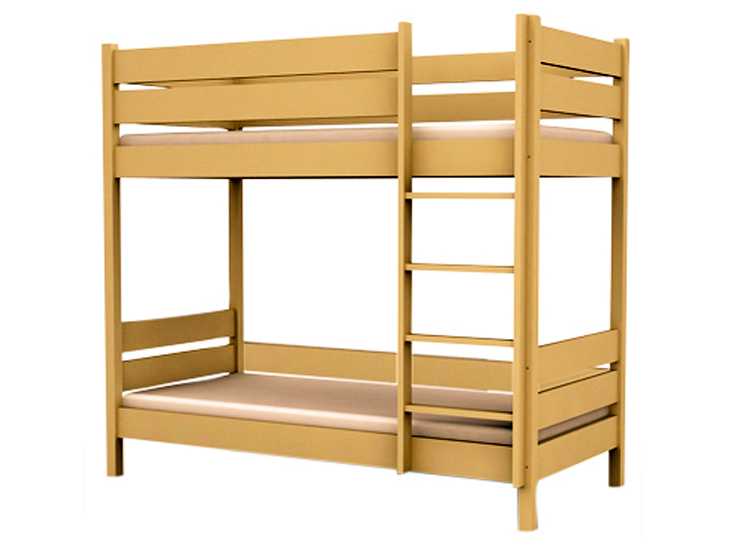
- Make two identical beds with thick racks and a sturdy frame. One is placed on top of the other and connected with pins or pins. If the height of the legs and back is not enough, and the mattress of the upper tier is too low, the racks are additionally increased, not forgetting to strengthen the joints.
Two identical beds are put one on top of the other and fastened
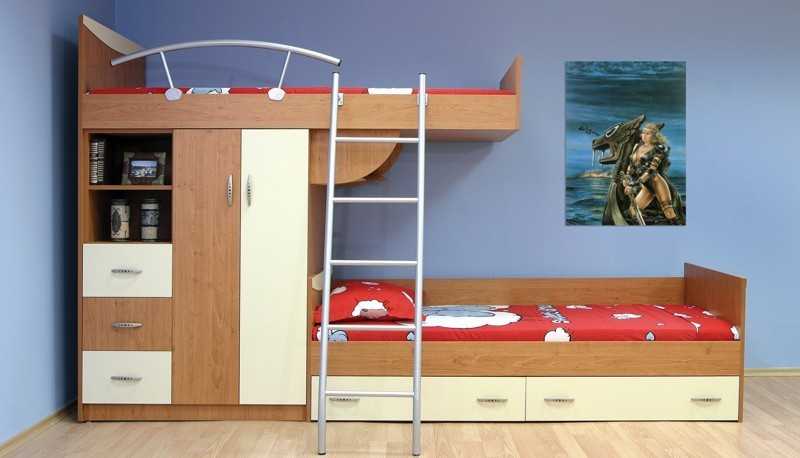
- At the bottom they arrange a workplace, and on top - a sleeping place. Such 2-tiered beds are also called "attic". This option is for those whose children are in competition with each other. And two sleeping places on different floors will cause constant conflicts. Two of these "kits" solve the problem. Read about the types of loft beds hereand in this article on how to do it yourself.

A two-story loft bed is a great way out for a small space or rival kids
- Corner bed arrangement. When the sleeping meta are not one above the other, but at two adjacent walls. Then at the bottom there is also an opportunity to organize a workplace or play space (playhouse).
Corner arrangement of berths
- Sleeping places are located along one wall, but not one above the other, but shifted. This option makes it possible to more efficiently use the available space - to fill it from wall to wall.

2-storey bed with offset sleeping places
- Roll-out or pull-out bunk beds for children. This is a variant of transforming furniture. For the day, the lower berth is hidden under the upper one. With this arrangement, the height of the bed can be small. This is an outlet for those who are afraid that children may fall from the second floor or stairs.
Roll-out bunk bed for children is safer


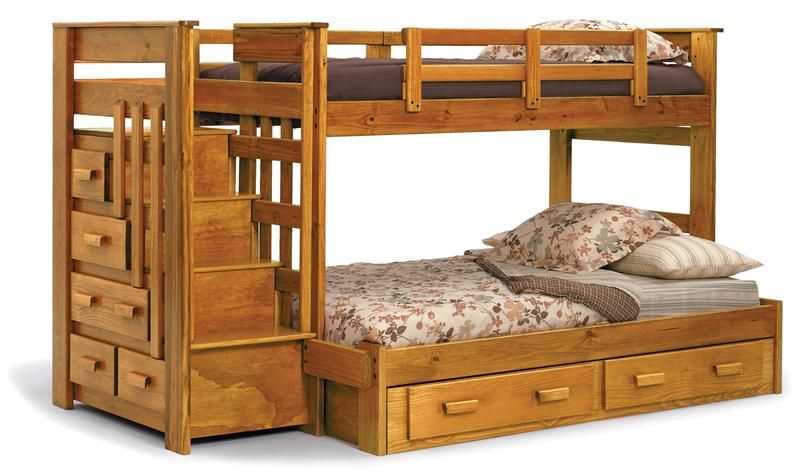
The choice of designs is great, but that's not all. Stairs add more variety. They can be ordinary, like on a Swedish wall or in the form of steps or boxes stacked on top of each other. The most economical options are the usual ones: they require little material and they take up little space. But you can put things into the stairs from the drawers, like into a chest of drawers, which is also practical. And even such steps are safer: you can attach high railings to them to make them even safer.
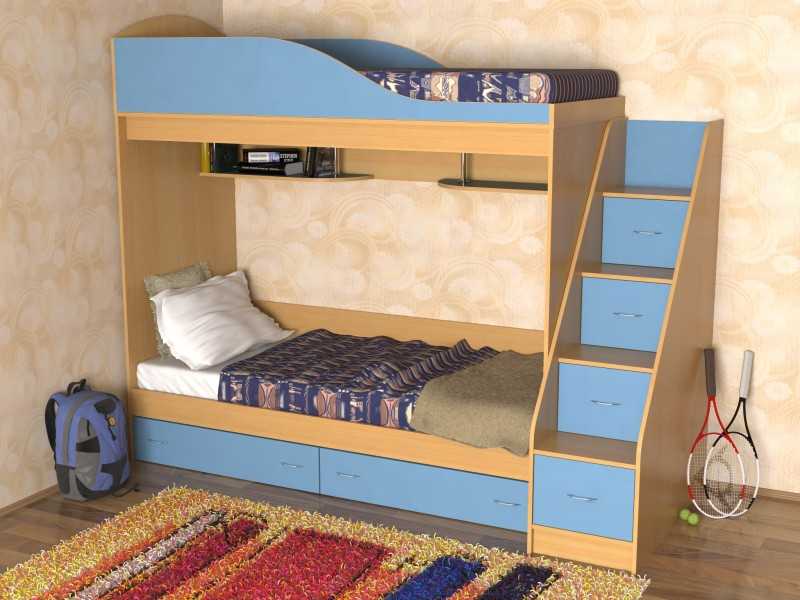
Ladder option with drawers
Ladders from rungs or steps can be located in front - along the long side of the beds. Moreover, they are sometimes made in the center, sometimes on the right or left. Another option is stairs from the end.They are also made vertical, and then they almost do not take up space, and sometimes at an angle. Climbing such is easier, but it is not always possible to put them on: the area does not allow, and it is easy to catch on protruding legs.
Read about how to develop a design for a children's room here.
What materials are they made of
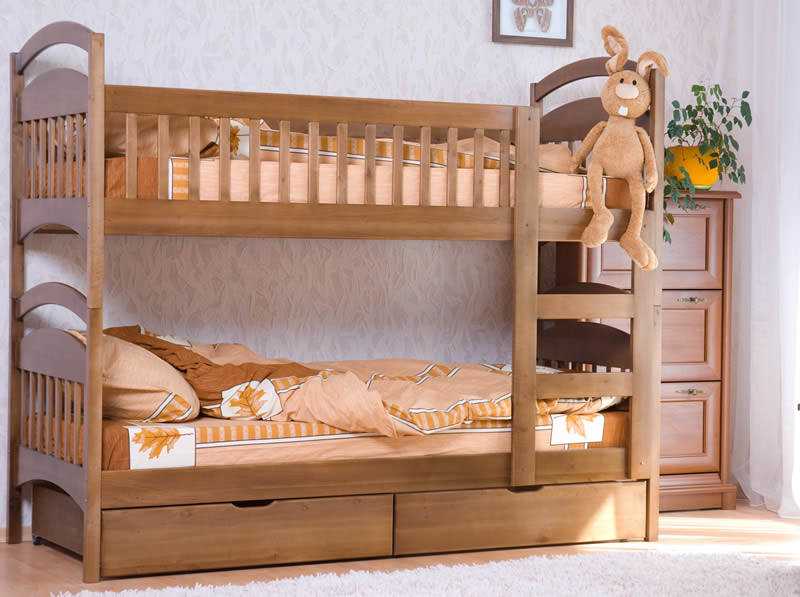
For the frame, they mainly use a wooden bead or make it from boards. And here are the options. All other elements can be made from boards. This material is natural, but it is not easy and long to work with it: every detail requires careful processing, and there are many of them, since the boards are usually not wide, otherwise such a bed looks rough. If you have any skills, it's worth a try. If not, use other materials better.
Bunk beds for children can be made of wood
A do-it-yourself bunk bed is built faster if the details are cut from sheet material: chipboard, MDF or plywood... Particleboard is better to take laminated, the same can be found on plywood. You can also paint it: if you take birch furniture plywood. She looks good. It is only important to cut it straight off so that there are no chips along the edge.
Chipboard edges can be treated with special tapes. They are self-adhesive, they are glued through a rag using an ordinary iron. Only these materials have an unpleasant feature: in their production, an astringent is used, which releases formaldehyde into the air. Since the substance is harmful, its amount is monitored and standardized. Fiberboard and plywood with emission class E1 are allowed for the manufacture of children's furniture. In terms of the amount of substance released, it is no more harmful than wood.
Drawings and dimensions of wall shelves can be found in this article.
Dimensional Drawings
Regarding how big or small the bed should be when the kids are young. In principle, a full-size bed can be placed right away. It only seems that it will take a long time until they grow up. In fact, before you have time to look back, the "children's" sizes will become small. And then the problem arises: what to do with the old bed. Of course, it is a pity to throw it away, but used furniture is not sold very well. Therefore, recommendations: immediately make a standard size bed: 1 * 2 m or so.
Bunk bed frame drawing
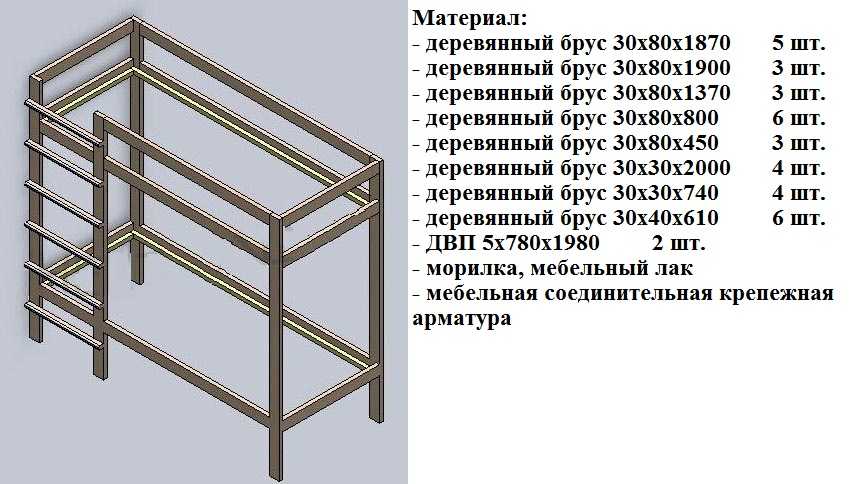
Bunk bed frame drawing and necessary materials
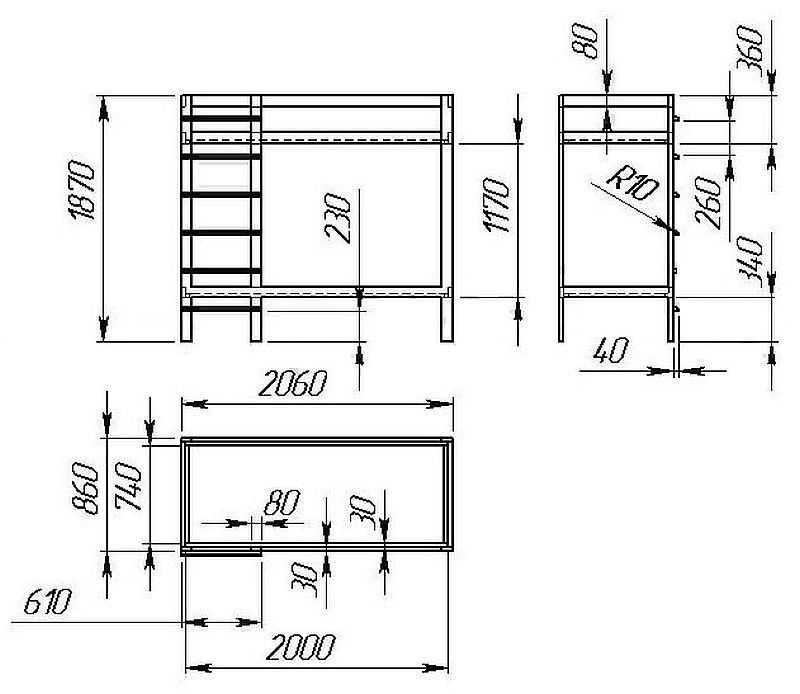
Bunk bed drawing with dimensions
Corner bed drawing
Corner bunk bed

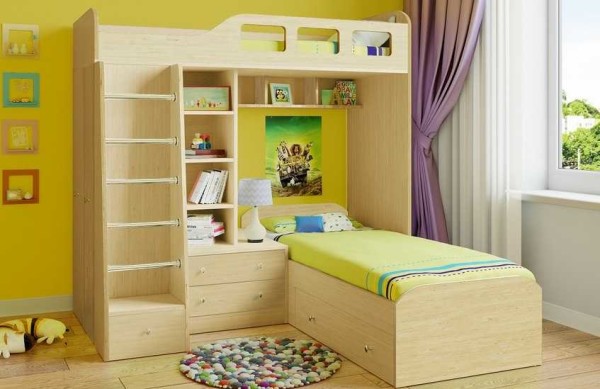
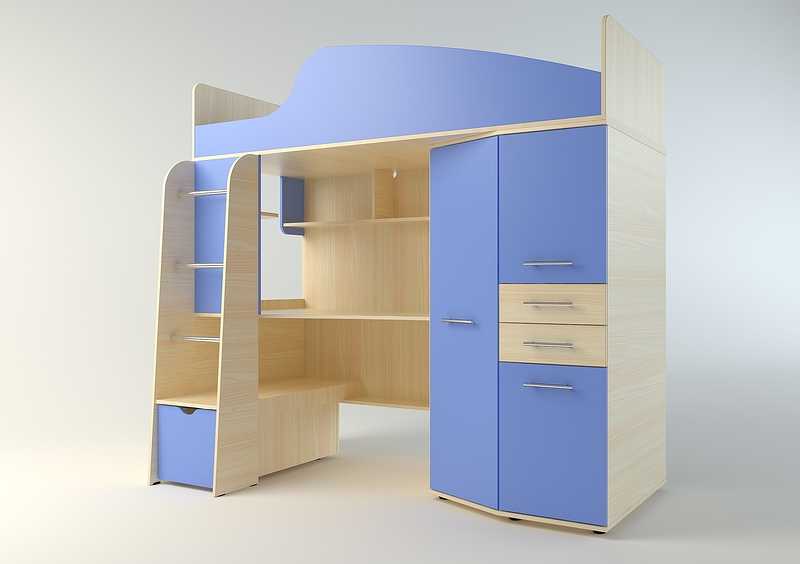
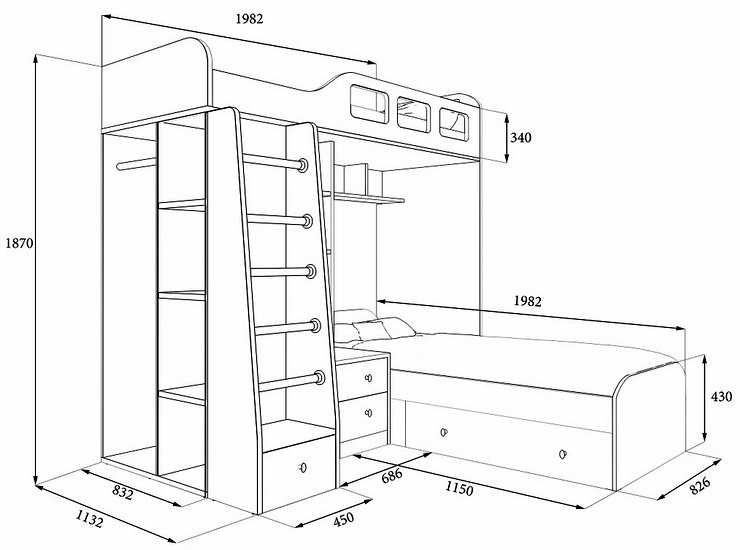
Bunk bed with wardrobe
Ladders to bunk beds

Drawing of stairs for bunk beds
You can read how to update the look of old furniture here.
Diy bunk bed: photo report
To save space in a small room, it was decided to make a bed on the second floor, and on the first to equip a workplace for a computer. If necessary, adding a jumper in front and making a shield under the mattress, you can also make a berth on the first tier.
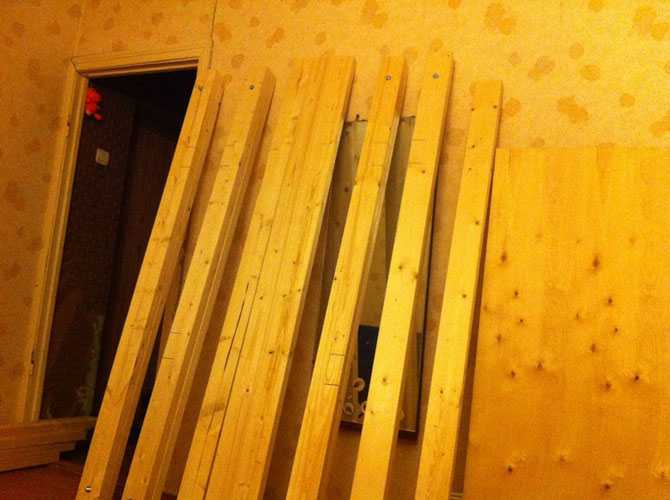
A drawing was developed, materials were calculated. It was decided to make the frame from spliced boards. It is both cheaper and more reliable: a guarantee that the pillars will not twist when they dry. Therefore, boards were bought, as well as a small section bar for strapping. The width of the bed is made to fit the existing mattress
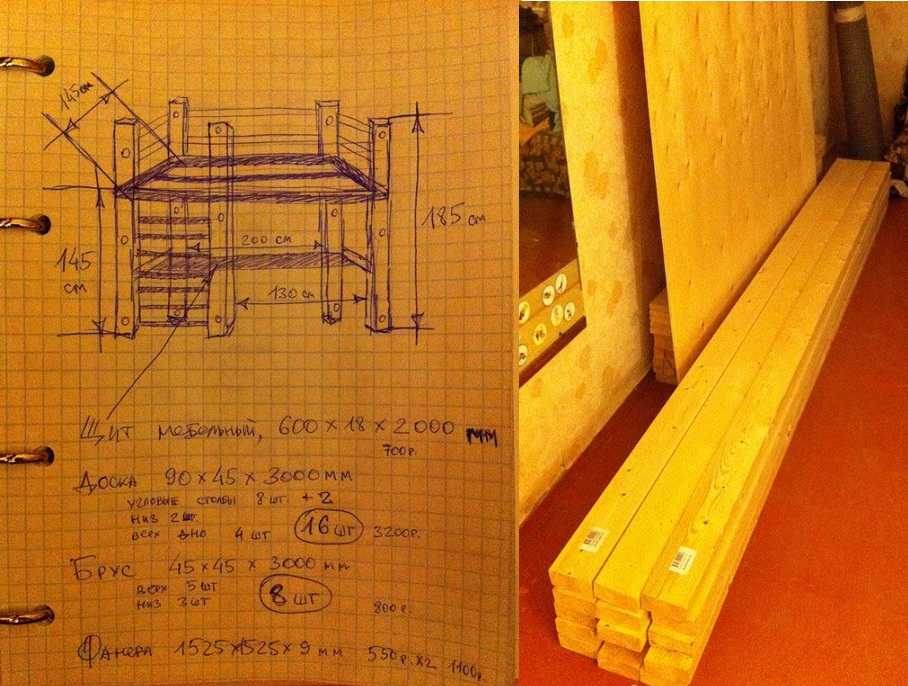
Drawing and purchased materials
The following materials were needed:
- for the workplace - furniture board 18 mm thick and 600 * 2000 mm in size;
- pine boards 90 * 45 * 3000 m - 16 pcs;
- pine timber 45 * 45 * 3000 m - 8 pcs;
- for the base for the mattress 2 sheets of plywood 9 mm thick, dimensions 1525 * 1525 mm;
- corners, screws, bolts.
The board was bought already planed and polished: there is no equipment for its processing on the farm yet. We immediately start with the manufacture of pillars:
- Cut to size - the height of the posts is 185 cm. In total, you need 10 identical ones: in the corners and one post on the other side of the stairs.
- We fasten them in two: we lay one on top of the other exactly. At the same time, make sure that the annual rings are directed in different directions. This will most likely keep the pillars straight.We drill a hole at the top and bottom for the bolts and tighten the boards by placing washers under the cap and nut. So that all this "beauty" does not spoil the appearance, we make recesses with a large-diameter drill so that the nut and head are recessed. Then they can be closed with furniture plugs or covered with putty on wood.

Ready racks
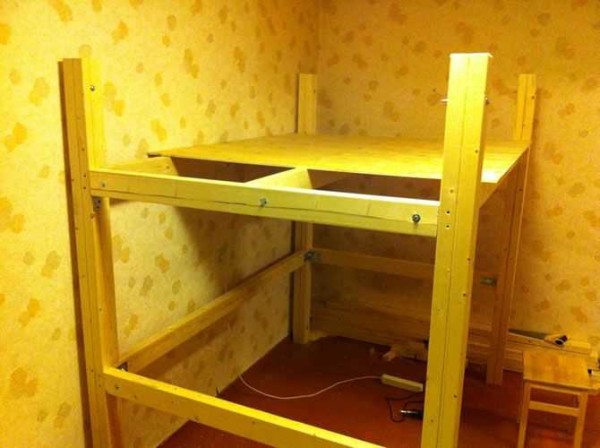
- We start assembling the frame. At a height of 145 cm, the first row of timber is the base for the mattress, at a height of 75 cm - the second is a frame for the work table. Under the timber we wash down in one board at half its width. Insert the bars into the resulting grooves and screw them into the end with self-tapping screws. Then we attach the corners to them, and already at the corners there are other sections of the strapping.

Starting assembly of the frame
- We apply a bar of the required length (145 cm) to the corners and fasten it with self-tapping screws. We attach the corners to the ends of the timber.

We attach side bars to the first frame
- We take two more racks and at the same height we attach the corners of the side harness beams to them. Now the structure is already standing itself. It remains to attach a long bar in the upper harness.
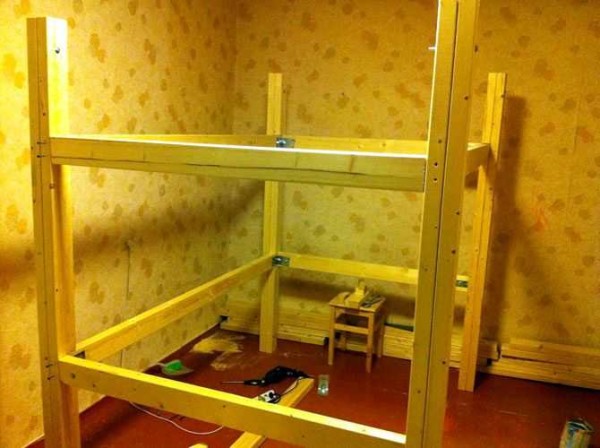
The frame is almost assembled
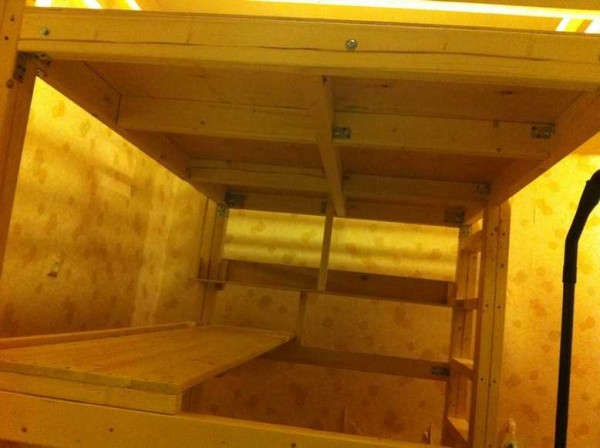
- At the top of the frame, another beam is screwed in length. This is a stiffener for plywood. You can make crossbars from short segments, but then it is better to make support strips to stop them, and nail the ribs to them. When nailing, you need to make sure that they are all in the same plane. Plywood is laid on top of the frame and nailed to the frame with small studs.
Longitudinal stiffening bar
- A stand is installed, which will serve as a support for the steps of the stairs. It can be made from one bar, which rests against the top harness and one 185 cm long.
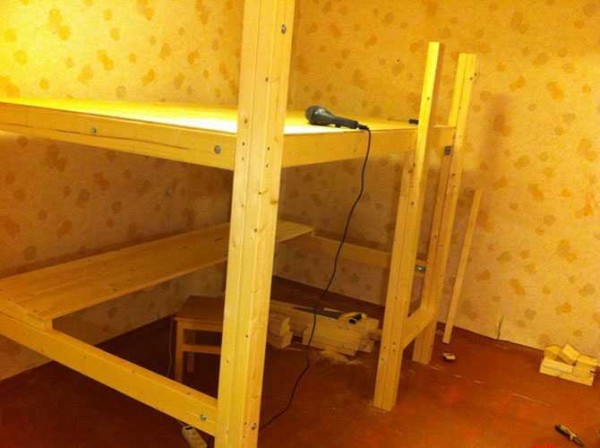
We install a support rack for steps
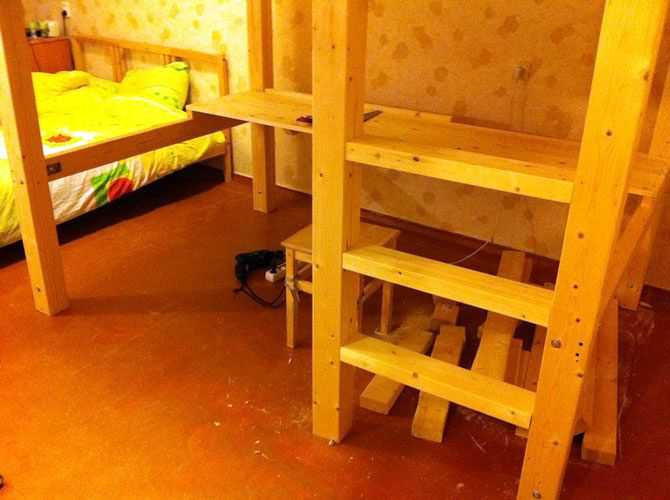
- If desired, the steps can be cut. If you have a jigsaw, it's not difficult. You can put them on the corners. It is less aesthetically pleasing, but reliable and simple.
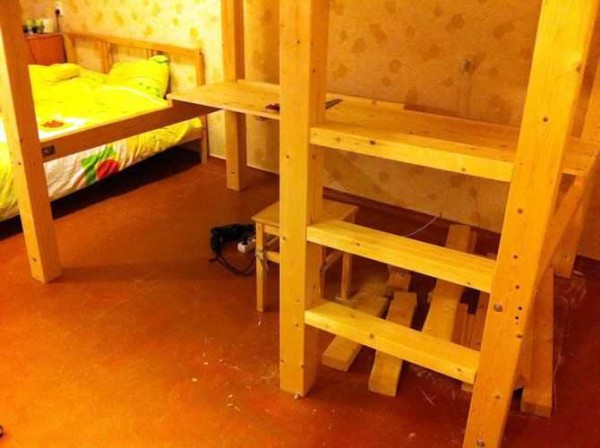
We mount the steps
- In order to save money, the furniture board was not bought, but the tabletop was made of boards. If you also come to such a decision, it is also advisable to lay a support bar under the outer edge of the boards, otherwise the board bends under load (put your elbows on the table).
How the countertop is made
- Finishing work remained: we fill the railing, we cover the nails with putty on wood. After drying, we grind, cover with paint or varnish.

Bunk bed: you can do it yourself


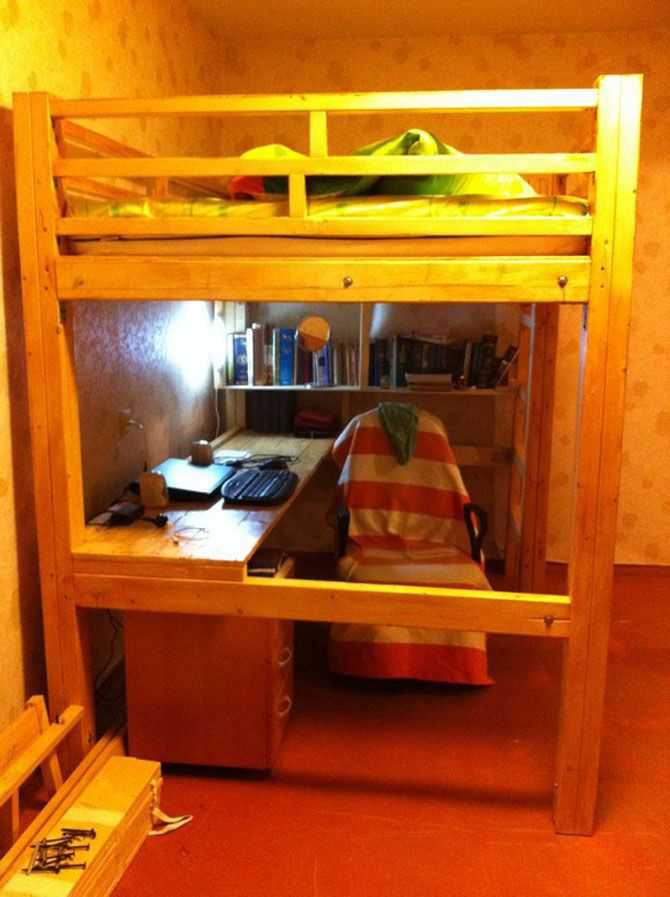
The option is simple. To implement it, only a screwdriver, a wood saw and fasteners were needed. This assembly option is for those who are unfamiliar with carpentry and who find it difficult to make cuts and grooves. If you really don't like the protruding fasteners, you can close it with decorative overlays: thin boards can be put on glue. They will hide all the flaws in the assembly.
For another option for assembling a homemade bunk bed, see the video.


We will consider an economical option, how to make a children's bunk bed with your own hands, when there are two identical wooden beds available. This bed option is relevant for children's rooms in Khrushchev. Where to start to avoid disappointment?
The option is very good and economical
Thank you, dear man! I just helped out! An excellent option for someone who is very far from carpentry. We were guided by the proposed scheme. We made only the top, the bed, without a table below. An old children's sofa remained at the bottom.Since the second tier is for the child, the bed posts were attached to the wall with corners, just in case. Thanks again!