We make doors for the wardrobe on our own
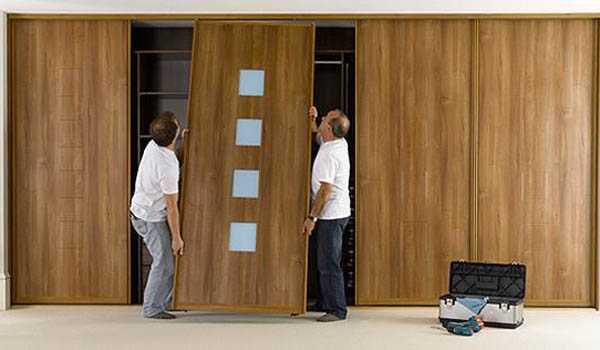
The sliding wardrobe is convenient, since the doors do not take up much space when open. It can generally be made uncased - in a niche, from wall to wall. All that is needed in this case is to install the doors for the wardrobe, and then collect the filling (or vice versa, this is not so important.
The content of the article
Doors for wardrobe: recommended sizes
If we talk about strict restrictions on the size of doors for a wardrobe, then there are none. You can make any length and width. But there are recommended parameters determined based on operating experience:
- The minimum width is 50 cm. Nothing prevents you from making the canvas narrower, but when moving it will skew, as a result it can even jump out of the guides.
- The maximum sash width is 110 cm. At the same time, considerable efforts have to be made in order to move it.
- The optimal width is 60-90 cm.
- Profiles come from the factory with a height of 5.5 m, and in stores they are usually cut in half. So there is a real opportunity to make doors for the wardrobe of the required height. At high heights, you only need to pay attention to the rigidity of the handle profile.
- The number of sliding doors is selected based on the optimum width. Choose them so that they do not block access to the filling of the cabinet.

There are almost no size restrictions
Sash design
The door leaf of the sliding wardrobe consists of profiles:
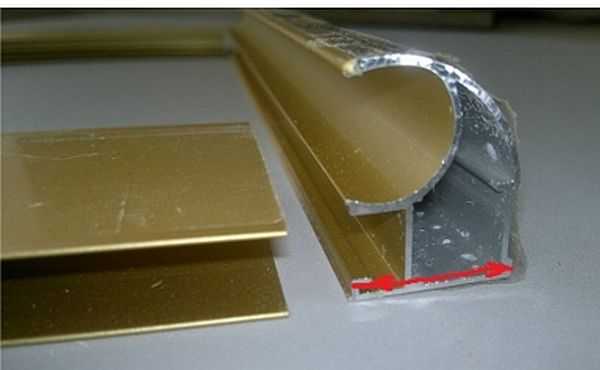
- bottom;

The lower profile has deeper sides
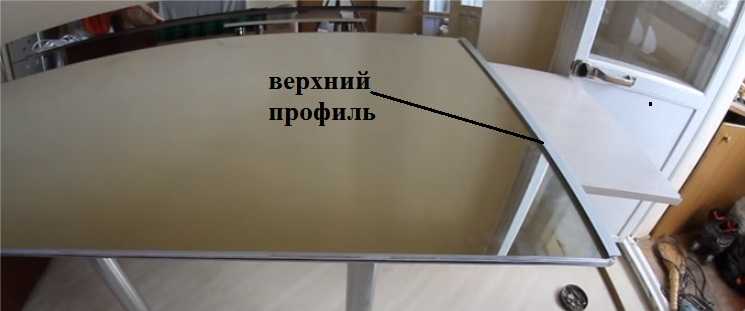
- upper;
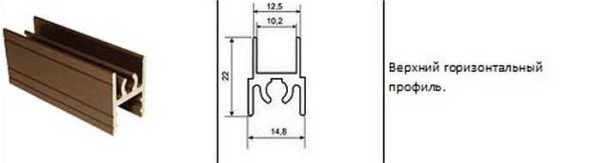
Upper profile for sliding door leaf
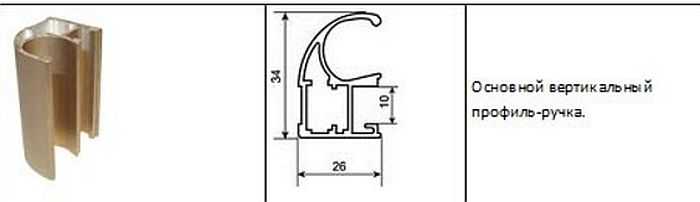
- profile handles;

The handle can stand on both sides
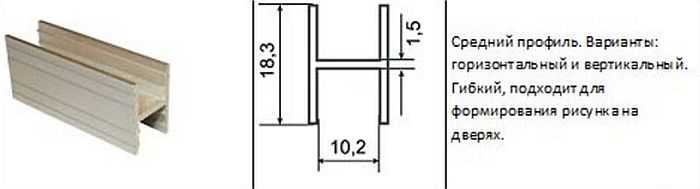
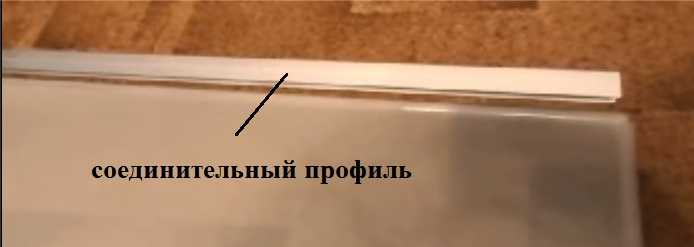
- intermediate.
-

These profiles are placed between parts of the door leaf, but you can do without them - if the door is one-piece, and not composite


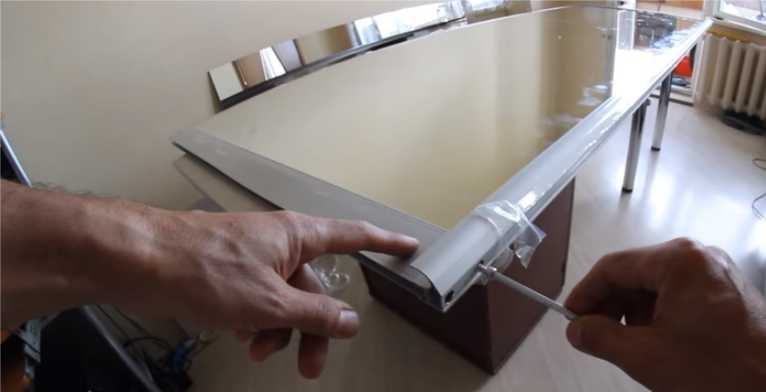
All this together looks like in the photo. In this frame, in the grooves, the material of your choice for the doors is inserted. It could be glass, mirror, Chipboard and other materials.
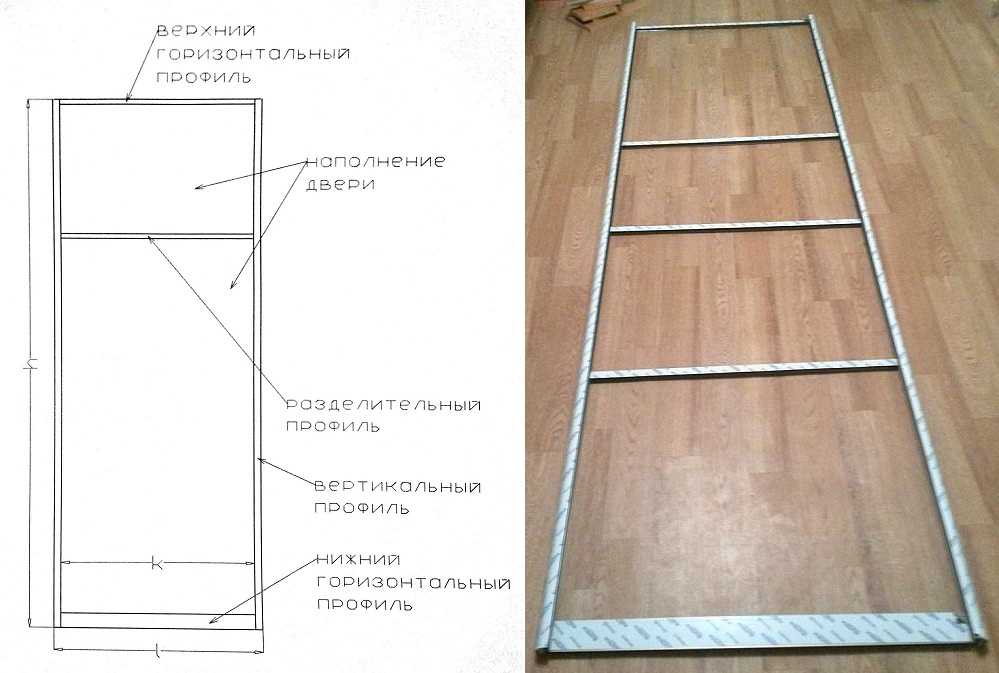
Sash construction without filling
Dividing profiles are optional. They are needed if the sashes are assembled from different materials or you just like them in this form. The maximum thickness of the filling material is 10 mm, the minimum is 4 mm. Thinner ones - glass, plastic, mirror - are inserted through the sealing gasket.
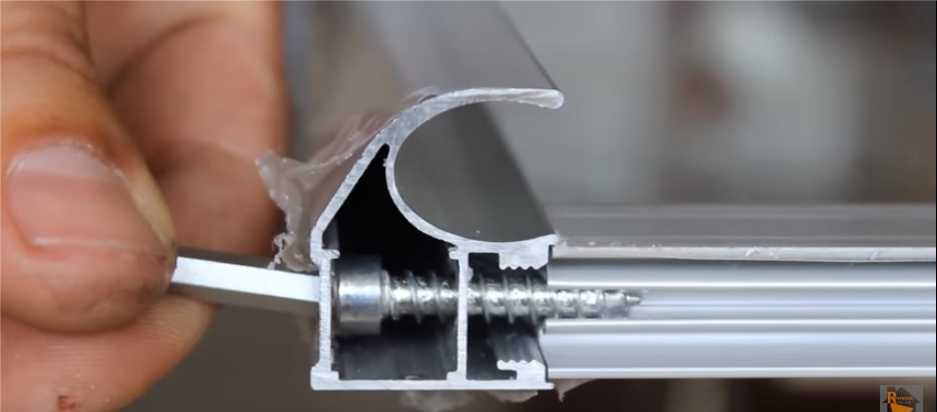
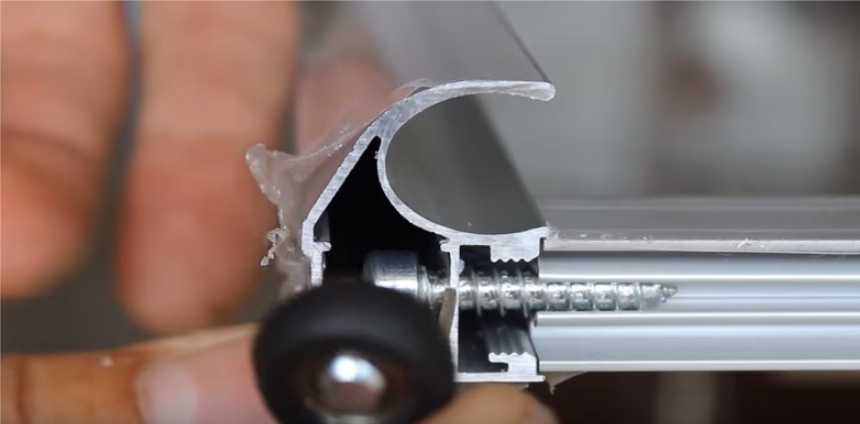
In order for the sash to be able to move, rollers are installed on it - above and below. The lower rollers account for the entire mass of the door, and the upper rollers stabilize the vertical position of the web, preventing it from deviating.

Rollers for sliding wardrobe doors
The rollers are attached to the side profiles with special fasteners.
Slides for sliding doors
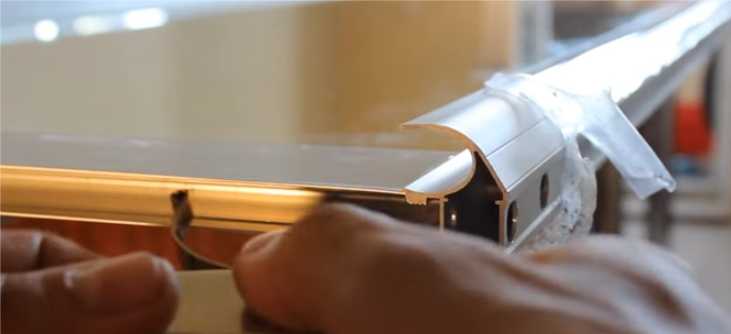
As you can imagine, the sash is not everything. Guides are needed along which these very doors will move. There are two of them - upper and lower. They differ significantly in appearance.

Top guide for wardrobe door

The bottom rail is made of metal
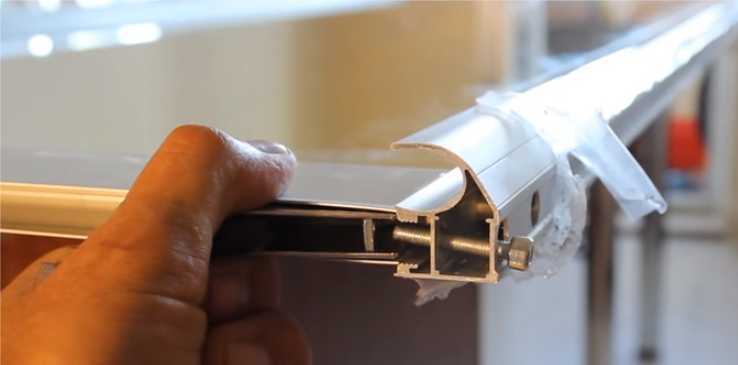
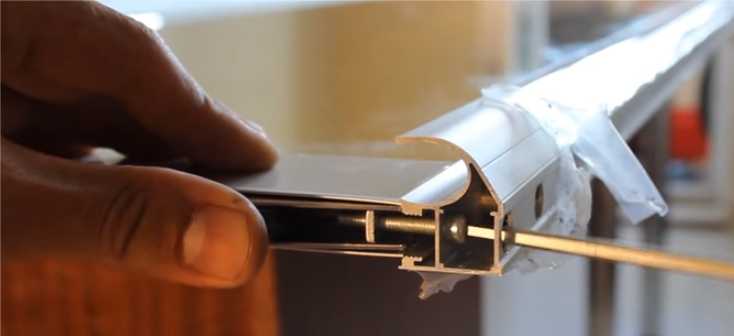
When installing, the doors are first tightly inserted into the upper guide, the sash is raised to the stop and the lower rollers are placed in the corresponding slot. The whole structure is shown in the following photo.
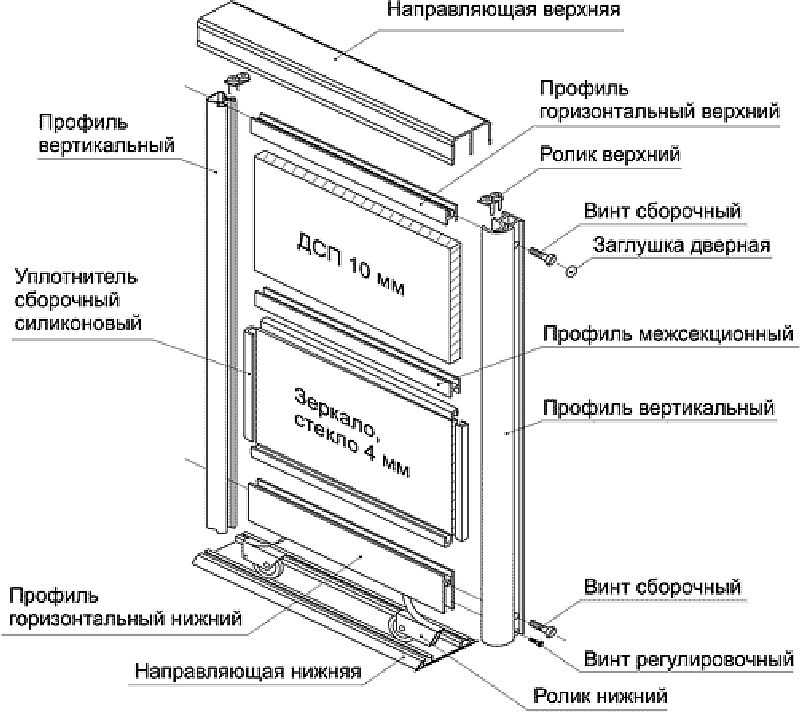
Assembly diagram
Size calculation
When self-assembling a door for a wardrobe, there are two options. The first is to measure the opening, think over how many doors you want to have and contact the door manufacturer with this information. Just make sure they sell the parts without any assembly fees. The manager himself will calculate all the necessary materials for you, give out the dimensions and announce the amount. It's simple. But you will have to buy everything in this office, i.e. choose from what is.
The second way is to calculate everything yourself and look for the necessary components for different companies. More difficult and more expensive, but the choice is wider. For those who do not like simple ways, we will describe the calculation of components.
Sash
Calculate the width of the doors so that only one handle is visible when closed, but at the same time it should not close the door leaf itself. For a compartment door of two leaves, count as follows: measure the width of the opening, add the width of the profile and divide it in half. This will be the width of the sash.
For example, the opening is 1600 mm, the width of the handle profile is 26 mm. We get 1600 mm + 23 mm / 2 = 811.5 mm. Please note that the width of the handle profile is arbitrary. It can be different in shape and, of course, in width. When calculating, substitute the width of the structure you have chosen.
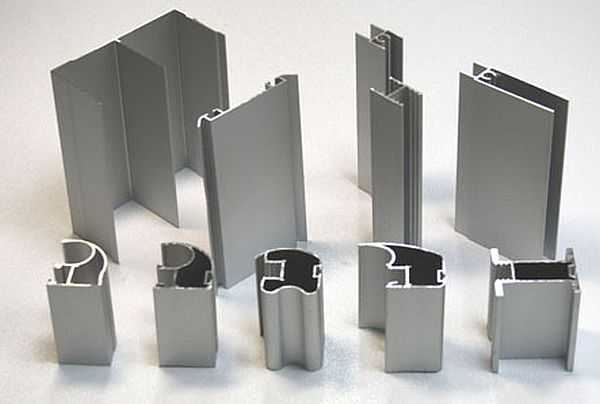
Profiles can be different, therefore they must be measured individually
To calculate the tricuspid, you will need to add twice the profile width and divide by 3.
Example: the opening is 2100 mm, the width of the handle is the same - 26 mm. We consider: 2100 mm + 2 * 26 mm / 3 = 717 mm.
With height, everything is easier. 40-45 mm are subtracted from the cabinet height and the desired sash height is obtained, as well as the length of the side profiles. That's it with the size of the valves.
Filling
Since the filling is in a frame of profiles, we subtract twice the profile width from the total sash width. We do the same with the height - we subtract the height of the lower and upper profiles.
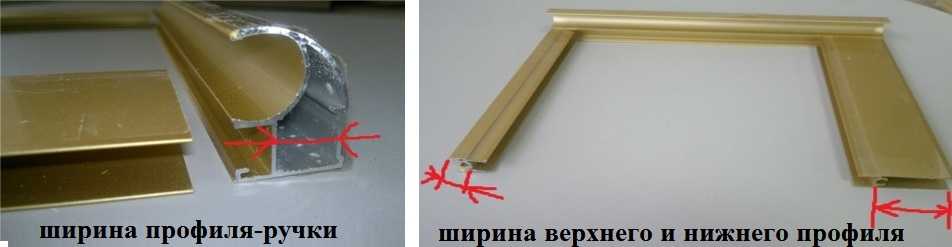
Measuring the width of profiles
So, the width of our sash is 811.5 mm. The measured width of the handle profile is 18 mm. Since the handles are placed on both sides, we double this figure. We get 36 mm. Total filling width 811.5 mm - 36 mm = 775.5 mm.
We also consider the height: let the original be 2350 mm, the width of the upper profile is 12 mm, and the lower one is 48 mm. Total filling height 2350 mm - 12 mm - 48 mm = 2290 mm. This is if the filling is solid and it is chipboard that does not require a silicone seal. If the sash is a solid mirror or glass, the thickness of the sealing gum must be subtracted from the found height. It is 1 mm, but since it is worn around the perimeter, in general - from the top and from the bottom - it takes 2 mm. In this case, the filling height is 2290 mm - 2 mm = 2288 mm.
If the sash infill consists of fragments, the thickness of the connecting profile is also subtracted. It is also approximately 1 mm.
Profiles
The height of the vertical frame profiles is equal to the overall sash height. The width of all horizontal ones is calculated depending on the width of the handle: from the width of the sash, we subtract twice the width of the handle (there are two of them).
How to measure pen width
Let the handle width be 26 mm. We get the width of the vertical profiles: 811.5 mm - 26 mm * 2 = 759.2 mm.
Photo report on the assembly
First, all profiles are cut exactly to the calculated dimensions. The accuracy must be perfect. Cut - strictly perpendicular, at 90 °. Holes are drilled in the handle profiles for the installation of rollers and fasteners.
The holes are made through two diameters. The exact size depends on the dimensions of the purchased fasteners, but basically there are two sizes: 4 mm and 6 mm, as well as 6 mm and 10 mm.
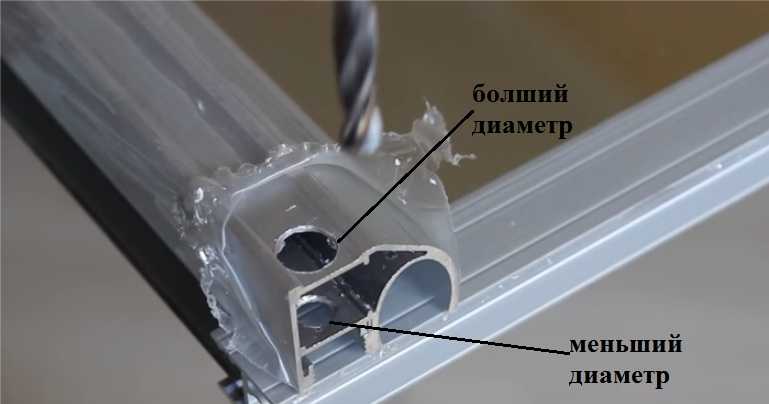
How to drill holes
At the top, one such hole is made, the center of which is at a distance of 7 mm from the edge of the profile, at the bottom of the holes there are two - the first at a distance of 7 mm from the edge, the second - departing from the cut of the profile 42 mm.
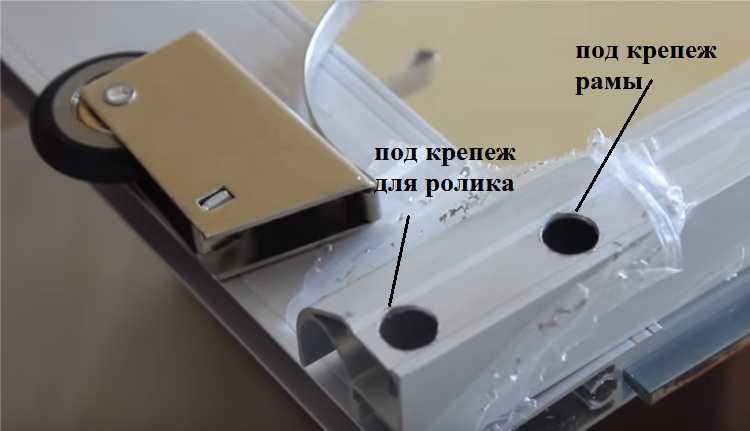
Holes at the bottom of the side profiles
During assembly, all parts of the filling are assembled first. First, if there is glass or a mirror, a sealing rubber is installed around the perimeter. It is simply put on the end of the part by pressing the finger. At the edges, the seal is cut off, put on end-to-end, but without overlap on the next side.
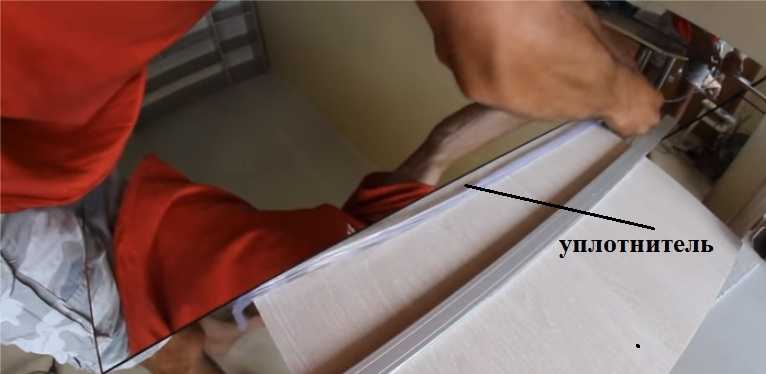
Seal on the mirror
A protective film is glued to the back of the mirrors. You can use regular self-adhesive. This film will prevent the debris from scattering if the mirror breaks.
If the sash is composite, we assemble it using connecting profiles. The filling parts are simply pushed into the profile. Sometimes it can take a lot of effort.You can tap on the end with the back of your hand or use a rubber mallet for this.
Just insert the filling parts into the grooves of the profile and tap on the end
When the sash is assembled, according to the same principle, the corresponding profiles are installed at the top and bottom.
Top profile installed
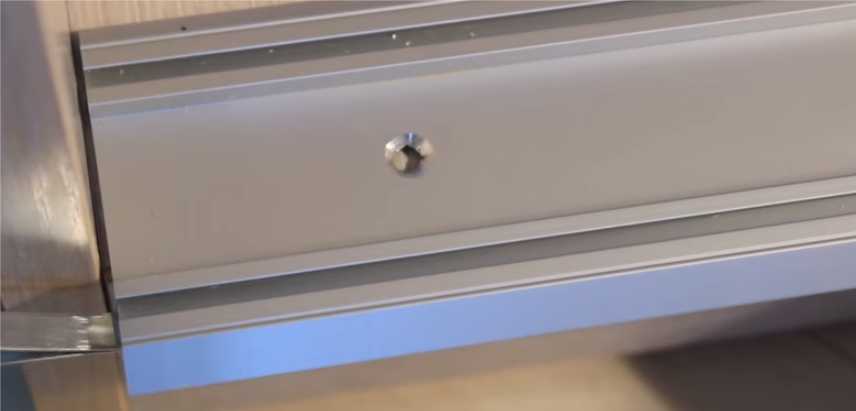
Then it's time to install the side handle profiles. Everything is the same: you drive the filling into the groove, make sure that it fits all the way along the entire length without distortions. When the frame is assembled, it is necessary to tighten it with fasteners. We start from the top. Take the fasteners, insert them into the previously drilled hole. If the distance has been accurately measured, the screw will fit into the groove of the head rail.
If drilled correctly
We tighten the connection with a hex key. Without slightly tightening it all the way, we insert the upper rollers between the screw head and the profile jumper, then we tighten the screw.
Insert the upper rollers
We repeat the same operation on the other side. Then we go down. Here the fasteners are installed in the upper hole. Just tighten it all the way. Repeat the same on the other side.
Installing fasteners from below
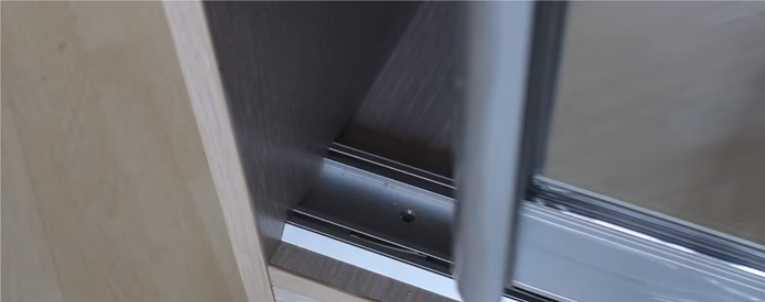
Next, we install the lower rollers. We put the thrust plate into the groove, press it.
Installation of the lower roller - we put the plate into the profile
We press the spring, tucking the roller body inward. Insert the screw into the hole, trying to get into the socket, tighten it with a hexagon. You may need a different size - slightly smaller than the others - as this screw is usually thinner and longer.
We tightened the roller, inserted the screw
You do not need to tighten it all the way. So that it goes into the plate for half a centimeter or so. Then, when installing the door and adjusting its movement, this screw adjusts the position of the sash - the angle is raised or lowered.
We tighten the screw that fixes the roller
If you press the roller wheel, it will go into the body, then return due to the elasticity of the spring. This simple mechanism ensures smooth movement of the door for the wardrobe.
Having collected all the doors, we proceed to the installation of the guides. They should be located strictly one below the other, even without deviations in a millimeter. Use a plumb line or laser level (how to use the laser level read here).
First, screw on the top guide. It is mounted either to the ceiling or to the top of the cabinet. The distance from the shelves is at least 100 mm, otherwise the doors will touch the shelves, things, hangers.
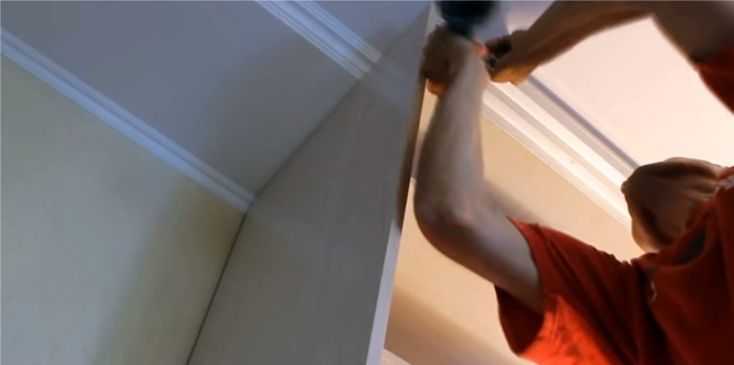
We fasten the top guide
In the bottom guide from the sides, insert the bump springs into the grooves. They will restrict the movement of the door. The number of springs is equal to the number of flaps, they are installed at both ends.
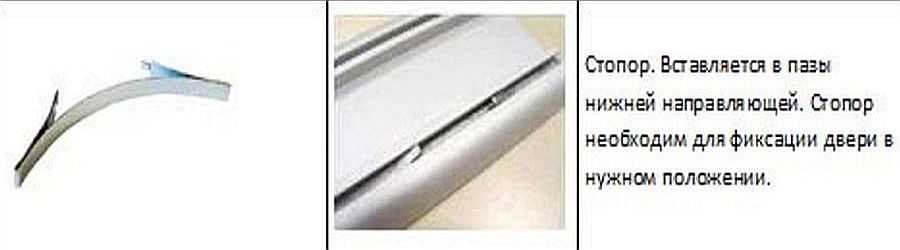
Stoppers for doors
Insert the travel stop springs
If there is no laser level, so as not to suffer with plumb lines, for a start, you can simply lay the lower guide, while not fixing it. Then install one blade, putting its upper rollers at the top, and setting the lower ones in the desired groove. This will link the doors to the top and bottom tracks.
With the sash vertical, automatically set the lower guide
By placing the canvas strictly vertically, you will automatically set the lower guide. It only remains to screw it on. Just make sure that the doors do not move.
The last thing to do is to glue the schlegel on the sides. This is a fleecy self-adhesive strip that softens the impact of the sash on the cabinet walls (or just on the walls, if the cabinet is open-frame).
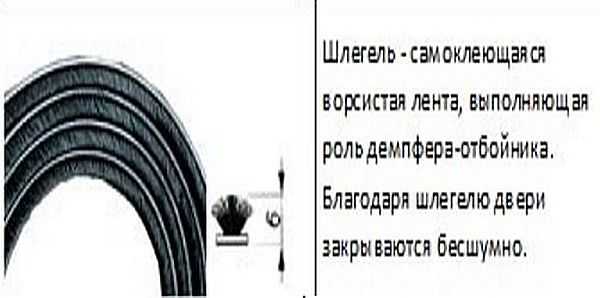
The final touch - the Schlegel sticker
On this, the doors for the wardrobe compartment are installed and ready to go. You can watch the process again in the video.


Thank you! Affordable, very sensible, understandable to the average man in the street. I probably won't become a furniture maker, but how to transform an old children's table into a new coffee table - an idea appeared. And about scraps of boards, planks and other things - too.
And do you plan any other master classes on the transformation of the surrounding space? .. For example, a chest made of the remains of building materials after building a house?
Thank you again for the pleasure of reading (including the literate text, which is now, alas, a rarity ...)
Thank you for your pleasant words. We try. So far, no new elders on this topic are expected, but there is already about updating old furniture (you can read here) and how to do table that's just from the leftovers ... or a bench, there is an interesting idea at the end of the article ...
Thank you, everything is explained very clearly. You can only clarify one point than to cut the profile on the door.
Thank you for your rating)) We are trying. And the answer to your question: the profile for the doors of the wardrobe compartment is cut with a file for metal with a fine tooth. But the cut still turns out to be rough. Bring it to smoothness with very fine sandpaper.
How many sashes are in height less than the guides by 40-45 mm?
The height of the sliding wardrobe sash is usually 40-45 mm shorter than the cabinet height. But exactly this parameter depends on the thickness of the guides and the size of the rollers, their design. After subtracting these values from the height of the guide, subtract about another centimeter - for freedom of movement. Just count everything carefully. You won't be able to add ...
vopros. why then the side profile handle staggers when you close it on one door, on the other it sits tightly, what can be done?
And tell me, is it possible for both chipboard and plywood to make doors like that?
If you are talking about filling the sash, you can. Only plywood and ordinary chipboard will need to be found of a suitable thickness - so that it stands in profile. And you also need to finish the surface with something ... You won't have doors in your wardrobe just made of plywood?