How to sheathe a house with siding with your own hands
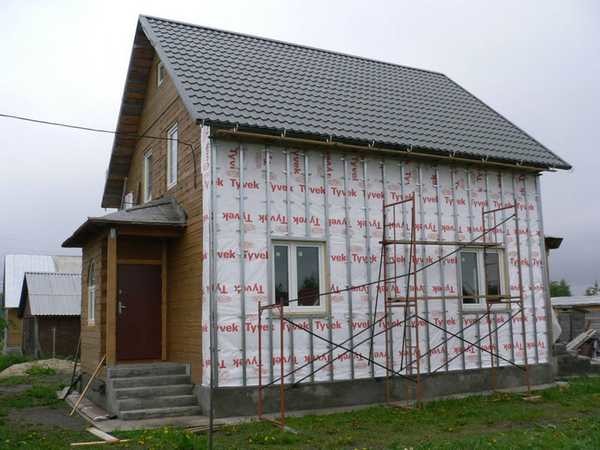
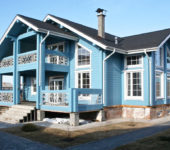
If you want to finish the facade of your house quickly, beautifully and inexpensively, you will most likely come to the decision to use siding. These are already far from those frankly plastic thin boards with an unpleasant shine. Modern siding imitates different textures of traditional finishing materials: stone, brick, wood. All surfaces look reliable enough. If a torn stone, then the color and surface are very similar. There are even color irregularities that are natural for this material in brick-like panels, cracks and chips are pressed and traced. The texture of the tree is also quite accurately conveyed. Not all materials, but many. It is produced today using at least five different materials and many technologies. Another important advantage of this material is that do-it-yourself siding installation is not a super-difficult task available to anyone who can hold a hammer.
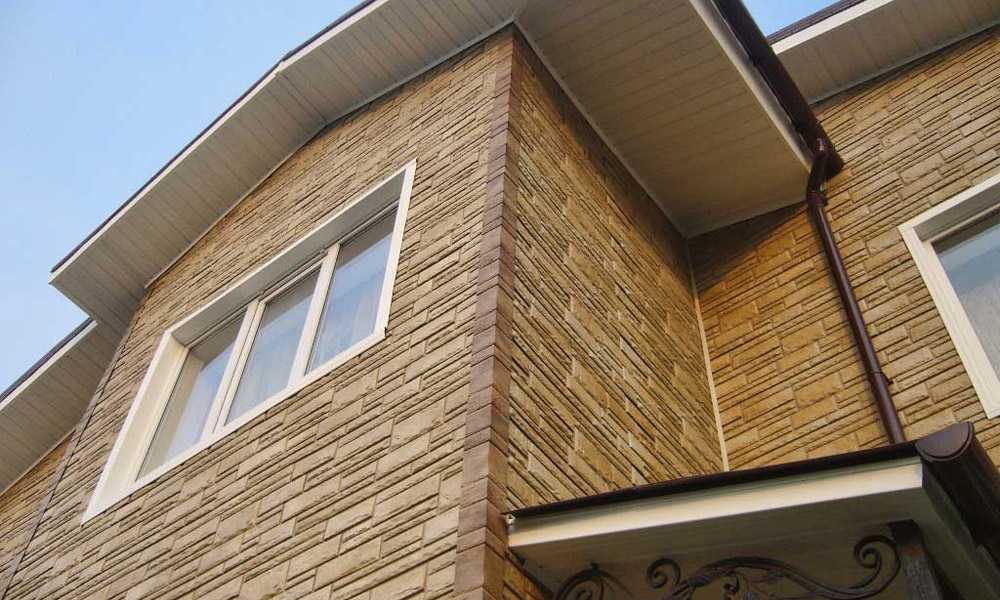
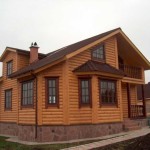
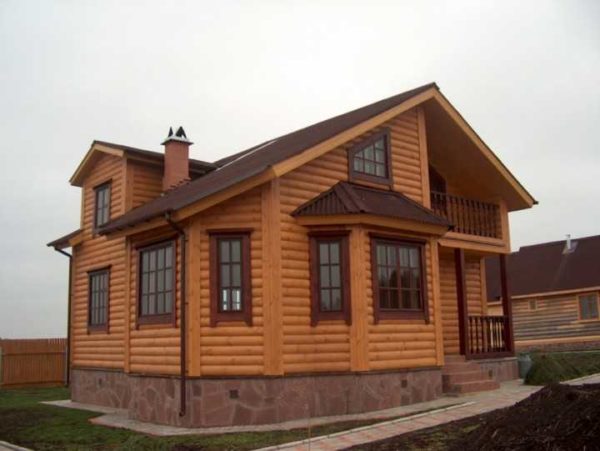
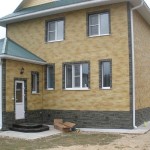
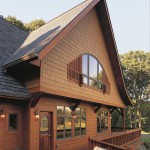
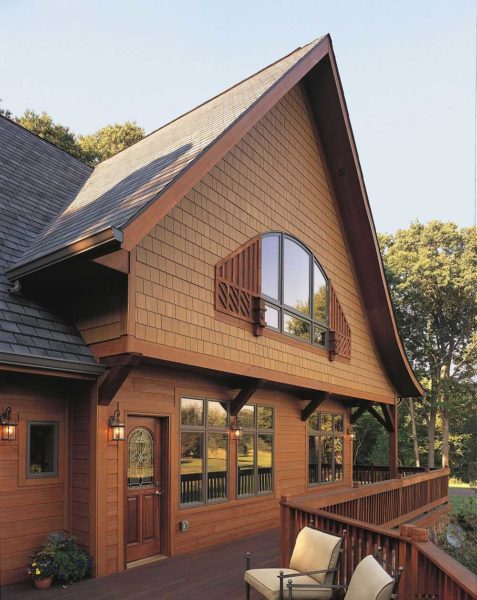
This house is also sheathed with siding
The content of the article
Types of siding for house cladding
To begin with, they produce it from different materials: based on polymers, wood, metal and their combinations. Here are the main types used for cladding houses:
- Polymer:
- vinyl;
- acrylic;
- Metal siding:
- aluminum;
- galvanized iron;
- Fiber cement;
- WPC - wood-polymer composite.
Polymeric
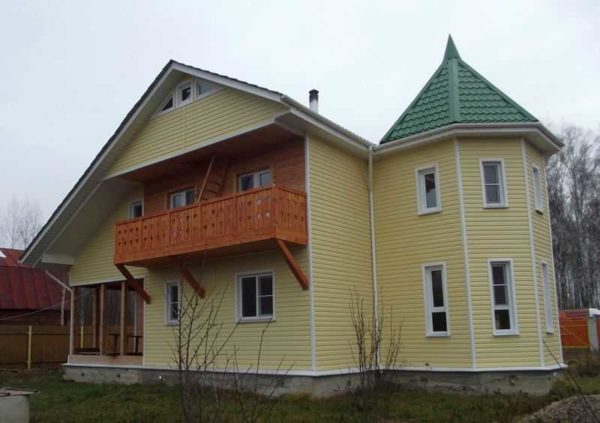
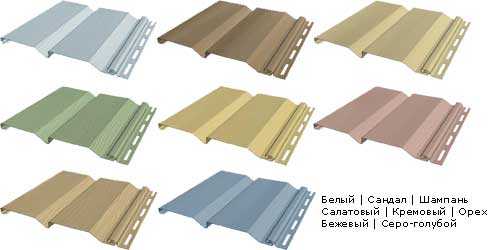
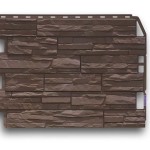
The first of the polymeric ones we have appeared is vinyl siding - made of polyvinyl chloride, which is abbreviated as PVC. Today it also exists and has the lowest prices, but outwardly it already differs significantly from the first samples. It has become much more attractive, there is not only smooth - with imitation of the surface of wood - it is also called "log siding". This is if it is semicircular in cross section. There is one that repeats the profile of the bar. So you can sheathe the house with timber siding. Some of the profiles and colors can be seen in the photo gallery.
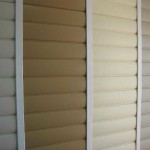
-

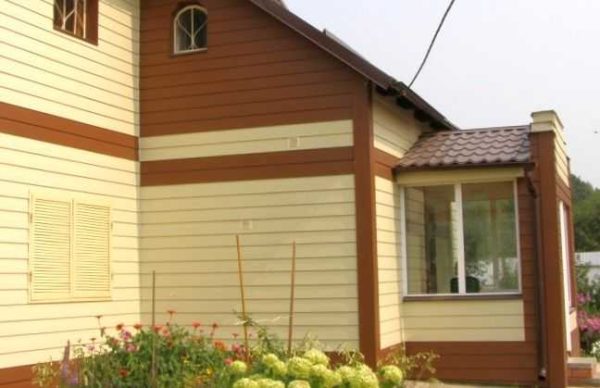
- Everyone knows what vinyl and acrylic siding looks like, but design options may be different
-
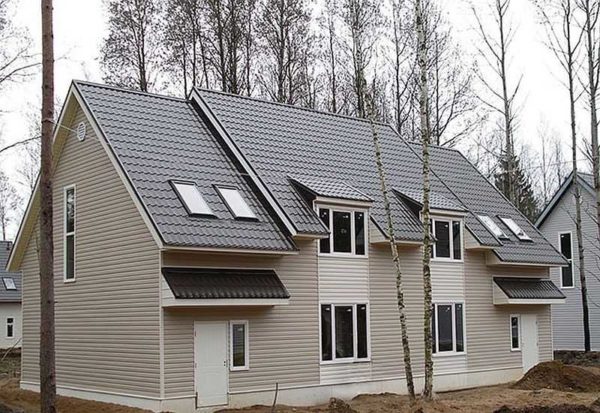
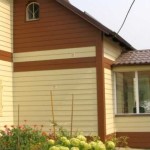
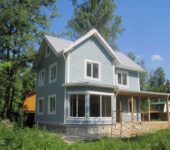
- Light wood imitation wins with dark roofing
-
- This house is finished with log siding (acrylic or vinyl - unknown)
-
- This is how it looks like an imitation of a log assembly
-

- This is vinyl siding for a bar - different colors
-

- From a distance it looks like a log, close, of course, not very

-
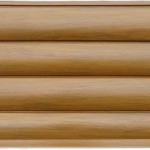
- PVC siding - imitation of a log

-
- This is a vinyl siding called herringbone for its characteristic profile. Its surface can imitate wood, and almost any color. It's just that some are hard to find
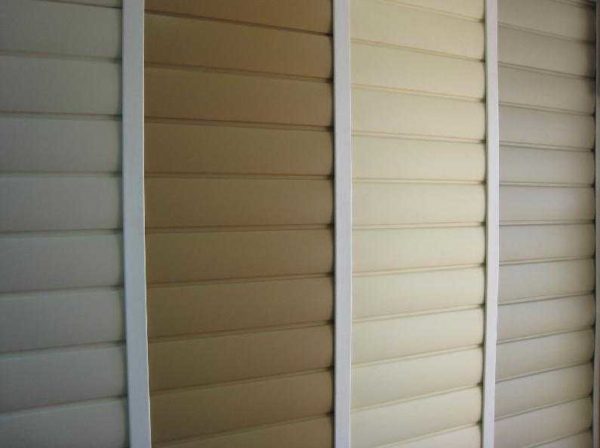
-

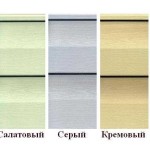
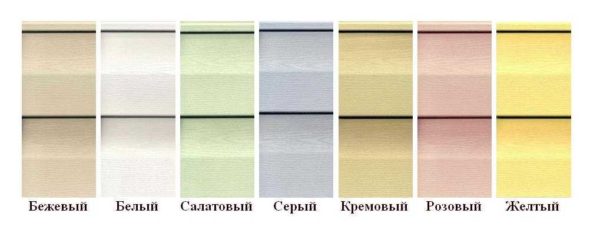
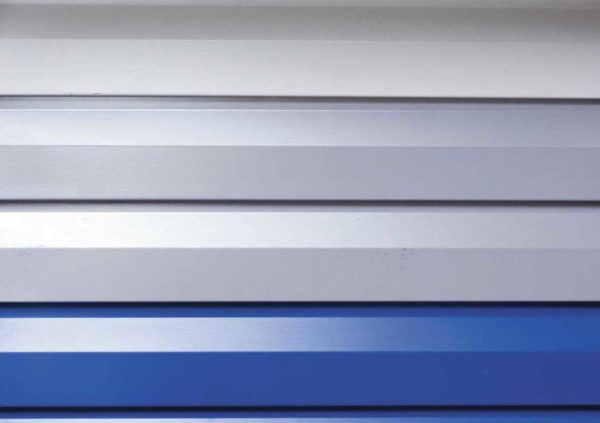
- It's just a smooth color - a small part of the palette
The second polymer siding is acrylic. It costs about 50% more than vinyl, but this is justified: it has better characteristics, many outwardly like it more. What are its advantages? It is more plastic, due to which it can withstand heavy loads, it cracks less in the cold (vinyl becomes brittle at subzero temperatures). The operating temperature range of acrylic is from -50 ° C to + 50 ° C, acrylic can be heated to + 85 ° C without loss of performance. And one more thing: acrylic fade less, although it all depends on the quality of the pigment. All these features are reflected in the warranty period: manufacturers for imported vinyl siding give a guarantee of 25 years (for ours 5-7), for acrylic - 50 years (for ours about 10). Outwardly, acrylic hardly differs from vinyl, so there is no point in publishing similar drawings.
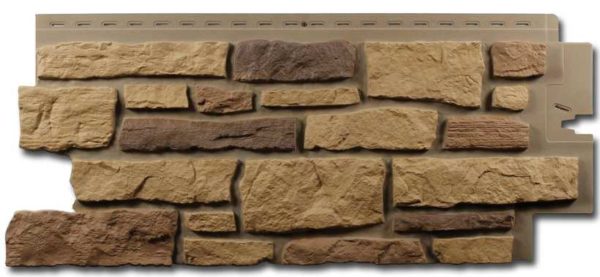
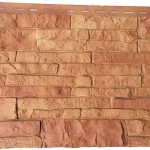
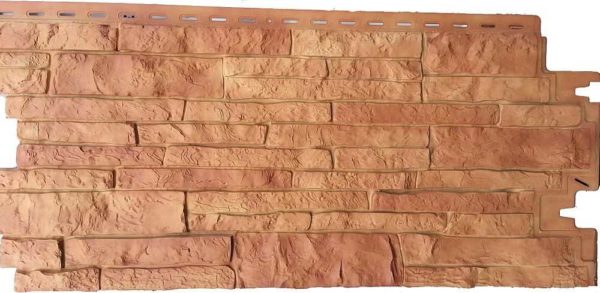
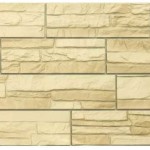
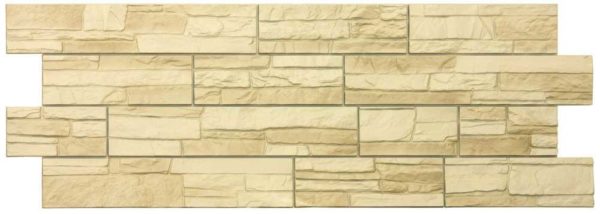
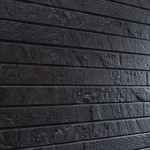
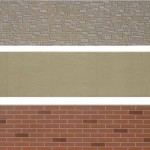
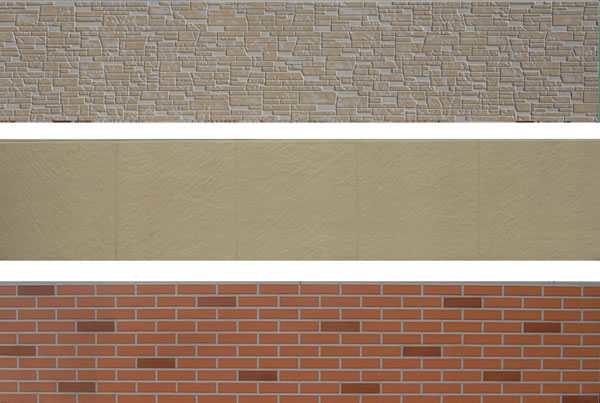
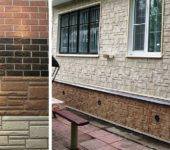
This was all about traditional siding, which is produced in the form of long strips (the thickness of the polymer wall, by the way, is from 0.8 to 1.2 mm). But there is also a basement option, which looks like sheets with uneven edges (for better joining). It is also called facade panels. It very faithfully imitates masonry or brickwork, as well as some types of wood surfaces - wood chips, for example. Some examples of basement siding, see the photo gallery.
-
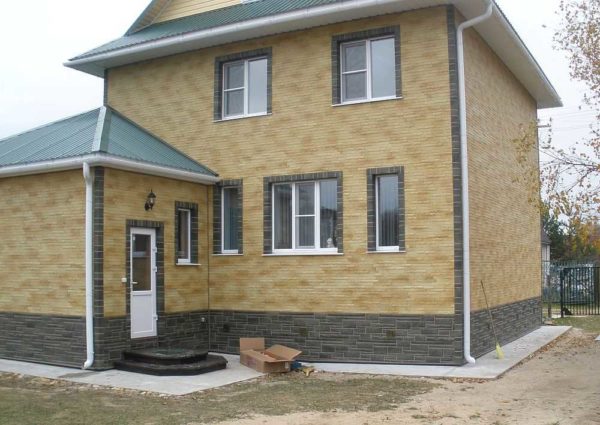
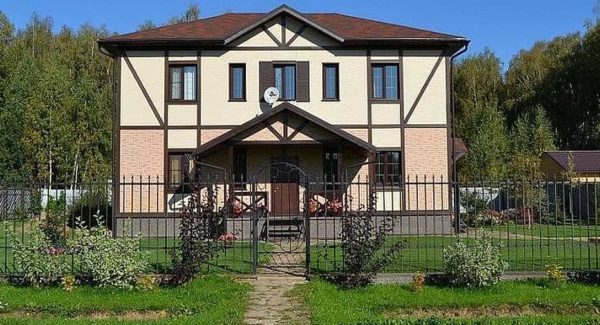
- You won't immediately guess that this house is finished with siding

-
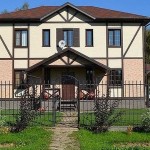
- This house is clad in façade siding from two different collections
-
- Simple geometry of the house emphasizes the "natural" finish
-
- Plinth siding cladding the whole house - a quick way to decorate

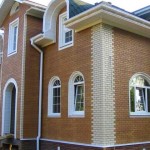
-
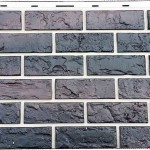
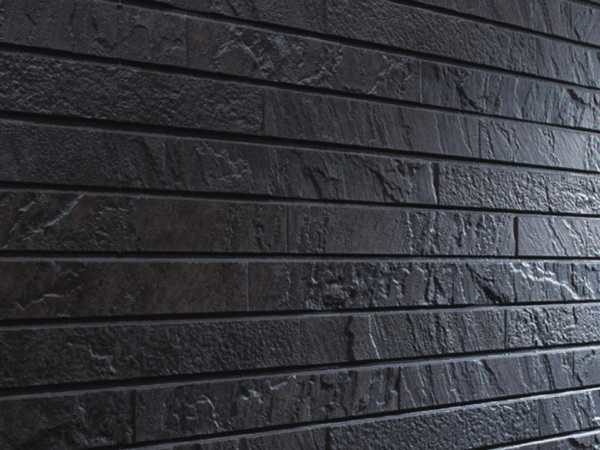
- Different bricks are imitated - from clinker to ceramic fired

-
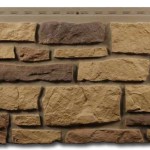
- The wall will look like stone
-
- Even cracks are visible
-
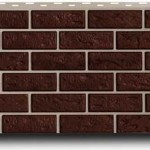
- Clinker tiles with jointing - if you want, you can do this

-
- Shades - from light, almost white, to dark
This type of siding is more expensive, but stronger - the wall thickness is 2-3 mm, depending on the manufacturer. Some reinforce the slabs to give greater rigidity: to make the finish more durable. The guarantee is given from 25 to 50 years, the temperature range depends on the material, because these facade plates are also made of vinyl or acrylic. In any case, more titanium is added to them, which makes it more plastic, and therefore does not break even in cold weather. It is titanium that largely influences the price: the more it is, the more durable the polymer becomes.
When decorating, it is important to remember that polymers have different sizes at different temperatures. Therefore, when installing the sadying, it is imperative to leave gaps that compensate for these changes.
You can read about the installation of basement siding in the article "Facing the basement of the house with your own hands«.
Metal siding
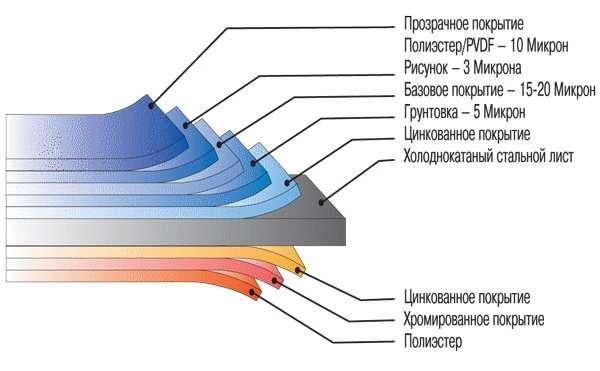
This type of finishing material is made from thin metal - galvanized steel or thin aluminum. Aluminum is more durable, but also much more expensive. In the production of metal siding, a whole "cake" of protective and finishing layers, the main of which is zinc, is rolled onto a sheet of steel with a thickness of 0.4-0.5 mm to protect it from rust. The latter is paint or polymer coating. Polymer coated metal sidedangs are more expensive, but they also have a longer service life and fade less.
-
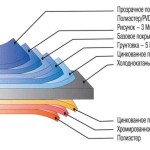
- Sequence of layers on metal siding
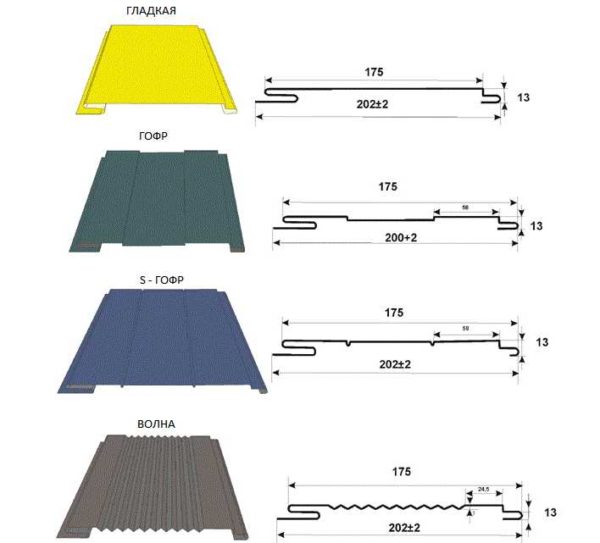
-
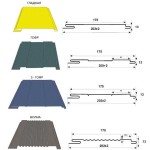
- Some of the profiles of metal siding
-
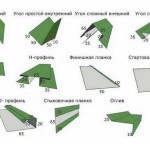
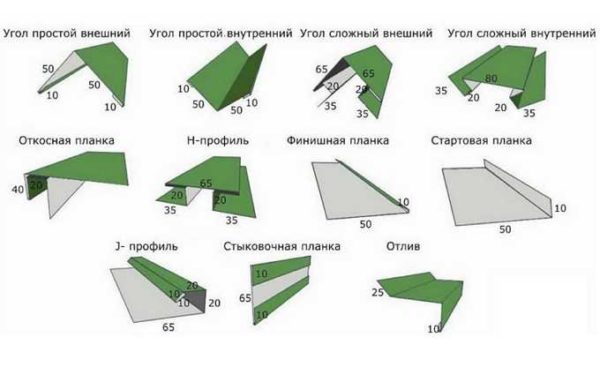
- Complementary elements for decorating windows, roofs, doors, corners, etc.
It is clear that metal is more durable than plastic, but only if the protective coating is not broken. Therefore, when cutting siding on a metal basis, you cannot use a grinder: the cut site heats up very much, the protective films are burned out. Subsequently, this is where corrosion begins. For the same reason, during installation, it is attached to galvanized self-tapping screws: they are guaranteed not to scratch the coating.
Of the features - metal siding has a significant weight, therefore, when calculating the foundation, it must be taken into account. If you wanted to sheathe an old house with metal siding, this is possible only if the foundation has a margin of safety. If not, you will have to strengthen it. Another important nuance: since the metal conducts heat well, the house needs to be well insulated (installed only with insulation).
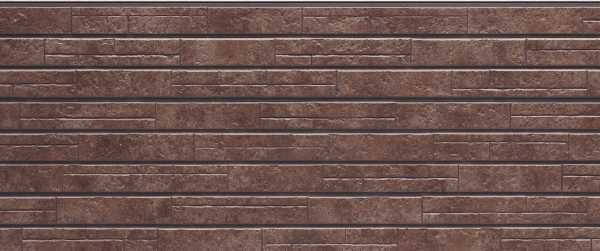
Fiber cement siding
This finishing material is made from a mixture of sand and cement, to which fiberglass is added for reinforcement. Siding or slabs are formed from this composition. The technology was invented in Japan, therefore this siding is also called "Japanese".
The advantages of this material include its incombustibility or low flammability, if the front side is painted.This material does not respond to temperature changes, is not afraid of ultraviolet radiation (the material itself, not the coating), does not change its properties when frozen. But since it consists of cement, it absorbs water, and also has a solid weight. Therefore, if you are going to sheathe a house from the outside with fiber cement siding, its weight must also be taken into account when calculating the foundation. When designing a wall cake, care must be taken to ensure that the facade is ventilated: there must be an air gap between the cladding and the wall of the house.
-
- Beautiful and, importantly, natural
-
- You can fill it like this, imitating a board

-
- The color gamut is wide, as you want and do
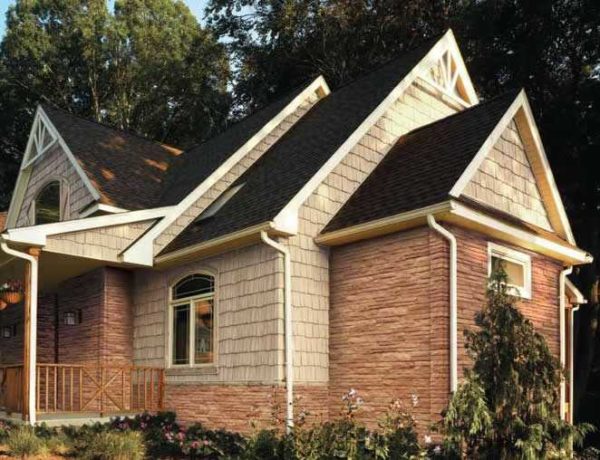
-
- This house is sheathed with fiber cement panels
-
- The surface of the fiber cement siding well mimics various natural finishing materials
-
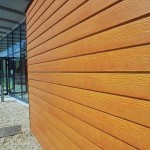
- The wall is very similar to a well-finished timber

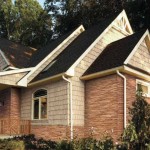
-
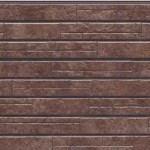
- Another type of brick on fiber cement siding
-

- Brickwork is one of my favorite patterns: laying siding is much faster and the result is excellent

-
- Different textures and surfaces provide ample opportunities for home decoration
Another feature of this material is that the colors that you see in the photo above are the result of staining. It is applied after the boards are formed. The paint penetrates quite deeply and manufacturers guarantee paint durability for 10 years. But then it will have to be updated: take a brush or roller and paint.
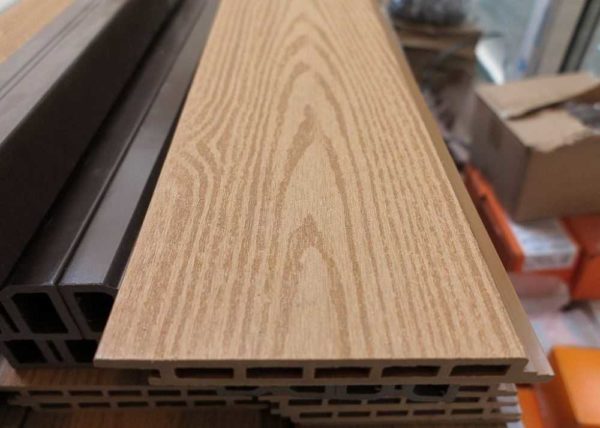
WPC siding - wood-polymer composite
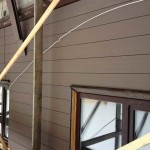
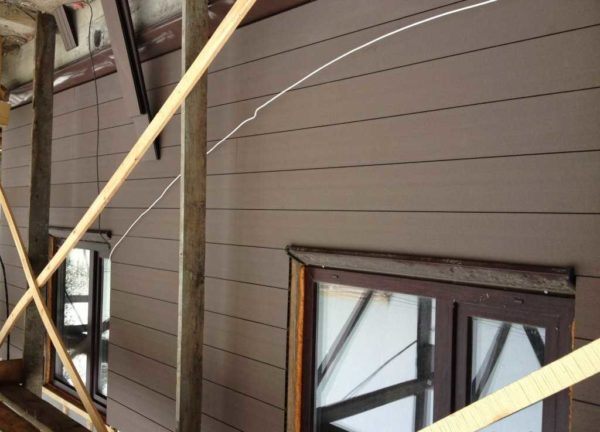
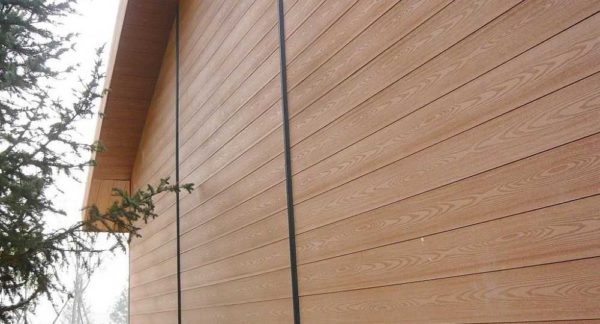
Woodgrain siding or WPC is made from wood flour mixed with polymer. Not only does it look like wood, it also smells like wood. The tactile sensations are very similar. Unlike fiber cement, WPC is dyed to the full depth: the pigment is added from the mass before molding. There is thermal expansion - about 3 mm per meter, the color of the posts, the strength is high - a decking - a terrace board is made of the same material, so people trample on it for years. She, by the way, can also sheathe a house.
Among the disadvantages of this material: a rather high price - from 850 to 2000 rubles per square meter, not a very large palette of colors, the absence of additional elements and proven installation technology. The material is new, all the flaws from this. But they are forgotten when the material is seen live: it looks very attractive and is very similar to wood. The photo gallery contains photos from dachas and houses under construction, not advertising ones. So you can appreciate the real look.
-
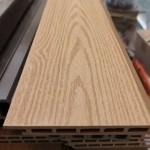
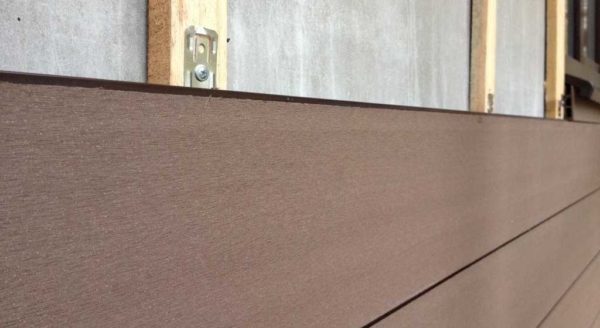
- WPC board at close range
-
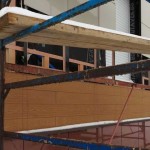
- In this house, only a part is finished with WPC siding
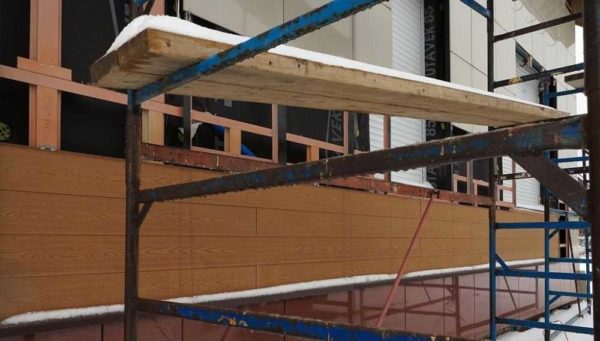
-
- Another angle. You can see how they are attached - to the crate with a perforated tape with a thickness of at least 0.8 mm
-
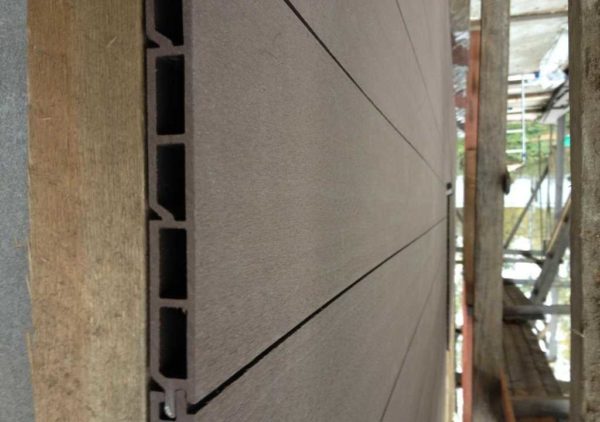
- As you can see, the walls of the WPC siding are thick. But the board is nailed on the wrong side - the owner liked the back one more. And on the front - three narrow boards "under the lining"
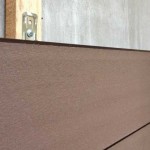
-

- This is one of the lighter shades
-
- The color appears dark, but in reality it is much lighter. The surface is slightly fleecy, because the color is transmitted with significant distortion
-

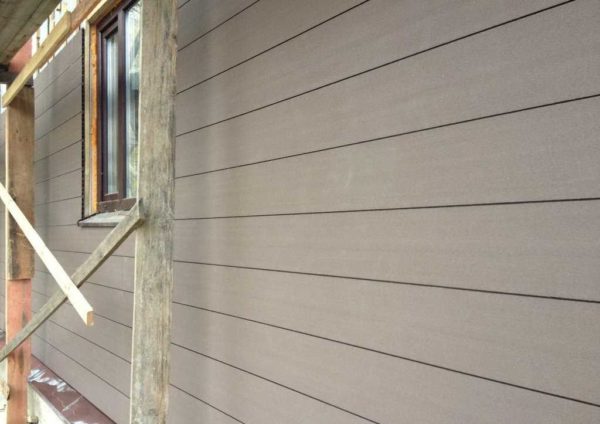
- WPC siding is very similar to wood
Since the material is new, there are few reviews, but those that are there are positive. For example, this: "Two years have passed, the color holds, no cracks, no deformations." Region - Moscow and Samara.
How else you can sheathe a house outside, read here.
How to choose siding for house cladding
After you have decided on the type of siding with which you will sheathe the house, you must not make a mistake with the manufacturer. You will need to carefully inspect the products and check the following points:
- Color uniformity. If the color is smooth, there should not be any changes or extraneous inclusions on the back or on the front.
- Uniform wall thickness. Examine several boards in profile. The thickness of the partitions must be the same.Sagging or pits, even on the inside, are a sign of poor quality.
- Examine the hardware holes. They should have smooth edges, without scoring.
- Smooth longitudinal edges of the locks, no deformation in any plane.
If everything is ok, you can buy.
DIY installation instructions
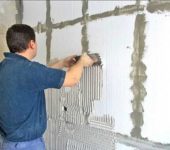
Despite the fact that siding is made of different materials, the principle of its installation is the same: on a flat surface. In some cases it can be a flat wall, but mostly on a crate.
Procedure
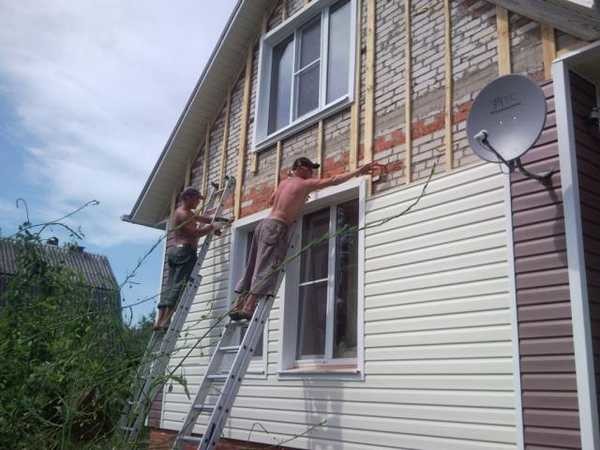
Do-it-yourself siding installation begins with checking the condition of the walls. If the house is new, no special action is required. If it is old, remove everything that may subsequently collapse: poorly adhered tiles, pieces of plaster. If there is an old finish that can be easily removed, it is advisable to dismantle it. Decorative elements are also removed - lamps, window and door cladding, etc., roof overhangs are disassembled. They will then be installed in place after finishing work is over.
After that, the siding is installed independently in the following sequence:
- A horizontal line is bounced along the perimeter of the building, the lowest point is located. The starting profile is packed not below this point. Everything below will be covered with a clipped board.
- The crate is installed. Its step depends on the type of material chosen, but most often it is 40 cm (for metal siding it can be up to 1 m). The lathing is set in level, correcting the unevenness of the wall. If necessary, put pieces of wood or plywood pieces of the required thickness.
Installation of siding on the crate
- The starting profile is mounted according to the marked mark.
- Corner elements are installed. Corresponding extensions are placed around windows and doors.
- Row by row, siding is installed and secured, starting from the bottom, moving up.
- A J-profile is installed at the top, which fixes the bar from above. If the whole bar does not fit, it is trimmed from below.
Actually, all the siding of the house is complete. Some points require clarification. About them - below with photos and video explanations and instructions.
Lathing
For any type, you can use wooden blocks 50 * 50 mm or a galvanized profile for outdoor use. For heavier materials such as fiber cement or WPC, façade fasteners can be used. It is, of course, expensive, but it is convenient to work with it.
If the lathing for siding is made of wood, the bars must be treated with bio-protective impregnations: so that fungi and mold do not multiply. The walls of a wooden or frame house are treated with a similar composition before finishing.
The step of the lathing is indicated by the manufacturer, but often it is also determined by the geometry of the house: if there are many broken lines, the lathing will have to be done more often. It must be installed:
- at the top and bottom of the wall;
- around window and doorways;
- at the corners;
- on the plane with the required step.
You can make a crate from a galvanized profile
According to the installation method, vinyl, acrylic and metal siding can be horizontal and vertical. Depending on the direction of laying the finishing board, the crate is stuffed in the perpendicular direction: if the boards are nailed vertically, the crate is nailed horizontally and vice versa.
As already mentioned, the standard for a wooden lathing for siding is a beam of 50 * 50 mm. But if installation with insulation is supposed, the thickness of the bar should be greater: it depends on the required thickness of the insulation. In this case, the bar should be 2-3 cm wider than the insulation. This is a ventilation gap that will help maintain normal humidity in the house and in all layers of decoration.
The lathing made of wood for siding does not raise questions: almost everyone knows how to work with wood, but not everyone understands how to make a lathing from profiles. Clarifications and tips on how to fix the profile of the batten to the wall are in the video.
DIY siding installation with insulation
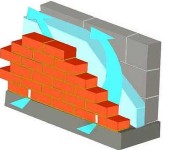
Traditional siding insulation is used: polystyrene, expanded polystyrene (extruded or not), mineral wool. For wooden houses, mineral wool is most often used: at a low cost, it has good characteristics and does not prevent the removal of excess moisture from the house, and this is important if a wooden house is going to sheathe. When sheathing a brick house or a house made of foam blocks or building blocks with siding, you can also use foam plastic: the walls are not very "breathable" and the same insulation paired with them will work fine.
It is undesirable to cover a wooden house with siding without crate. Even if the walls are flat. Condensation will form on the inner surface of the sheathing: steam passes through the wooden wall, settles on a cooler surface. Humidity in this interval will be high: there is no ventilation gap, evaporation is poor. Conditions are created for the rapid destruction of wood.
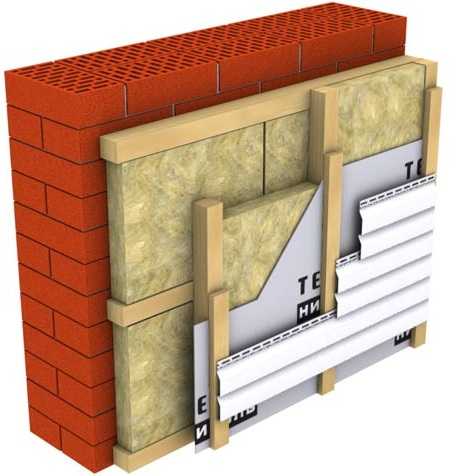
If there is insulation, the crate is packed differently
Therefore, in any case, a crate is stuffed onto a wooden surface. If the sheathing is with insulation, it is installed and fixed between its strips. They are laid very tightly, with effort so that there are no cracks near the battens of the crate - cold bridges. If there is more than one layer, it is laid so that the seams of the lower row are closed with the upper one, it is possible - in different directions (see the figure).
Top windproof vapor-permeable membrane. Pay attention to this material: how long your insulation will "live" depends on it. Not a plastic film, but a membrane that does not lock water vapor inside (water vapor can escape from the insulation), while protecting it from moisture from outside (precipitation and condensation cannot get inside). On top of it there is a counter-grill, which will create a veneered gap. Boards or panels are already attached to the counter-crate.
In this case, as you understand, counter-lattice should be located perpendicular to the direction of laying the siding. Therefore, the first is stuffed in the same direction as the sading.
How to brick a house is described here.
How siding is attached
The main problems with the exterior decoration of the house with siding are associated with a violation of installation technology. Therefore, it is necessary to treat this very carefully and strictly follow the recommendations. Manufacturers may have a different set of additional elements - profiles for joining strips and decorating openings - but the installation is the same:
- Fasten the starting profile exactly horizontally.
- To securely fasten the siding, it is necessary to insert it into the lock along its entire length. To do this, you can lightly tap it on top (only slightly).
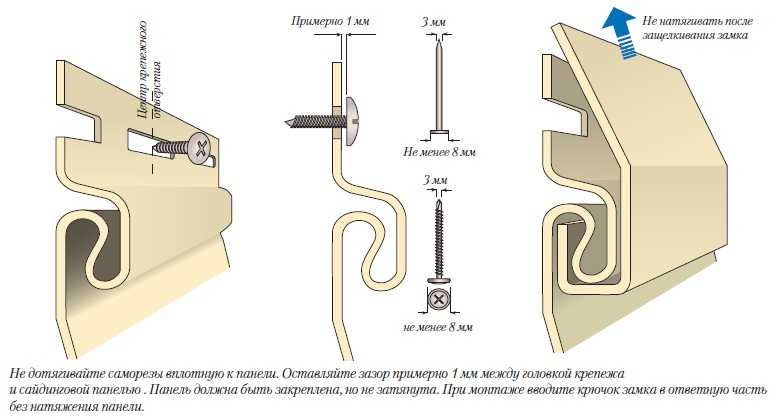
- After installing the strip, do not pull it up, but mount it in a "natural" state.
- When installing the siding with your own hands, it is important to properly fasten the strips: in the middle of the mounting hole. They are specially made oblong so that when the slats are resized due to thermal expansion, they can move. It is also important to underscore the self-tapping screw a little, leaving at least 1 mm of the leg free - so that the panel can move.
- When joining with additional elements (corners, edging of windows and doors), it is necessary to cut the boards so that they do not reach 5-6 mm to the stop. This is also an allowance for expansion.
Do-it-yourself installation of vinyl (acrylic, metal) siding requires compliance with these rules
There are requirements for the type and size of fasteners:
- The use of self-tapping screws or nails is allowed.
- The head of the fastener must be at least 8 mm in size (4 mm in diameter). For self-tapping screws, it should be round, not flat.
- Bar thickness - 3 mm.
When installing metal bonding, it is recommended to use galvanized fasteners: it will not damage the zinc protective coating. For other types of self-tapping screws, it is better to use white, not black: they can withstand heavy loads (in black, when twisting, the cap often breaks).
This is true for this material of any kind: it is necessary to properly fix both vinyl, acrylic, and metal. See the video for what violations during installation lead to.
Installation instructions video
The technology for cladding with vinyl or acrylic siding is described in detail in this video. It is about how and in what order to install the profiles, how to mount and join the outer and inner corners. The process of siding window cladding is described in detail.
Installation of facade siding is not much different. Is it just that the crate is required "in a cage." Otherwise, everything is the same: we install the screws in the center of the mounting holes, do not tighten them.
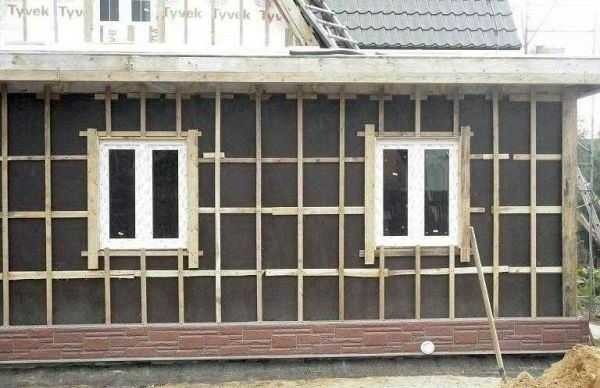
It looks like a crate for a basement siding (under a stone, brick or tile)
There are small differences in the docking of elements. On the back side of the panels there are stops that prevent the panel from moving further. When installing siding under a stone or brick, you must not miss this moment: the stops can break with strong pressure. A good story is told about the installation features in the advertising and training video of the German manufacturer Docke (Dock or Deck).
For how a large wooden house was sheathed with vinyl siding under a stone, see the next video. This is no longer a commercial, but an experience: the siding was done by hand for the first time. What happened and what sensations - look.


We fasten metal and vinyl siding with a small gap - these materials are subject to thermal deformation. In principle, experts recommend fixing panels made of other materials with a slight gap.
I covered the house with siding. I don't understand anything about the casing, I was afraid to mess up.