How to make a 4-pitched roof: device, nodes
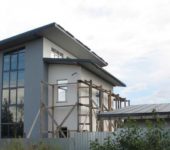
Many people like houses with hipped roofs. Despite the fact that they require the most materials, and therefore the most money, they are popular. Firstly, because they give even a simple "box" a more interesting look. Secondly, because they are durable and reliable. And even if the rafter system of the hipped roof is one of the most complex, it can be developed and made by hand.
The content of the article
Types of hipped roofs
Hipped roofs are the most expensive and difficult to construct. But despite this, they were and remain popular. And all due to the fact that they look more attractive than all other types of roofs, they have high mechanical strength, they resist well wind and snow loads. A house with a hipped roof or even a gazebo looks "more solid" than any other.
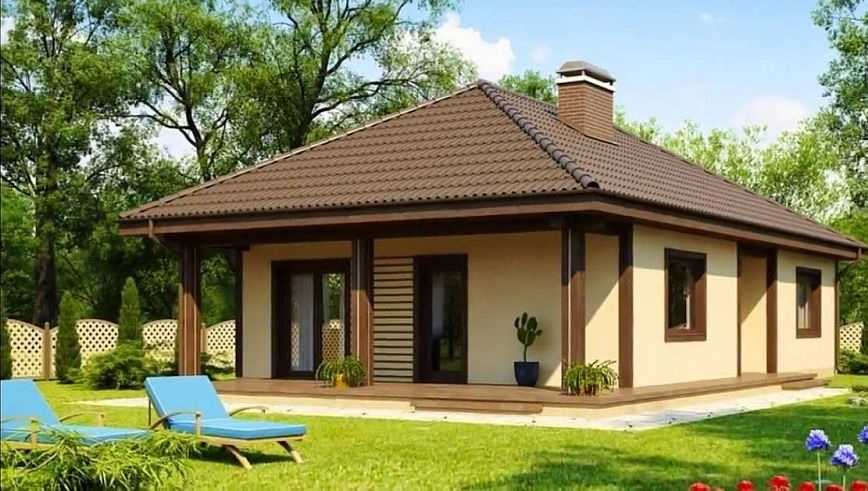
Even a simple "box" under a 4-pitched roof looks impressive
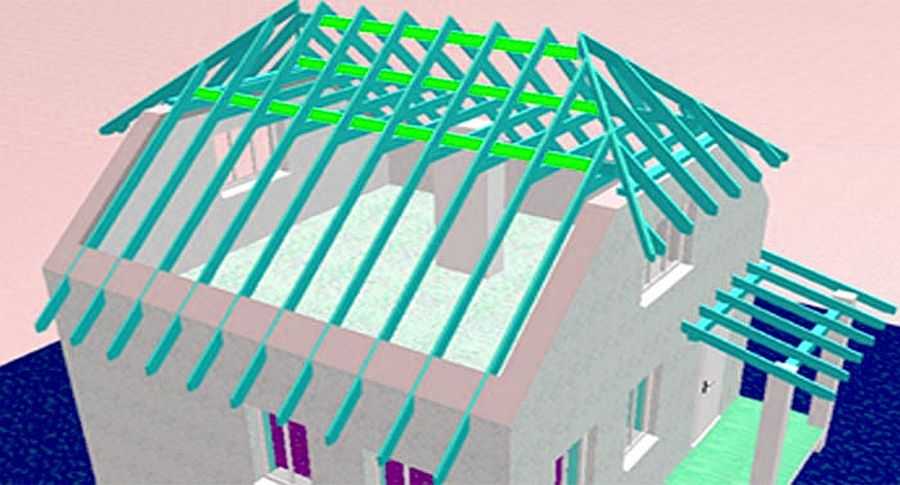
There are two main types of 4-pitched roofs: hip and hip roof. Hip-roof is suitable for square buildings, hip - for rectangular ones. In the hipped roof, all four slopes look like triangles and they all converge at one point - in the center of the square.

General structure of the hipped roof
The classic hip roof has two trapezoidal ramps that converge on the ridge. These slopes are located along the long side of the rectangle. The other two slopes are triangles that adjoin the extreme points of the ridge beam.

Hip roof device in general terms
Despite the fact that there are four slopes in any case, the structure and calculation of these roofs is different. The assembly order is also different.
Half-hip
The hip roof is much more common - after all, there are much more rectangular buildings than square ones. There are several more varieties of it. For example, half-hip - Danish and Dutch.
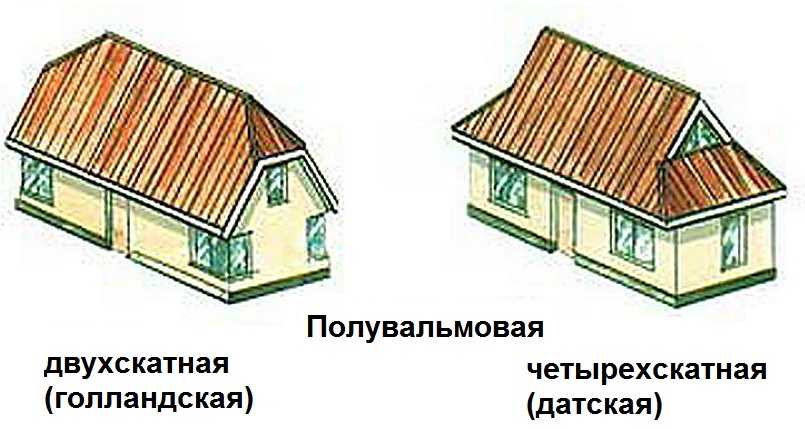
Semi-hip roofs - Danish and Dutch
They are good because they make it possible to install full-fledged windows in the vertical part of the side slopes. This allows the under-roof space to be used as living space. Of course, compared to a full-fledged second floor, the living space is less, but the construction costs are also not so great.
Slope angle and roof height
The slope of the hipped roof is determined based on the snow and wind loads in your area. The higher the snow load, the higher the skate must be raised - so that the slope is steeper and snow does not linger in large volumes. In case of strong winds, on the contrary, the skate is lowered lower - in order to reduce the area of the slopes and, therefore, the wind load.
Even when choosing the angle of inclination of the roof slopes, they are guided by aesthetic and practical considerations. With aesthetics, everything is more or less clear - the building should look proportional. And it looks better with sufficiently high roofs - 0.5-0.8 heights of the first (or only) floor.
One of the options for the truss system of a half-hip roof
Practical considerations can be of two kinds. First, if the under-roof space is planned to be used as a living space, pay attention to the area that will be comfortable for use. More or less comfortable in a room with a ceiling height of 1.9 m. And even then, this is for people of average height. If you are taller than 175 cm, the bar will have to be raised.
On the other hand, the greater the height of the roof, the more materials will be required for its manufacture. And this is the second practical aspect that needs to be considered.
There is one more point that should be taken into account: roofing materials have a minimum and maximum slope angle with which this coating can "work". If you have certain preferences for the type of roofing material, consider this factor. It depends on what height the rafter system of the hipped roof should be raised (relative to the walls).
Hip-type hipped roof rafter system
If a hipped roof is made, most often it is a hip roof. Let's talk about it first. The central part of the rafter system repeats the system one by one gable roof... The system can also be with layered or hanging rafters. Hanging rafters are installed "in place" - on the roof, two people are enough for such work. The roof trusses, in the form of triangles, can be assembled on the ground and then, ready-made, lifted and installed. In this case, there is less work at height, but in order to raise and install the finished trusses, you need either a technique (crane) or a team of four or more people.
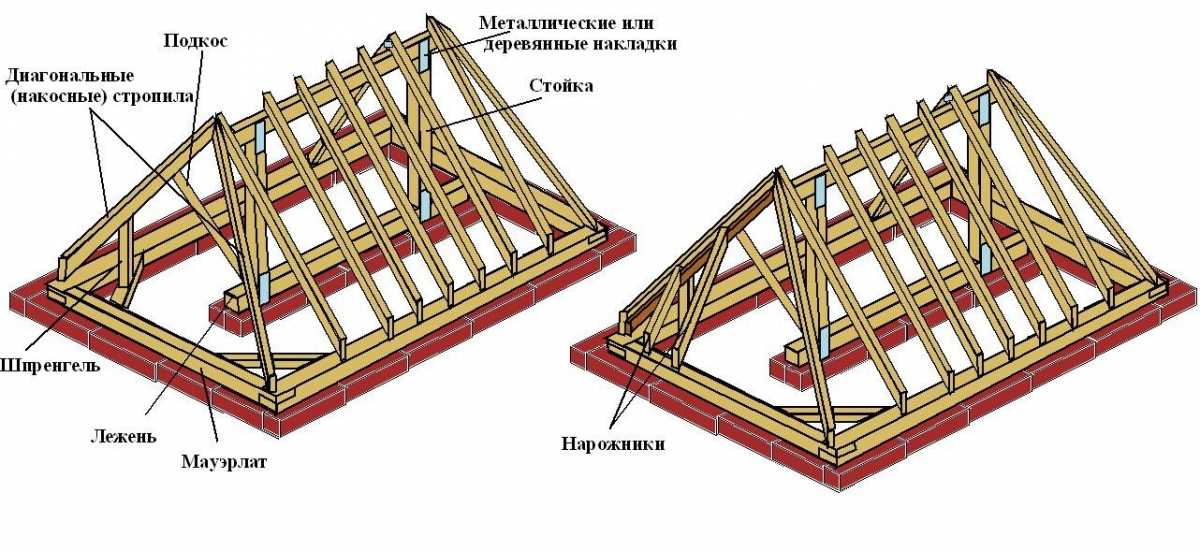
Hip roof rafter system with layered rafters
The main differences between the rafter system of the hip roof are in those places where the rafters are shortened (rafter half-legs) and the hip is formed - triangular slopes. Here diagonal rafters are installed, which are also called overhead rafters. They rest on the outer or inner corners of the building and are longer than conventional rafter legs. Special attention should be paid to diagonal rafters, since they have a one and a half load (when compared with neighboring rafters). Therefore, the corner rafter legs are made reinforced - they are assembled from two boards, splicing them in width with the help of nails. Also, to support the diagonal rafter legs, additional racks and slopes are installed, which are called a truss block.

Hip roof rafter system: hip roof device
Another rafter system of a hip-type hipped roof is distinguished by the fact that the Mauerlat is laid along the perimeter of the building, and not only along the long sides of the box. This is understandable - the rafters are located along the perimeter, and not only on two sides, as in a gable roof.
Mauerlat - an element of the building's roofing system. It is a bar or log, laid on top along the perimeter of the outer wall. Serves as an extreme lower support for rafters.
Diagonal rafters
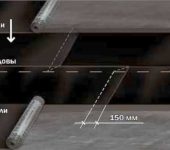
As already mentioned, the slant (corner) rafters carry an increased load: from the shortened rafters of the side slopes and from the hips. In addition, the length of the diagonal rafters of the hip roof usually exceeds the standard length of lumber - it is more than 6 meters, so they are made spliced and doubled (paired). This solves two problems at once: we get a beam of the required length, we increase its bearing capacity. Two paired boards withstand higher loads than a solid bar of the same section. And one more thing: spliced beams for nesting rafters are made of the same material as ordinary rafter legs. It's cheaper and you don't have to look for special material.
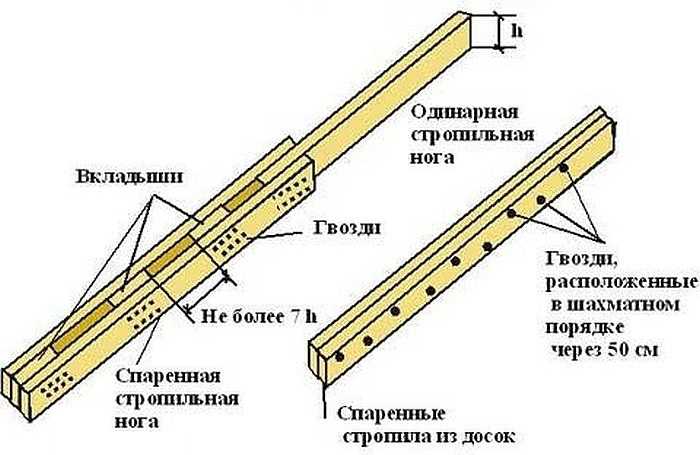
How to pair rafters from boards
If spliced beams are used, diagonal rafters are usually secured by installing struts and / or trusses (pillars).
- If the length of the beam is up to 7.5 m, one brace is sufficient, which rests against the top of the beam.
- With a length of 7.5 m to 9 m, an additional rack or truss is installed. These props are placed at the bottom, 1/4 of the rafter length.
- When the length of the inclined rafter is more than 9 meters, a third, intermediate support is needed - a rack that supports the middle of the run.
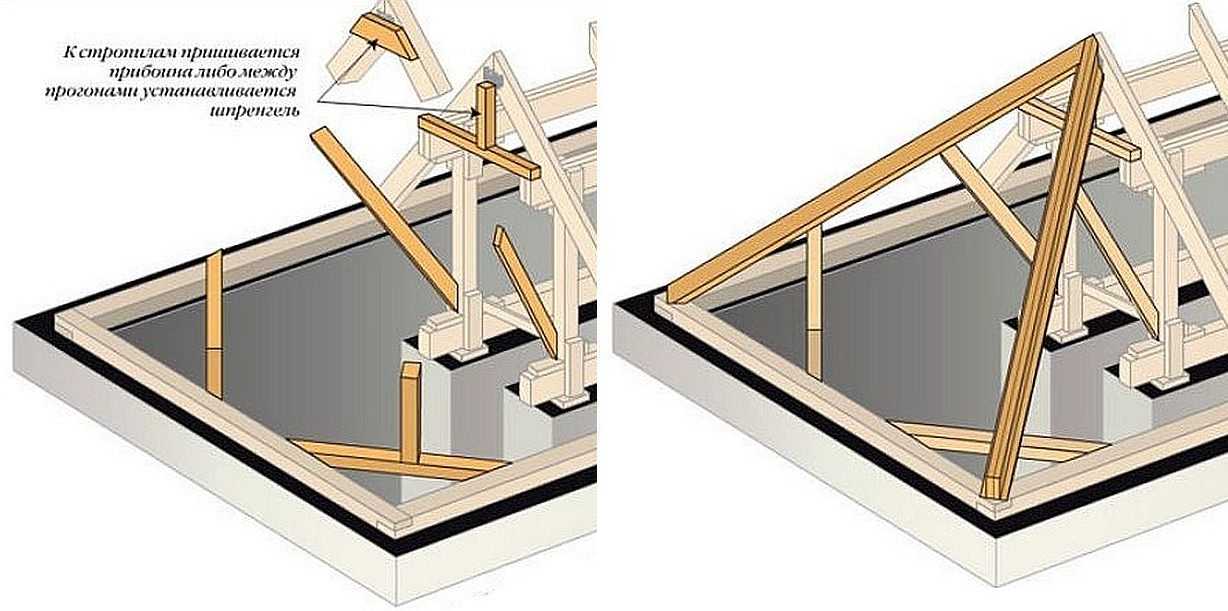
Sprengel - a special system that consists of a beam supported by two adjacent external walls.A stand rests on this beam, supported by slopes on both sides (slopes are set if necessary).
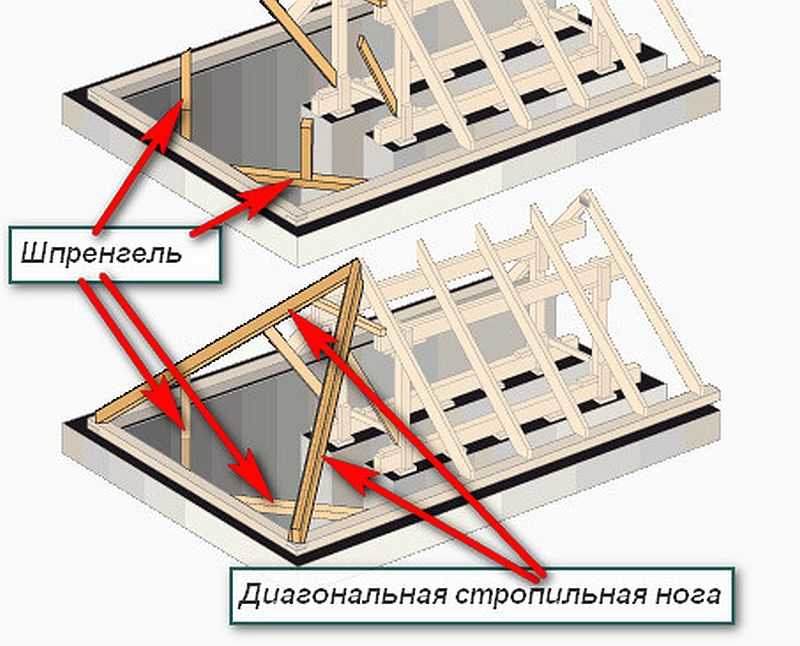
Truss beams support diagonal rafters
A truss truss is usually not counted, but is made of the same materials as the truss system. For the beam itself 150 * 100 mm, racks - 100 * 100 mm, for mowing - 50 * 100 mm. It can be a timber of a suitable section or spliced beams.
Supporting the rafter leg
Diagonal sling legs with their upper end rest on the ridge beam. The exact design of this assembly depends on the type of system and the number of runs.
If there is one run, the consoles are made 10-15 cm longer than the rafter frame. If such a release is too large, then it is cut. But doing it shorter is not worth it - growing is much more difficult and more expensive. The diagonal slant legs will rest at this point.

Supporting unit for diagonal rafter legs with one ridge run
The rafters are cut at the desired angle, butted on the console. Fastened with nails. The connection can be reinforced with metal cover plates.
If there are two ridge spans (they do if an attic-type dwelling is planned), the connection method depends on the material from which the rafters are made:
- If spliced boards are used, a sprengel is needed that rests on the outlets of the ridge girders. Diagonal rafters are trimmed and rest on the truss post.
- If a timber is used, a sinker is installed at the point of support - a piece of board with a thickness of at least 50 mm. The board is fastened with nails to two girders, and to this board there are already rafter legs that will form a hip.
With two ridge beams
The lower part of the rafter rafter legs is trimmed horizontally and attached to the Mauerlat or harness board. For greater reliability of the node, you can install an additional oblique beam and fix the corner beam to it (in the figure below).

Fastening the rafter to the Mauerlat
Fastening - with nails on both sides, if necessary, you can additionally fix it with wire twists or clamps.
How to fix the cuffs and half-legs
To the installed diagonal rafter legs, on the one hand, shortened rafters of the side slopes (also called half-legs) are attached, on the other hand - rafters - rafters that form a hip. They must be positioned in such a way that the joints do not coincide. Sometimes for this you have to change the distance between the rafters (better - in the direction of decreasing the step).

In order not to count the dimensions of the beams, you can use the table
Usually shortened rafters are trimmed and fastened with 2-3 nails on both sides. This attachment is sufficient in most cases. But, if you want to do it "correctly", you need to make a "cut" for each rafter - a notch for no more than half the thickness of the beam. The rafters are cut, set in the desired position, the desired contour is drawn on the beam (an uneven trapezoid is obtained due to different connection angles). Along the resulting contour, a recess is cut into which the half-leg is inserted, after which it is fastened with nails on both sides. This is a complex knot, and it takes a long time to make it. But the bearing capacity of such a connection is much higher. There is another option, which is many times simpler in execution, but differs little in reliability.
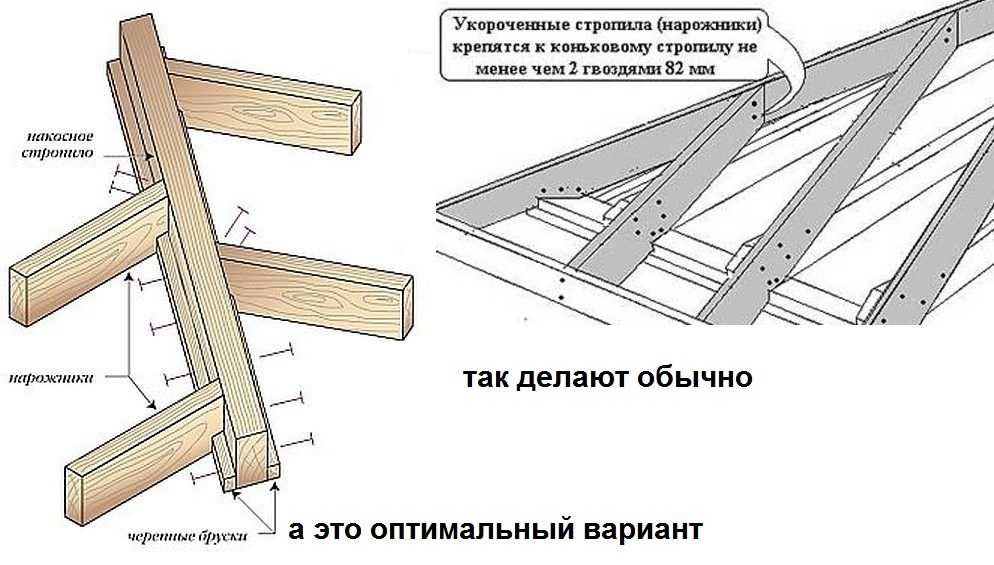
Mounting methods
The optimal way of attaching handcuffs and half-legs to the support beam can be considered to be fastened to nails with additional installation of cranial bars (see the figure above). For this, a bar with a cross section of 50 * 50 mm is used, which is nailed along the lower edge of the beam between the fixed rafters. In this version, the beam becomes I-beam, which greatly increases its elasticity and increases its bearing capacity.
How to attach the lower ends of the rafters
The method of fastening the lower ends of the rafters depends on what type of rafter system of the hipped roof is chosen - with hanging or layered rafters, which scheme is used. A system with sliding rafters (usually used for buildings for which spacer loads are contraindicated - wood, frame, lightweight concrete) is implemented using special metal fasteners. They are in two parts. One is installed on the mortgage board, the second on the rafters. They are connected to each other movably - using a long slot or plate.

Sliding rafter mount
With such a device, when the load changes, the roof "wins back" - the rafters move relative to the walls. There are no thrust loads, the entire mass of the roof and precipitation is transferred to the walls vertically downward. Such fastening allows you to compensate for uneven loads that arise with a complex roof structure (with abutments in the form of the letter G or T).
Rigid fastening can be done in different ways - with a cutout for the Mauerlat / strapping board or with a hemmed support bar. Fastening is usually with nails, it can be strengthened with metal plates and corners.
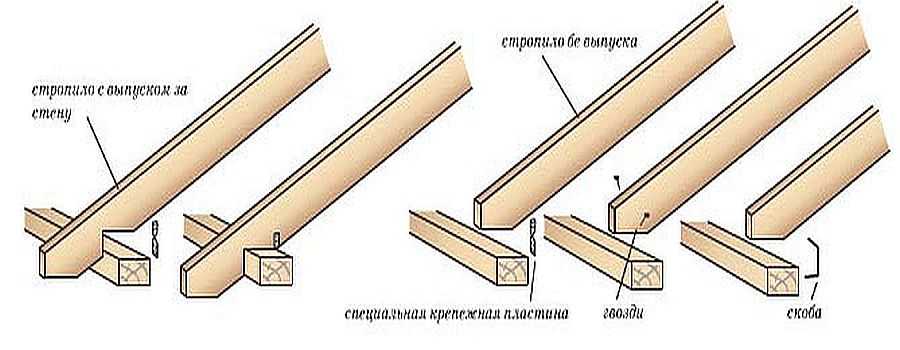
Several options for attaching rafters to the Mauerlat
The connection with the cutout is made if the hipped roof has an outlet - overhangs. Usually, the overhangs are quite large and, in order not to buy long beams, they are grown - boards are added, which are nailed through to the bottom of the beams. This allows you to make overhangs as long as you want without wasting much on materials.
Danish half-hip roof
The rafter system of the Danish hipped roof differs from the classic hip roof. The difference in the design of the hip - here, at some distance from the ridge, a support board with a thickness of at least 5 cm is stuffed. Diagonal double rafters are attached to this board. How low to lower the support board is up to you. But, the lower the board is lowered, the smaller the angle this slope will have, and the worse the precipitation will be. With a large area of a half-hip, you will have to count the load and select the thickness of the rafters.
On the other hand, a low-lowered support board allows you to put a horizontal window of sufficient area. This is beneficial if a living space is located under the hipped hipped roof.
To prevent the sinker (a board connecting two opposite rafter legs) from bending from loads directed downward, a shorty is installed - a piece of the same board that is nailed to a rack that supports the ridge bar. The same stops are made on the edges of the drills, having well secured the shorty with nails (the installation step is staggered after 5-10 cm).
Hip roof rafter system: Danish half-hip
With such a device, it is necessary to strengthen the attachment points of the layered rafters, since the load from them is transferred to the extreme pair of rafter legs. Two methods of amplification are used:
- The extreme rafters are made double.
- Install struts from double boards. The lower part of the brace rests against a bed or a rack. They are fastened with nails, the joints are reinforced by installing scraps of boards.
If the house is rectangular and the hip is not too wide, you can either install struts or make the outer rafters from double beams. Otherwise, the rafter system of a hipped roof of a half-hip Danish type is assembled in the same way as described above.
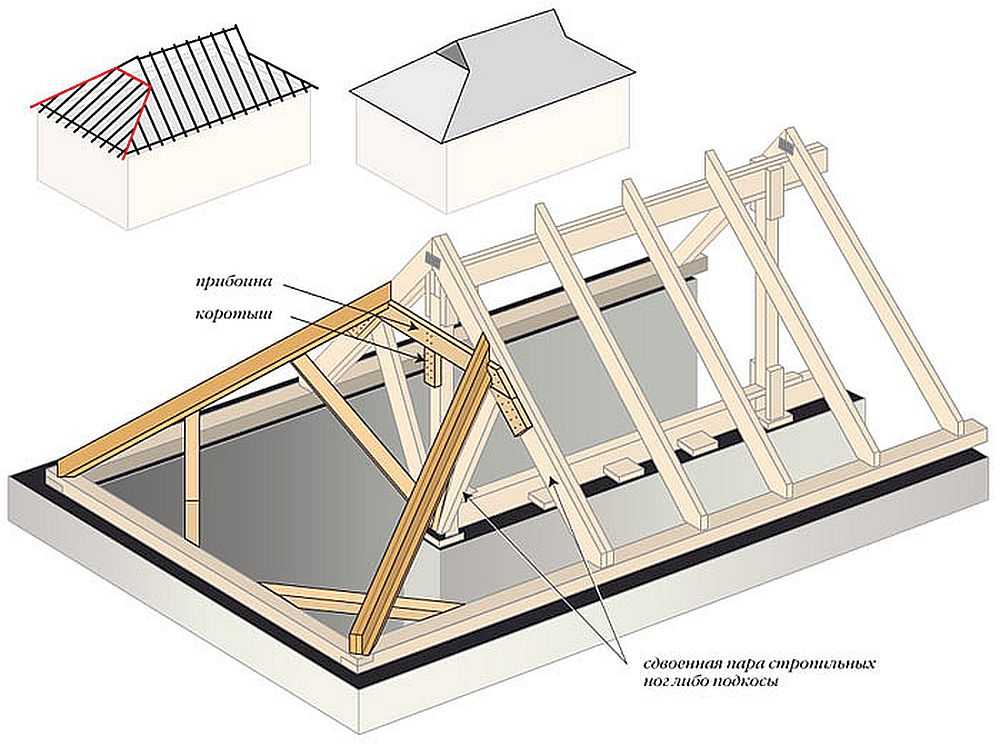
The device of 4 pitched hipped roof on the example of a gazebo
For a square gazebo 4.5 * 4.5 meters, a hipped roof covered with soft tiles was made. The slope angle was chosen "floor material", taking into account snow and wind loads - 30 °. Since the structure is small, it was decided to make a simple system (in the picture below). The distance between the rafter legs is 2.25 m. With a rafter length of up to 3.5 m, a board of 40 * 200 mm is needed. A beam of 90 * 140 mm was used for the strapping.

Diagram of the rafter system of the hipped roof for the gazebo
They assembled the rafter system on the ground, fixed it on the support pillars, then installed a solid flooring of OSB, after - covered with flexible tiles.
First, we assembled a harness that will be attached to the support posts. Next, we installed the rafters, which rest on the middle of the strapping. The procedure here is as follows: in the middle we put a stand, on the top of which the rafter legs will join. In this version, this rack is temporary, we only need it for a while - until we connect the first four rafters in the center. In other cases - for large houses - this rack may remain.
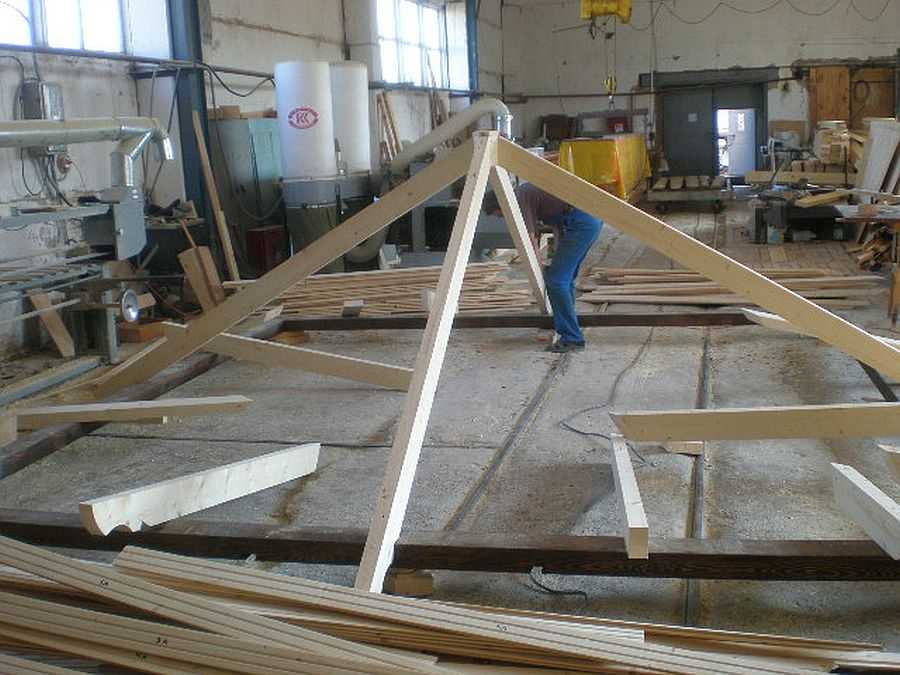
The procedure for assembling a hipped 4-pitched roof: assembled the harness, attached the middle rafter legs to it
We take a board of the desired section, lean it against the rack in the place where they will join (depending on the desired angle of inclination). We mark how to cut it (at the top, at the junction and where it joins the harness). Cut off all unnecessary, try on again, adjust if necessary. Further on this blank we make three more of the same.
Now the rafter system of the hipped roof can be assembled. Most of the questions arise about the junction of the rafter legs in the center. The best way - reliable and not too complicated - is to take a piece of timber of a suitable section, make an octagon out of it - for joining eight rafter legs (four corner and four central).
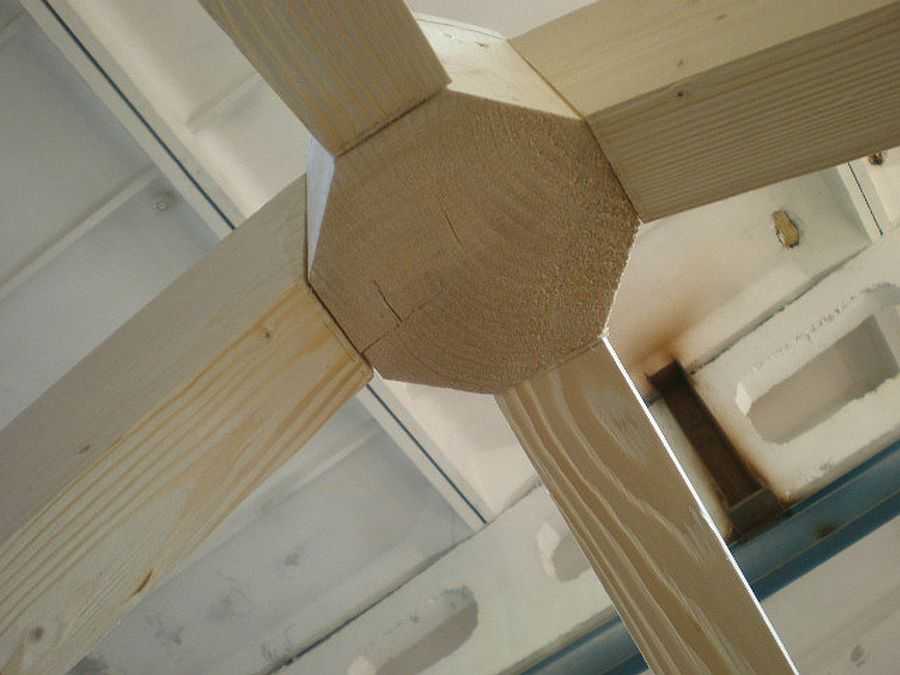
The size of the edges - along the section of the cut of the rafter legs
Having fixed all four central elements of the rafter system with nails, we do the same operations with the corner rafters: we take one, try it on, cut it out, make three copies according to the template made, and mount it.
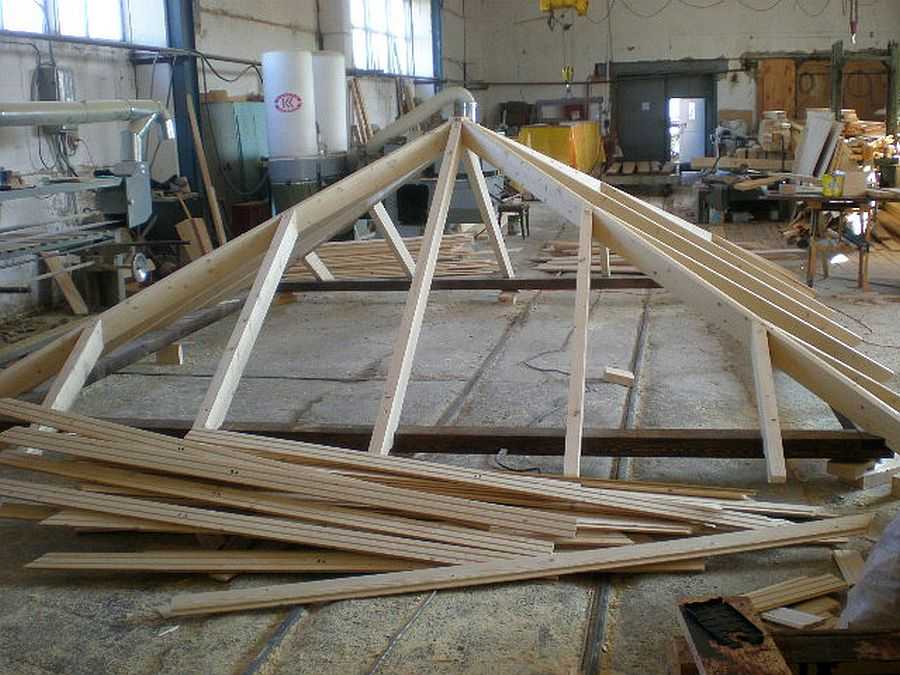
The rafter system of the 4 pitched hip roof is assembled
By the same principle, we make half-legs (shortened rafters). If desired, all connections can be additionally reinforced with corners or metal plates, then the rafter system of the hipped roof will be more reliable and you can not be afraid even in the heaviest snowfalls.
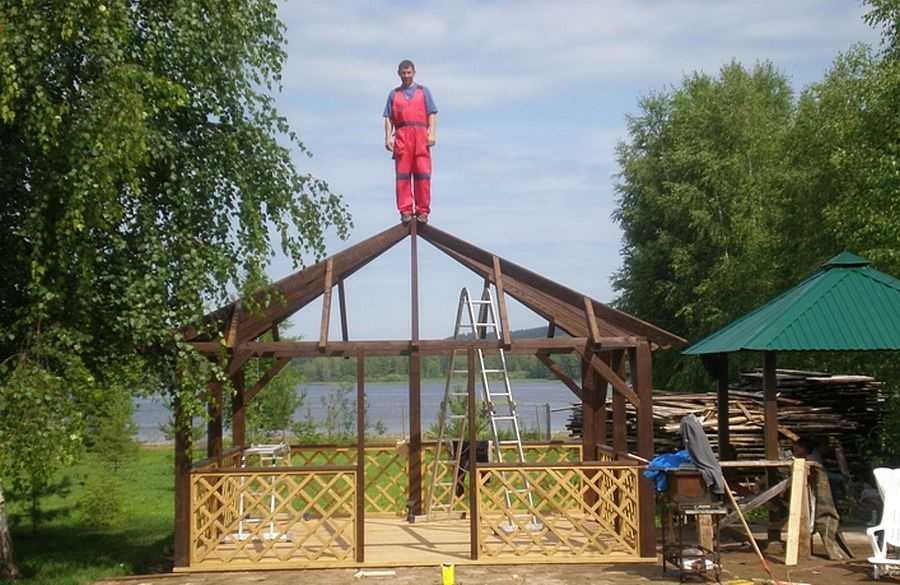
The tests were successful
We put the assembled system on the pillars of the gazebo, fasten it with nails, corners, and fasten it with slopes. After that, you can mount the crate (in this case, solid) and lay the roofing material.