How to cover the roof with a profiled sheet: step by step instructions, processing of nodes
One of the most inexpensive, durable, practical roofing material options - decking, or, as they say also a professional sheet, a metal profile. This is a sheet of metal that is covered with several protective layers, and then passed through a molding machine, which pushes projections and grooves into it - to make it more rigid. The material turns out to be quite light, the roof of the corrugated board can be mounted independently and even "in one hand". The technology is not the most difficult, it is quite possible to do it yourself.
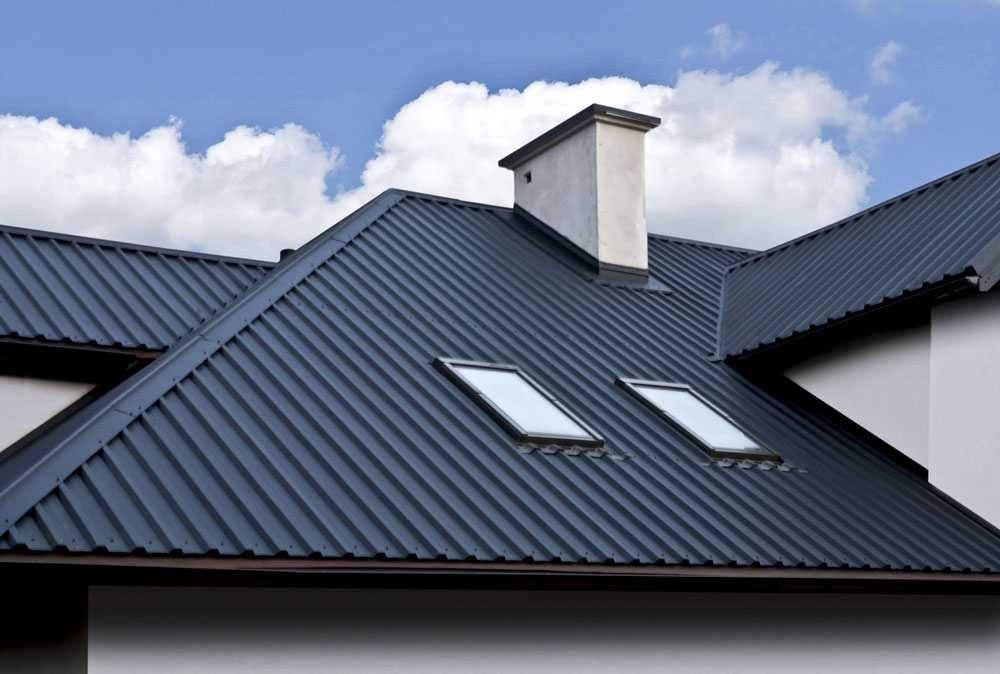
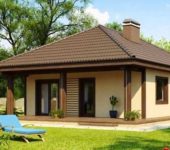
At low cost, a corrugated roof looks solid
The content of the article
Types of corrugated board
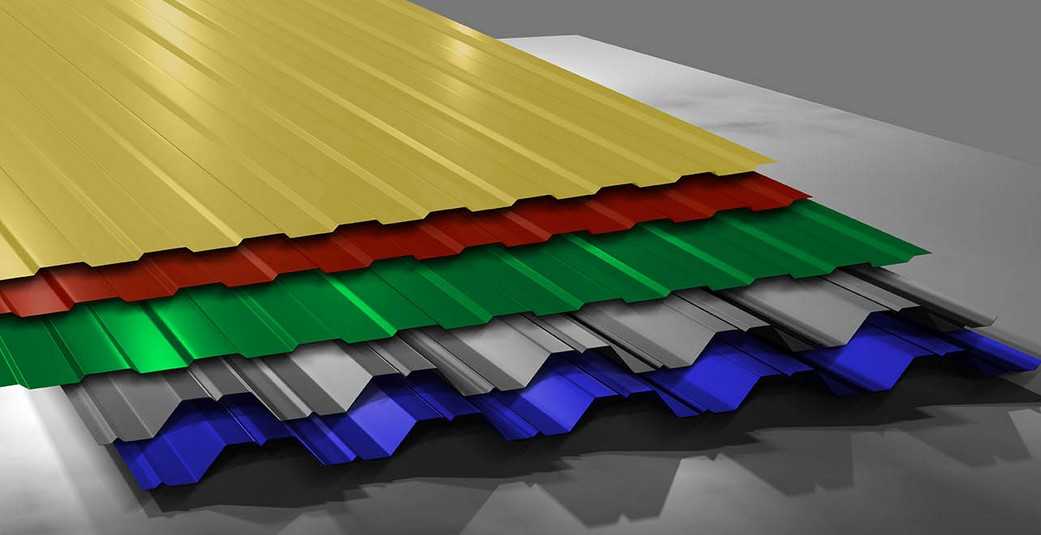
There are different types of corrugated board. There is an ordinary profiled sheet - galvanized, there is a colored one - with a layer of polymer applied over the zinc coating. The polymer coating has a double role - it protects from external influences and gives the material a more decorative appearance. Simple galvanized corrugated board is used as a roofing material mainly in temporary buildings, colored has a quite solid appearance, it can be seen on the roofs of residential buildings and courtyard buildings.
By appointment
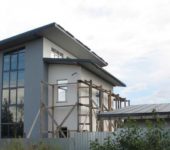
Decking is made of sheet metal of different thickness. The thinnest ones are designed for wall decoration, but can fit on the roof with frequent lathing and light snow loads. Sheets of this group are marked with the letter "C".
The thickest metal is used to make a material with increased bearing capacity. It is marked with the letter "H" and is used as a roofing material in areas with increased wind or snow load. There is also a universal professional sheet - it is designated "NS". It can be used both for walls and for roofing (the amount of snow should be medium).
After the letter coding of the profiled sheet, there are numbers: C8, H35, HC20. They indicate the height of the wave in millimeters that is formed in a given material. In the example, this is 8 mm, 35 mm, 20 mm, respectively. A corrugated board with a wave height of at least 20 mm is laid on the roof.

Marking and dimensions of the profiled sheet
The waveform of the load-bearing metal profile is often more complex - additional grooves are added to it to increase rigidity.
By type of coverage
With all the external similarity, the price of corrugated board of the same type may differ significantly. The point is, most often, not in the impudence of the manufacturer or seller, but in different technologies and materials that are used in production. For example, the protective coating can be zinc and aluzinc. The second type of protection has appeared recently, the equipment is expensive, but the durability of the metal coated with aluzinc is much higher.
Also, the method of wave formation affects the durability of the coating. There are two technologies - cold rolling and emulsion. In cold rolling, the sheet is simply pushed by rollers without any preparation. To prevent damage to the previously applied coating, expensive equipment is required. Accordingly, cold-rolled profiled sheet is more expensive.

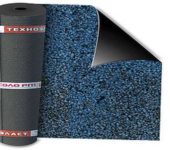
Colored corrugated board has many layers
When a wave is formed with an emulsion, the metal surface is moistened with a liquid (oil, water, special liquid) and then sent under the rolls. If, after rolling, such a sheet is not dried, but sent to the baking oven - to fix the paint, then the places that were wet will quickly begin to rust.It is impossible to see this defect in advance; one has to hope that the technology is not violated. But the profiled sheet made using this technology is cheaper.
There are also different polymer coatings. They create films of different thicknesses and densities, with different properties.
- Polyester (glossy and matte). The profiled sheet with a polyester coating has a relatively low price (the cheapest of the colored ones) and good characteristics - the coating is plastic, it does not change its color for a long time. Matte polyester has no reflections on the surface, it looks velvety. This is achieved with a different application technique and a thicker layer. This coating is the most resistant to mechanical damage.
- Plastisol. Has increased resistance to aggressive environments, but does not tolerate ultraviolet light. Plastisol-coated corrugated roofing will quickly fade (two to three years).
- Pural - polyamide and acrylic are added to polyurethane. The coating is more uniform, the service life without color change is from ten years. The disadvantage is the high price.
- PVDF is a composition of polyvinyl fluoride and acrylic. The coating is expensive, but it lasts a long time even in an aggressive environment. This roofing material can be used on the seaside. Another great property is that it can self-clean. The slightest rain and the PVDF-coated corrugated roof shines like new.
Different coatings provide different performance
Under normal conditions, a roof is made of corrugated board with a polyester coating. In terms of price and quality ratio, it is optimal.
How to make a roof from metal tiles, see here.
How to install corrugated board on the roof
A roof made of corrugated board is laid on a ready-made sheathing of boards, in which the fragments are located parallel to the eaves of the roof. The installation step of the lathing is up to 60 cm. Usually an inch edged board, 25 mm thick, is used. Sheets are stacked one after another with vertical overlap on one wave. When laying the corrugated sheet on the roof, please note that the outer shelves have different lengths. The one that is slightly shorter should be at the bottom, which is slightly longer - covering the short one. In this case, they adjoin one another tightly, without a gap. If you mix it up and do the opposite, then a gap of several millimeters will form between the two shelves, into which water will flow. Therefore, be careful when installing.
About the amount of horizontal overlap. If there are more than one rows of corrugated board on the roof, the sheets are laid with overlap. The amount by which the top sheet overlaps the bottom one depends on the angle of the roof slope: the flatter the roof, the more entry is needed.
| Roof slope | The value of the horizontal overlap of the profiled sheet |
|---|---|
| less than 12 ° | 200 mm + sealant |
| from 12 ° to 14 ° | 200 mm |
| from 15 ° to 30 ° | 150-200 mm |
| more than 30 ° | 100-150 mm |
Most decking factories can offer you to make sheets that will cover your entire roof - from ridge to eaves - with one long sheet (maximum length 12 meters). This creates certain difficulties during installation - such sheets are difficult to lift and stack. Especially it will take a long time to expose the first sheet - it must be placed strictly vertically, which is difficult at a height. But the main advantage of such a solution is a continuous covering from top to bottom, which significantly increases the degree of protection of the attic space from moisture penetration, negates all the inconveniences. After all, there are no horizontal joints, which means there are no problems with flowing too.
How to cover the roof with flexible tiles, see here.
How to properly attach corrugated board to the roof
To fasten the profiled sheet, use special self-tapping screws with rubber gaskets under the caps. They ensure the tightness of the connection. Such screws are usually painted in the same tone as the roofing material.The number of fasteners per square meter is 5-7 pieces (do not forget to add about 20% - for fastening the ridge element, fastening joints and other similar work).
Self-tapping screws are installed in the lower shelf, where the sheet is in contact with the crate. Their length is 20-25 mm, depending on the thickness of the sheathing board, since it is important that the sharp end of the screw does not protrude from the back of the board. There will be a waterproofing film that can be damaged.

How to calculate the length of a self-tapping screw for installing a profiled sheet on the roof
When connecting two adjacent sheets, they are also fastened with self-tapping screws. But in this case, you have to screw the fasteners into the wave, and also break through the double layer of metal. For these purposes, the fasteners are longer - 40 mm or more (depending on the wave height) - the screw must go into the batten board.
What to cut
Very rarely, the installation of corrugated board on the roof does without trimming - these are just unique cases. How to cut the profiled sheet? Scissors for metal or jigsaw. Yes, it is slow and not very convenient, but this is exactly what the manufacturers advise. It is impossible to use an angle grinder (grinder) - when cut with it, the sheet is heated to very high temperatures at the cut site, which leads to the evaporation of zinc. As a result, in this place, the material quickly begins to rust.
Installation procedure
After collecting the rafter system, the front board is nailed, hooks are attached to it for installation weir systems, and on top of a special bar - a drip, on which the edge of the waterproofing film is then brought. Both the drip and the film are attached to it with self-tapping screws with a sealing rubber washer.

How to make a roof overhang from corrugated board
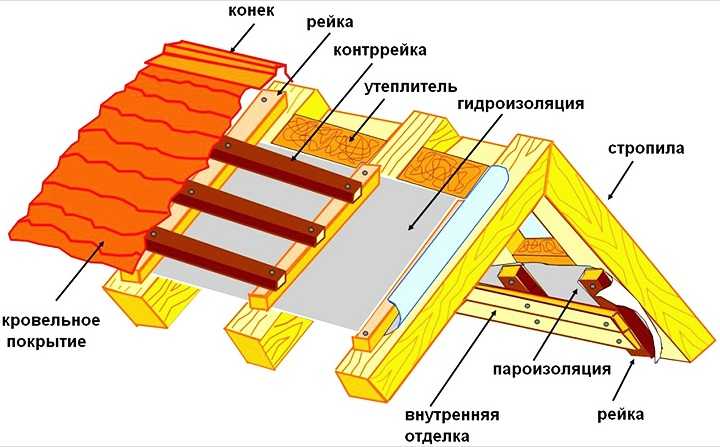
The composition of the pie of materials for corrugated board depends on whether you are going to make the attic room cold or warm. If the attic is cold, the sequence is as follows:
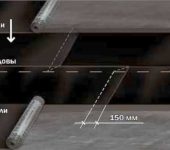
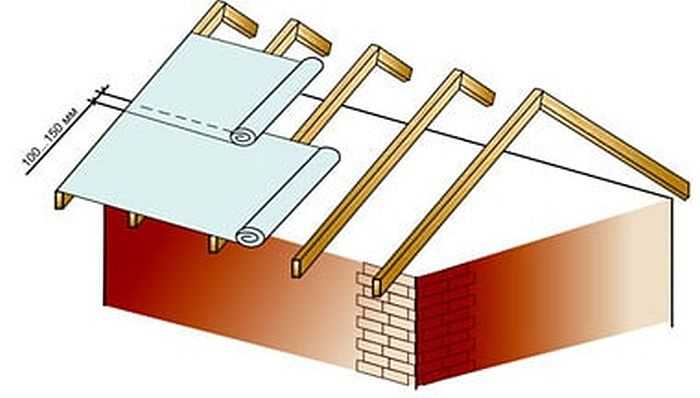
- On top of the rafters, a vapor-waterproofing membrane is stuffed. It does not let vapors from the house to the roofing, and does not allow moisture that has seeped under the profiled sheet to get into the attic. It is stuffed onto the rafters, fastened not in a stretch, but with a sag. They begin to spread the membrane from the bottom, moving up. One panel extends 15 cm onto the second, the joint must be glued with tape.

How to install roof waterproofing
- The membrane is fixed with strips that are nailed along the rafter legs. The same strips create the necessary clearance: the membrane must not come into contact with the roofing material.
- Perpendicular to the rafter legs, a crate is nailed (board 100 * 25 mm) with a pitch of 50-60 cm. Two boards are fixed at the top in a row, on both sides of the ridge - ridge elements will be attached here. In the lower part, where the overhang is formed, two or even three boards in a row are also attached - here another drip is attached (see the picture above).
- A professional sheet is attached to the crate.
If you insulate the roof, the order of work and the amount of materials required will change. There will be more layers:
- From the side of the attic, a crate is nailed to the rafters. They will hold the insulation.
- A vapor barrier membrane is attached to the crate with the help of strips (also from the attic side), then the finishing material can already go.

The approximate composition of the pie for the insulated roof made of profiled sheet
- From the side of the roof, the space between the rafter legs is filled with thermal insulation material. Most often, this is stone wool and it is better if you find an opportunity to buy material that is not afraid of getting wet (there are some).
- On top of the insulation, a waterproofing film or membrane is attached to the rafter legs. The rules for laying it are the same as described above. But here the task is more complicated: the sagging should be such that the membrane does not come into contact with the insulation. The minimum sag is 2.5 cm, plus the minimum ventilation gap is 2 cm.If, with the recommended thickness of the insulation, it cannot be ensured, an additional bar is nailed to the rafters, and waterproofing is attached to it. The waterproofing itself is also fastened with strips.
- The crate is being arranged.
- A professional sheet is mounted.
Corrugated roofing: knots
Even with the construction of a conventional gable roof, there are several difficult sections that are usually formed at the junction of different planes and / or parts of the system. These sites are usually called "nodes". We examined one such unit in the previous paragraph - the design of the front board and the fastening of the gutters. But this is far from the only site where a detailed explanation is required.
Installation and sealing of the ridge
The roof space under the corrugated board should be well ventilated. This material heats up quickly and also cools down quickly, which contributes to the formation of condensation. Therefore, when installing a metal profile on the roof, in the upper part, the sheets on both sides do not fit closely, but leave a gap of several centimeters - so that the air can freely come out, taking water vapor with it.
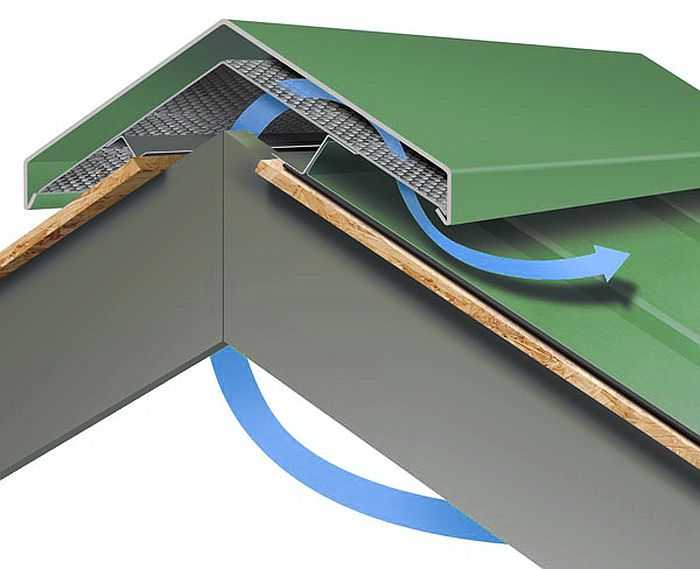
Installation principle of a ridge with ventilation
If there are special skates with ventilation (pictured), but even if you just install a regular ridge element, between the profiled sheet and its edge, a large number of holes are obtained - in each groove of the corrugation. The amount of this gap depends on the height of the wave - the higher the wave, the larger the gaps are. On the overhang, where the front board is nailed, there are also similar holes. The air movement usually goes from bottom to top - from the overhang, through the under-roof space (for this, it is necessary to leave ventilation gaps, which are formed by the crate, when installing the roofing material), to the slots in the ridge. This is how the ventilation and regulation of the moisture content of the insulation occurs, the condensate evaporates and is carried away.
Large gaps are good for ventilation, but they clog up precipitation with rain / snow with the wind, and dust and leaves get into the attic through them. It is much worse if the holes are clogged with leaves - ventilation will immediately deteriorate. In order not to get into a similar situation, previously about 2/3 of the height of the gap was filled with sealant, applying it in layers on the roofing material. Crawling back and forth with a sealant on the top of the roof, waiting for the previous layer to polymerize a little, is not very convenient. Also, this decision is incorrect from the point of view of ventilation - the gap decreases, the air movement worsens. But there was no other solution. Now it is - a compactor for corrugated board. It is made from foamed polyurethane, polyethylene or wood composite. The structure of these materials is porous, air permeable, but not dust, water or leaves. In shape, it either repeats the shape of the corrugation - there is for different types of profiled sheet, and there is also a universal tape that is simply pressed in the right places.
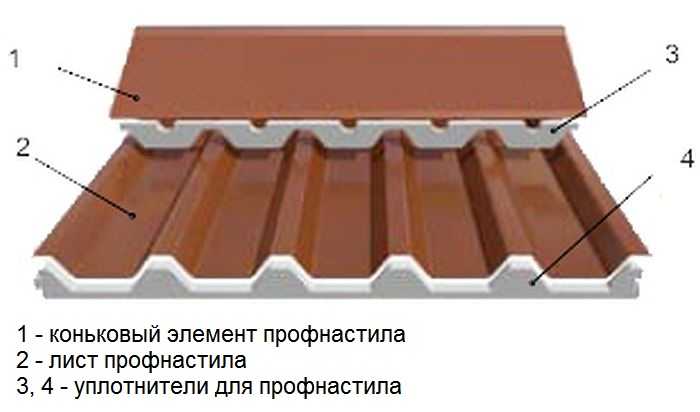
Sealing openings in corrugated roofing with a sealant
The sealant "sits down" on the sealant, double-sided tape, glue, there are options with self-adhesive tape. With this compaction, air passes freely, and precipitation remains in the outer layers, from where it then evaporates.
Overhang filing with profiled sheet
In order to sheathe the overhang with a profiled sheet, a special profile is attached to the front board. A profiled sheet is inserted into its groove, cut into strips of the desired width. The second edge of the filing is attached to the board nailed to the ends of the rafters. The joint between the filing and the board is closed with two droppers - one is nailed from the bottom, covering the lower half of the board, and the other - from the top. The edge of the waterproofing film is then laid on it.
If the gutter system will be attached, then the gutter hooks are nailed after the lower drip is installed. The top drip is nailed after all hooks are installed.
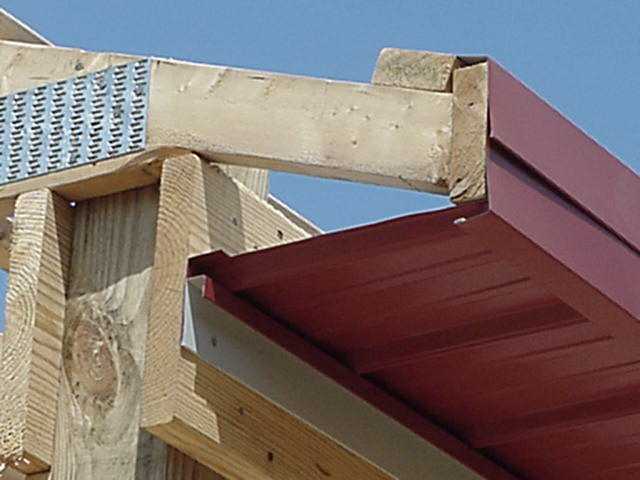
How to hem the roof overhang with a profiled sheet
How to make a roof valley, see here.
Adjoining corrugated board to the wall
In some cases, a metal profile roof adjoins the wall of a structure. How to make an abutment so that there are no leaks? There are two options (see picture). Both use a corner strip, only it has a different size and a different profile.
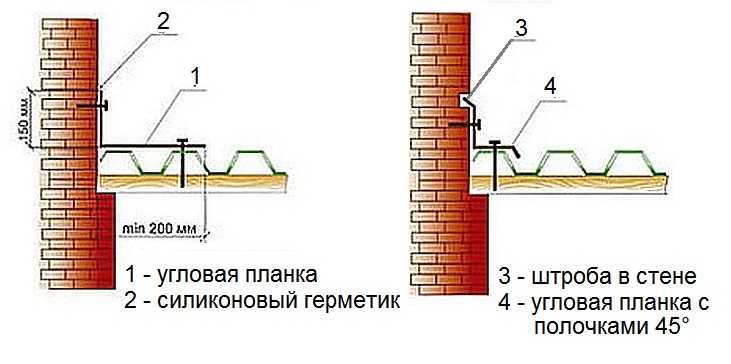
How to attach a roof from a profiled sheet to a wall
You can take a corner strip with shelf dimensions 150 * 200 mm. A shorter side is brought to the wall, a longer side is attached to the roof. Attached to the wall using fasteners depending on the material from which it is made (nails or screws, if it is wood, dowels, if brick and building blocks). The joint of the plank with the wall is passed with silicone sealant. From the side of the roof, a bar is attached to the crest of the wave, installing special self-tapping screws with rubber washers. Their length is determined in the same way as when joining adjacent sheets of corrugated board (wave height + 20 mm for entering the sheathing board).
The second option is more laborious: a groove (groove) is made in the wall, into which an angular bar with shelves bent at 45 ° is inserted. The fastening in this case is similar, the difference in the dimensions of the strip - it can be 100 * 100 mm or so.
Pipe passage
Many questions arise when sealing the passage of a chimney pipe or ventilation through a roof made of corrugated board. Pipes are round and rectangular in cross-section, each type has its own solution.
For the passage of round pipes through the roofing material, there are special steel or polymer aprons. Their upper part is made in the form of a cone, the lower part is a skirt made of elastic material, which can take a given shape. The apron is tightly put on the pipe, lowered so that the "skirt" lies on the roofing material. Next, you need to give the elastic skirt a corrugation shape. A hammer is used for this (normal or rubber - depending on the type of apron). To prevent water from flowing under the skirt, the joint is coated with sealant, well pressed.
After fixing the skirt, the neck is fixed. If the apron is metal, the top is covered with a clamp, tightened, the joint is coated with sealant. When using a polymer apron (master-flush), it is put on the pipe with a decent effort (sometimes it is even necessary to lubricate the pipe with soapy water), but the joint, nevertheless, for reliability, passes with a sealant.
With a rectangular (brick) pipe, everything is somewhat more complicated. Elements are cut from metal sheets that close the joint with the roofing pie.
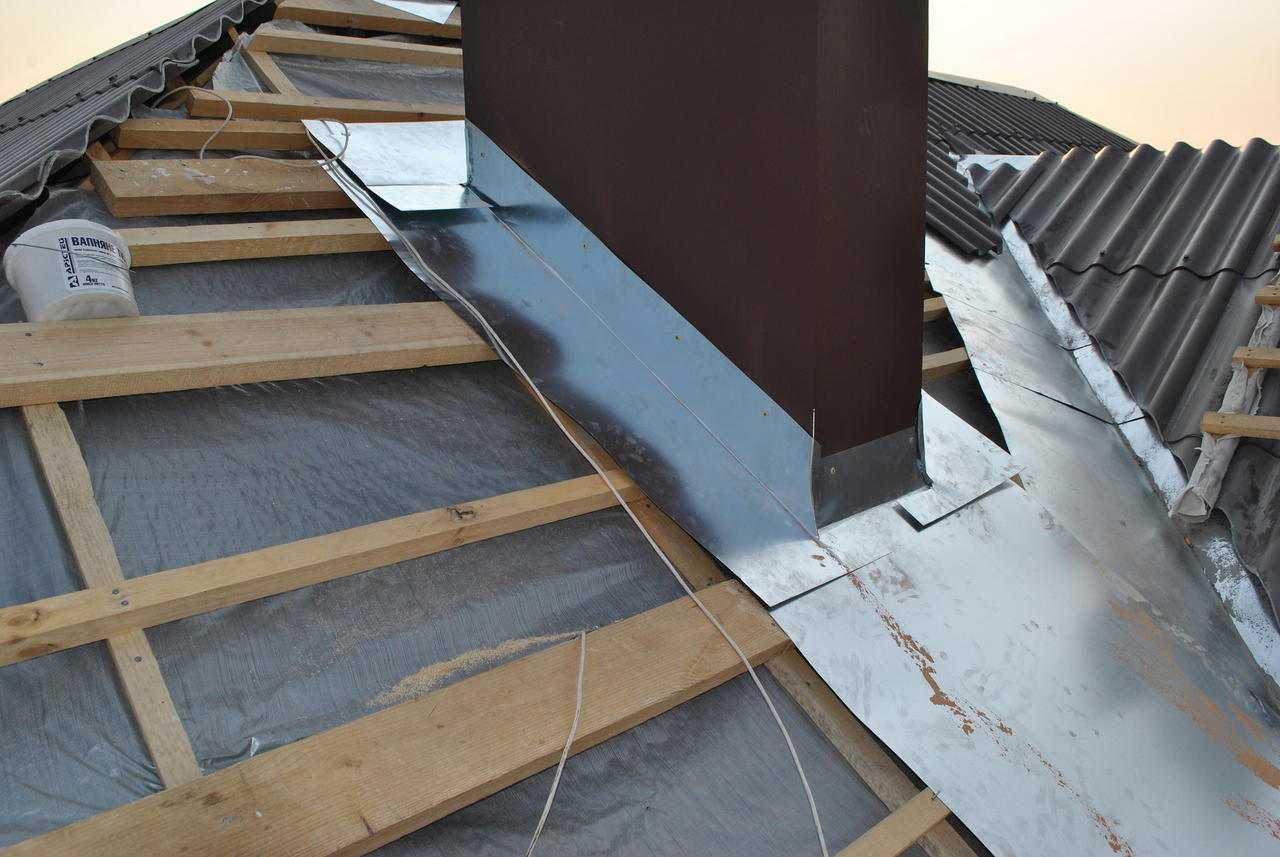
Organization of a rectangular pipe bypass on the roof