How to install soft tiles
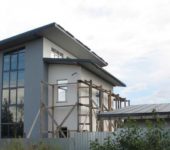
The roof made of bituminous soft tiles is easy to use, durable and aesthetic. Its big plus is that self-assembly is quite possible. The technology is not the most complicated, the weight of the fragment is small, it is attached to an adhesive base, and additionally fixed with roofing nails. So the installation of soft tiles with your own hands can be done even alone.
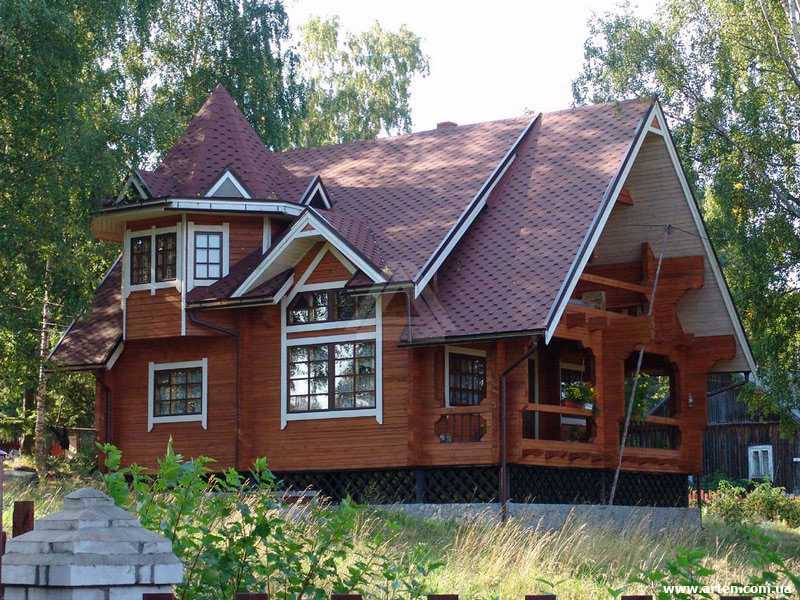
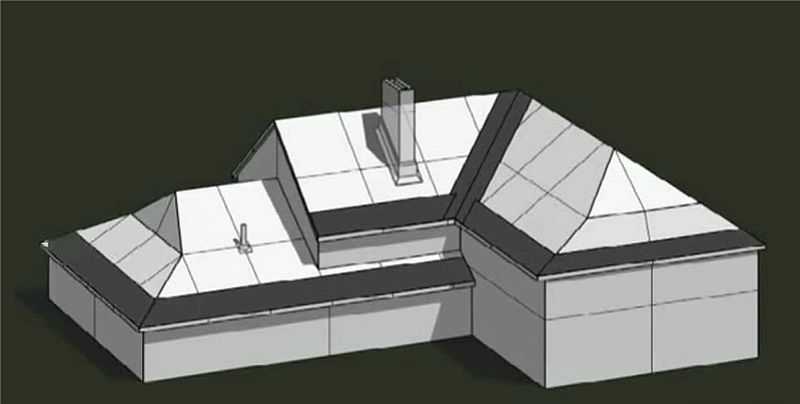
Flexible bituminous shingles can be used on roofs of any shape
The content of the article
- 1 Roofing cake for soft tiles
- 2 Soft tile roofing technology
- 2.1 Reinforcement of the overhang
- 2.2 Laying waterproofing carpet
- 2.3 Underlay carpet
- 2.4 Gable (end) strip
- 2.5 Ramp marking
- 2.6 Valley carpet
- 2.7 Adjoining a brick pipe
- 2.8 Round pipe outlet
- 2.9 Starting strip
- 2.10 Installation of soft ordinary tiles
- 2.11 Valley decoration
- 2.12 Pediment decoration
- 2.13 Skate installation
- 2.14 Ribs and kinks
Roofing cake for soft tiles
The attic under the roof can be warm or cold, depending on this, the composition of the roofing cake changes. But its part from the rafters and above always remains unchanged:
- waterproofing is stuffed along the rafters;
- on it - bars with a thickness of at least 30 mm;
- solid flooring.
We will consider these materials in more detail - what and how to make, what features each of them has.
Waterproofing
Waterproofing membranes are available in one, two and three layers. Single-layer membranes are the simplest and cheapest; they perform only a double task - not to let moisture in towards the room and release vapors outside. In this simple way, not only the attic is protected or attic from the penetration of condensate or leaked, suddenly, precipitation, but excess moisture is also removed from the air, accompanying human life. Single layer membranes are poorly represented on the market. Practically they are produced by one company - Tyvek.

The waterproofing membrane is laid over the rafter legs
Two and three layer membranes are more durable. In addition to the waterproofing layer, they also have an interlayer that gives greater tensile strength. The third layer, if any, is the absorbent layer. That is, even if a drop of condensate has formed on the surface of the membrane, this layer absorbs it into itself, preventing it from spilling onto other materials. With sufficient ventilation, moisture from this layer gradually evaporates and is carried away by streams of air.
Three-layer membranes (for example, EUROTOP N35, RANKKA, YUTAKON) are desirable if your attic is insulated and mineral wool is used as insulation. It is afraid of getting wet and when the humidity rises by 10% it loses half of its thermal insulation properties.
If there is a cold attic under the soft tiles, it is advisable to use a two-layer waterproofing membrane. In terms of strength, it is much better than single-layer, and at a price only slightly more expensive.
Lathing
On top of the waterproofing film, parallel to the overhang, the battens are stuffed. They are necessary to create a ventilation gap. It will maintain the normal moisture content of the roofing materials.
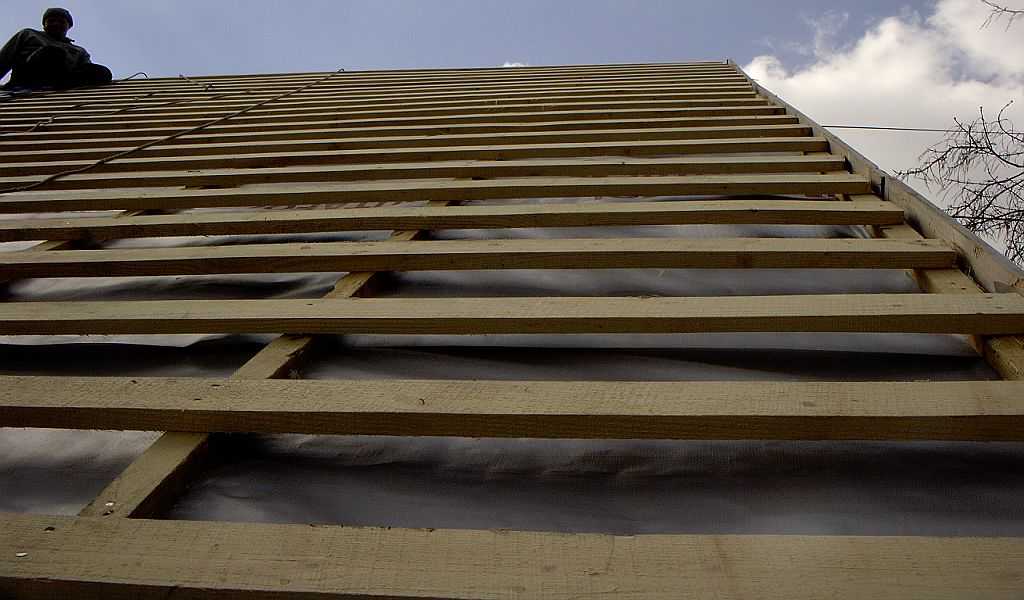
The lathing is made from edged boards 30 mm thick
The lathing is made from coniferous boards (mainly pine). The thickness of the boards is at least 30 mm. This is the minimum gap that will ensure normal air movement in the under-roof space. Before laying, the wood must be treated with an impregnation that protects against pests, fungi, after this layer has dried, it is also treated with fire retardants, which reduce the flammability of the wood.
The minimum length of the board for the lathing is at least two rafter spans. They are attached and connected above the rafter legs. You cannot connect them anywhere else.
Flooring
The flooring for soft tiles is made continuous.Materials are selected based on the fact that nails should be driven into it, therefore they usually use:
- OSB 3;
- moisture resistant plywood;
- grooved or edged board of the same thickness (25 mm) with a moisture content of no more than 20%.
When laying the flooring under soft tiles, it is necessary to leave gaps between the elements - to compensate for thermal expansion. When using plywood or OSB, the gap is 3 mm, between the edged boards 1-5 mm. The sheet material is fastened with a gap between the seams, that is, so that the joints are not continuous. Fix the OSB using self-tapping screws or punched nails.
Most often, flooring for soft tiles is made from OSB
Using boards as a flooring, it is necessary to ensure that the annual rings of the wood are directed downward. In the opposite arrangement, they will bend in an arc, the soft tiles will be lifted, the tightness of the coating may be broken. There is another trick that will allow you to keep the wood flooring even if the moisture content of the boards is above 20%. When laying, the ends of the boards are additionally fastened with two nails or self-tapping screws, hammered close to the edge. This additional fastener will prevent the boards from buckling when shrinking.
The choice of the thickness of the material for the flooring for soft tiles depends on the pitch of the battens. The larger the step, the thicker the flooring is required. The best option is a frequent step and thin slabs. In this case, a light but hard base is obtained.
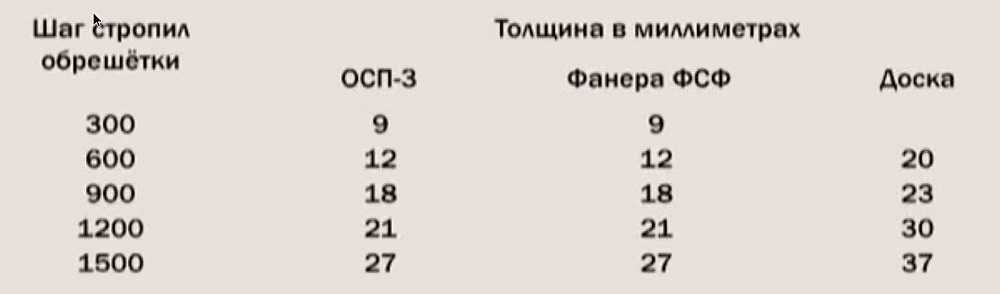
Sheathing and decking thickness
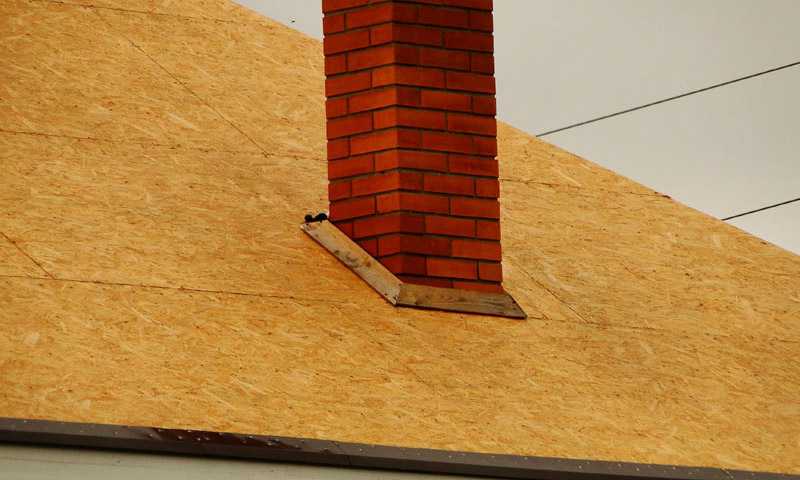
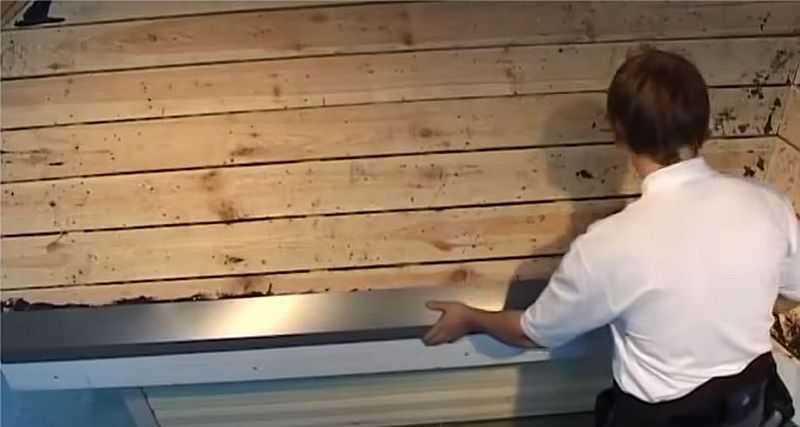
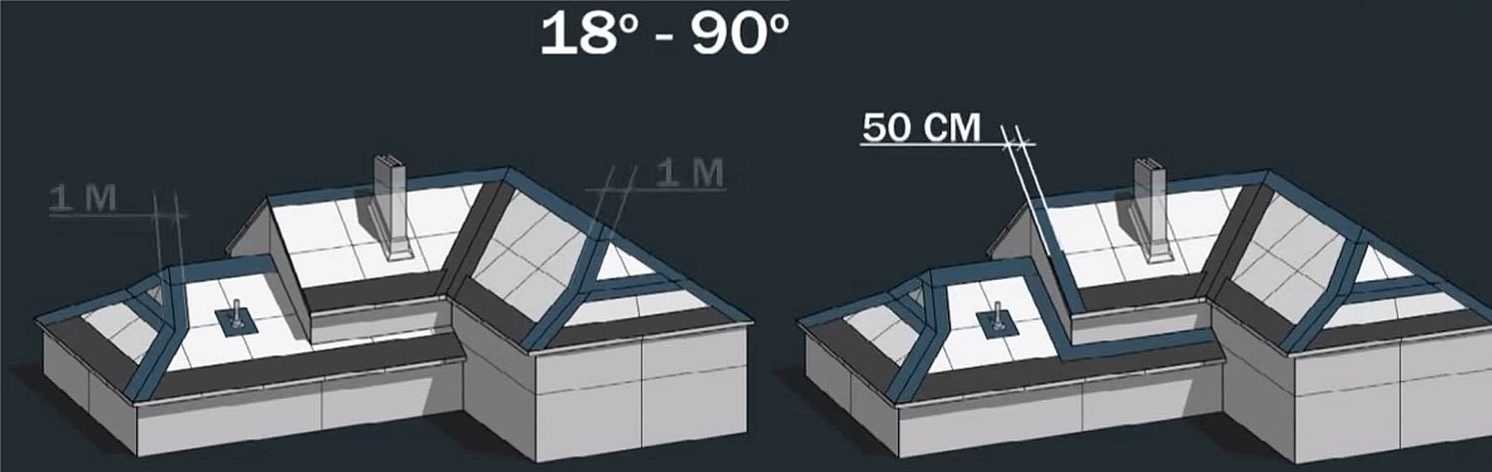
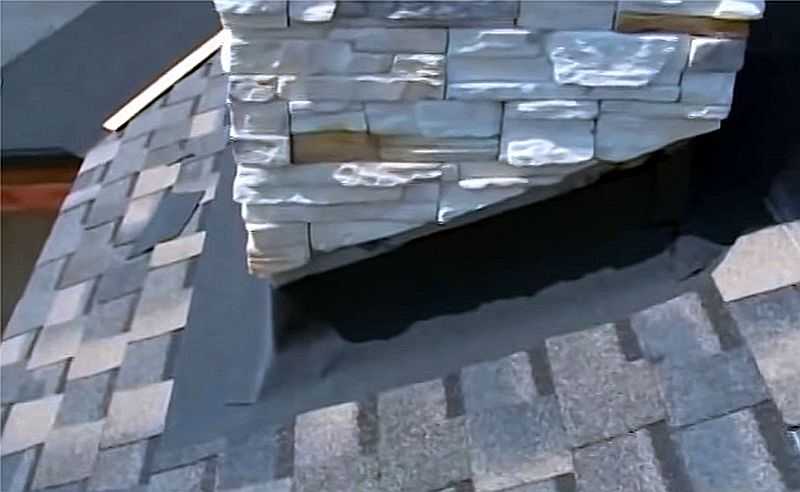
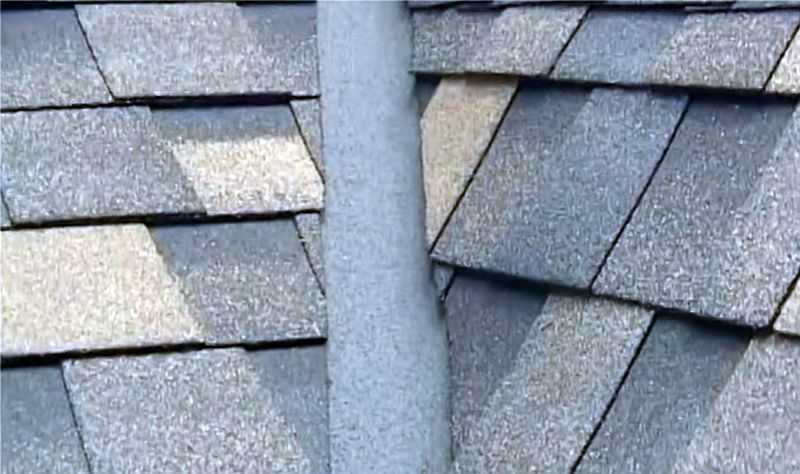
Another point concerns the device of flooring for soft tiles around the chimney pipe. With a brick pipe, the width of which is more than 50 cm, a groove is made behind it (pictured). This design is reminiscent of a mini roof. It divides rain streams, they roll down on the sides of the pipe, without flowing into the under-roof space.
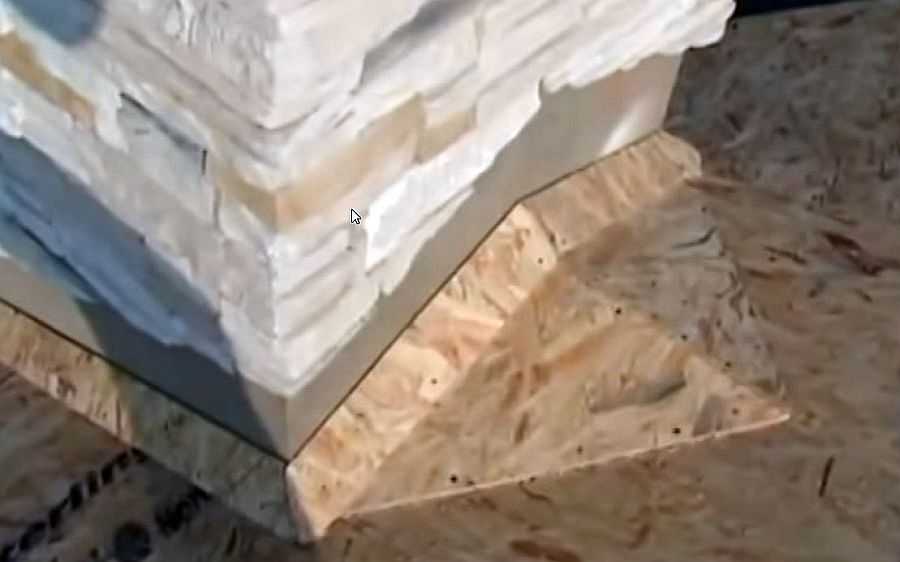
A groove, which is installed behind a wide brick pipe
After installing the flooring, its geometry is checked. The length, the width of the slope at the top and bottom, the height of the slope on both sides are measured, the diagonals are measured. And the last check - tracking the plane - the entire ramp must lie entirely in one plane.
The device of the roofing from the deposited materials is described here.
Soft tile roofing technology
When buying, you will most likely be provided with instructions, to which the installation of soft tiles will be painted step by step and in detail, indicating all the exact dimensions that this particular manufacturer requires. These recommendations should be followed. However, you should first get acquainted with the order of work and their volumes ahead of time - in order to understand the intricacies of installation and the required amount of materials.
We must say right away that you need to be careful with soft tiles when laying - she does not like to be bent. Therefore, try not to bend or crumple the shingles unnecessarily (this is one fragment, consisting of the visible and mounting parts).
Reinforcement of the overhang
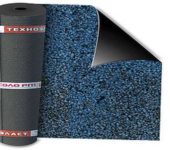
The first is the drip bar. This is an L-shaped sheet of metal coated with paint or polymer composition. The polymer coating is more expensive, but also more reliable. The color is selected close to the color of the shingles.
The drip bar is installed along the roof overhangs
The task of the drip plank is to protect the battens, rafters and decking from moisture. With one edge, the drip is laid on the flooring, with the second it closes the overhang. Fastened with galvanized (stainless steel) nails, which are hammered in a checkerboard pattern (one closer to the fold, the second almost at the edge). The step of installing the fasteners is 20-25 cm.

Planks overlap
A drip bar is sold in two-meter pieces. Having laid the first element, the second is fixed with an overlap of at least 3 cm. If desired, the gap can be closed: coat the joint with bitumen mastic, fill with sealant. At the same stage, the drainage systemanyway hooks are nailed that will hold the gutters.
Laying waterproofing carpet
Regardless of the roof angle, in endowe and along the slope, a waterproofing lining carpet must be laid. It is sold in one meter wide rolls. An adhesive is applied to the underside, covered with a protective film or paper. Before laying, the paper is removed, the valley carpet is glued to the flooring.
Regardless of the slope, the waterproofing carpet is laid along the eaves, in the valley and on the ridge
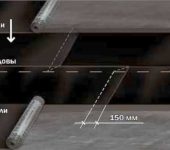
Installation of waterproofing carpet begins with laying it in the valley. Roll out a meter-wide material, distributing 50 cm on both sides of the bend. Here it is desirable to do without joints, but, if necessary, the overlap of two canvases should be at least 15 cm. The laying goes from bottom to top, the junction is additionally coated with bitumen mastic, the material is well pressed.

The joints are coated with mastic and should not be less than 10-15 cm
Further, the waterproofing carpet under the shingles is laid along the eaves. The minimum width of the carpet on the eaves overhang is the size of the overhang itself, plus 60 cm. The lower edge is located on top of the dropper, it can bend down a few centimeters. First, the carpet is rolled out, if necessary, cut, then the protective film is removed from the inside and glued to the substrate. Additionally, they are fixed at the edges with stainless steel or galvanized nails with a large flat head (step 20-25 cm).
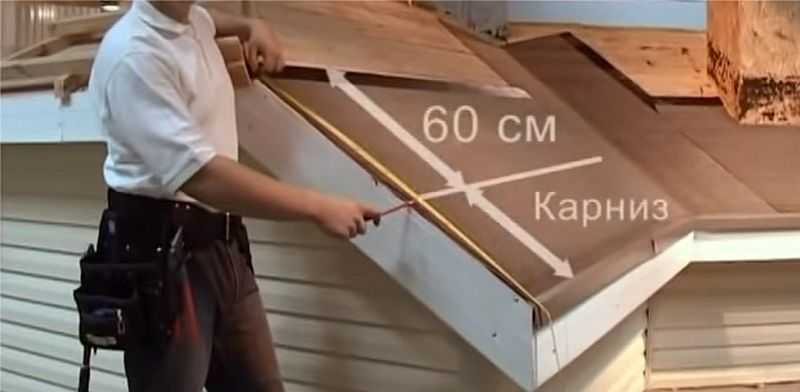
How to determine the width of the carpet along the eaves
In the places of the horizontal joint, the overlap of two canvases is at least 10 cm, in the vertical direction - at least 15 cm. All joints are additionally coated with bitumen mastic, the material is compressed.
Underlay carpet
The underlay carpet, as well as the waterproofing carpet, is sold in rolls of a meter wide, the back side is covered with an adhesive. The installation method depends on the slope of the roof and on the profile of the selected bitumen shingles.
- If the slope of the soft tile roof is between 12 ° and 18 °, the underlay is applied over the entire roof area. Installation starts from the bottom, from the laid waterproofing carpet. The overlap of the panels is 15-20 cm. The joints are additionally coated with bituminous mastic, the upper edge is fixed with nails (galvanized or stainless steel) with a flat head.
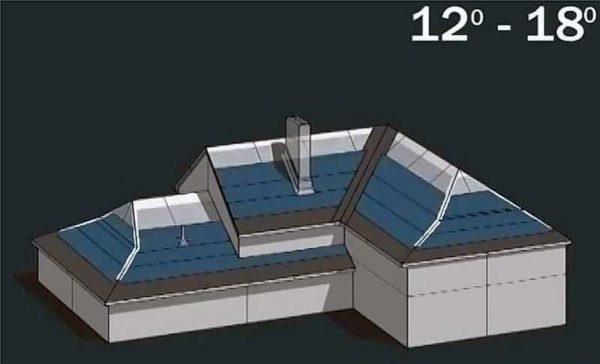
When the slope is low, the underlay carpet is solid
- If the slope of the roof is more than 18 °, the underlay is laid only in places where the roof bends. In the area of the ridge, ribs, breaks of the slope, a whole meter-wide roll is spread, distributing the material 50 cm from the bend line. A roll cut in half is used along the gables and abutments to the walls - a strip 50 cm wide.

With a slope of more than 18 °, the carpet is rolled out only in places where the roof bends

When using bituminous shingles with cuts (such as Jazz, Trio, Beaver tail), regardless of the slope, the underlay is spread over the entire roof surface.

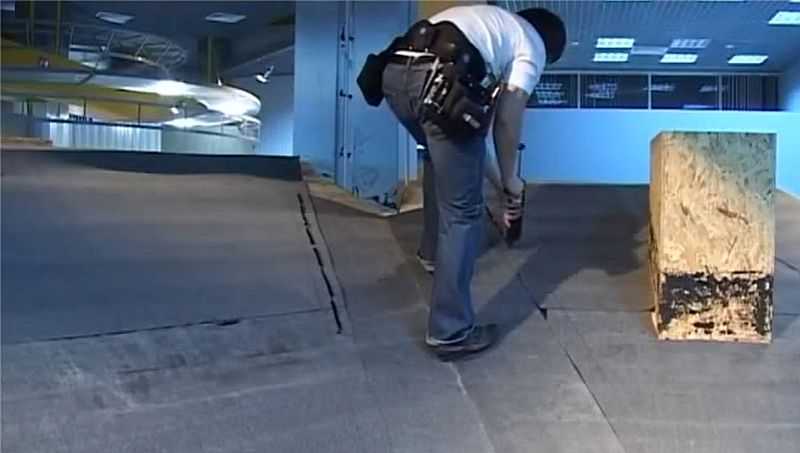
How to trim roof carpet
Installation of underlayment often requires an undercut. This is done with a sharpened knife. In order not to damage the material below when cutting, put a piece of plywood or OSB.
Gable (end) strip
Pediment strips are mounted on the side sections of the overhangs. These are strips of metal, bent in the shape of the letter "L", along the fold line of which there is a small ledge. They cover the laid roofing materials from wind loads, from moisture ingress. The pediment strip is laid on the flooring over the lining or waterproofing carpet, fixed with nails (stainless steel or galvanized) in a checkerboard pattern with a step of 15 cm.
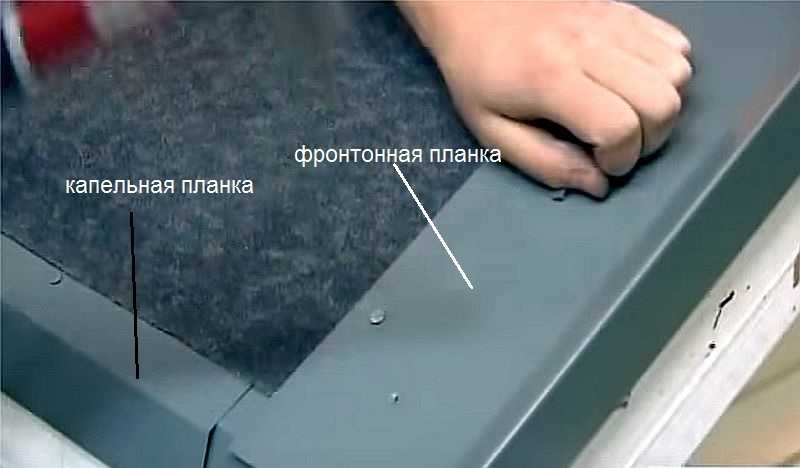
Installation of the pediment bar
These planks also come in pieces of 2 m, stacked with an overlap of at least 3 cm.
Ramp marking
To make the installation of soft tiles easy, markings in the form of a grid are applied to the underlay or flooring. This is done with a paint cord. Lines along the eaves overhang are applied at a distance equal to 5 rows of shingles, in the vertical line - every meter (the length of one shingle shingle).These markings make it easier to lay - the edges are smoothed along it, it is easier to track distances.
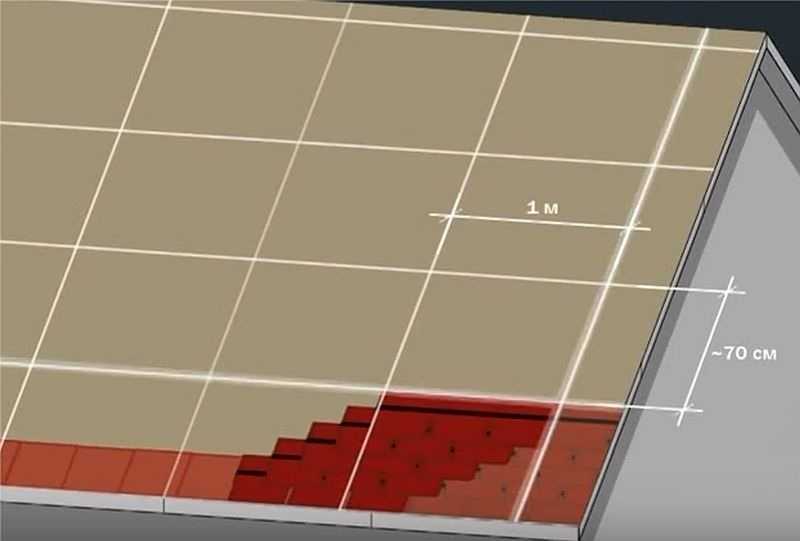
To make the installation of soft tiles easier, markings are made in the form of a grid
Valley carpet
On top of the already laid waterproofing carpet, still valley material is laid. It is slightly wider and serves as an additional guarantee that there are no leaks. Without removing the protective film from the bottom side, it is laid, cut at the bottom in the overhang area, the borders are marked. Having departed from the mark of 4-5 cm, a special mastic of increased fixation is applied Fixer. It is applied from a syringe, with a roller, then triturated with a spatula into a strip, about 10 cm wide.
Mastic is applied
The valley carpet is laid out on the mastic, the folds are smoothed, the edges are pressed. Having retreated from the edge by 3 cm, it is fixed with nails in increments of 20 cm.
Adjoining a brick pipe
To bypass pipes and ventilation outlets, patterns are made from a valley carpet or galvanized metal painted in the appropriate color. The pipe surface is plastered and primed.
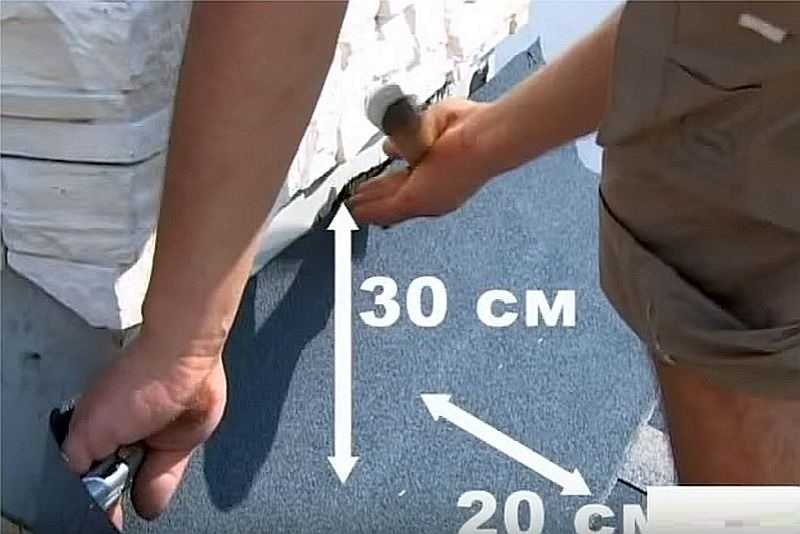
When using a valley carpet, a pattern is made so that the material extends at least 30 cm onto the pipe, at least 20 cm should remain on the roof.
The pattern is mounted first on the front of the pipe
The pattern is coated with bitumen mastic, placed in place. the front part is installed first, then the right and left.
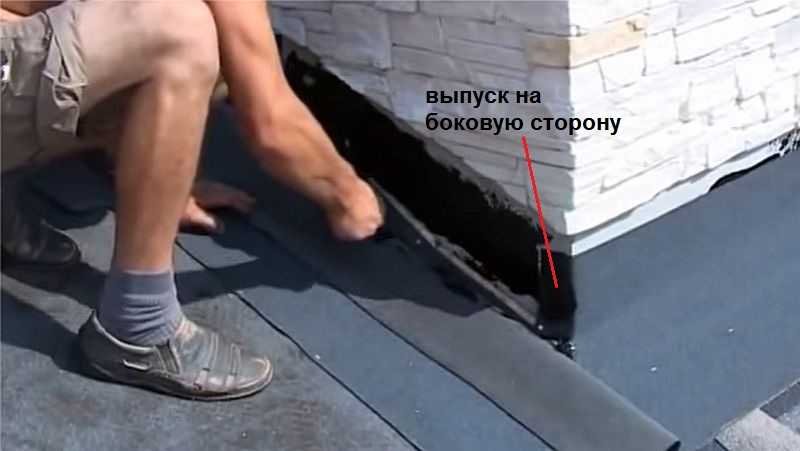
The front pattern will wind up a little to the sides
Some of the side elements are folded onto the front part. The back wall is installed last. Its parts go to the side.
With proper installation on the flooring around the pipe, a solid area is formed with a valley carpet. Before laying the tiles in this place, the surface is coated with bituminous mastic.

The surface of the underlay carpet is coated with bitumen mastic
The shingles go on the laid carpet from three sides, not reaching the pipe walls 8 cm.
Around the pipe there is an 8 cm wide valley carpet gutter
The upper part of the junction is sealed with a metal strip, which is attached to the dowel.

Fastening the strip on the back of the pipe
All gaps are filled with heat-resistant sealant.

All joints are sealed
Round pipe outlet
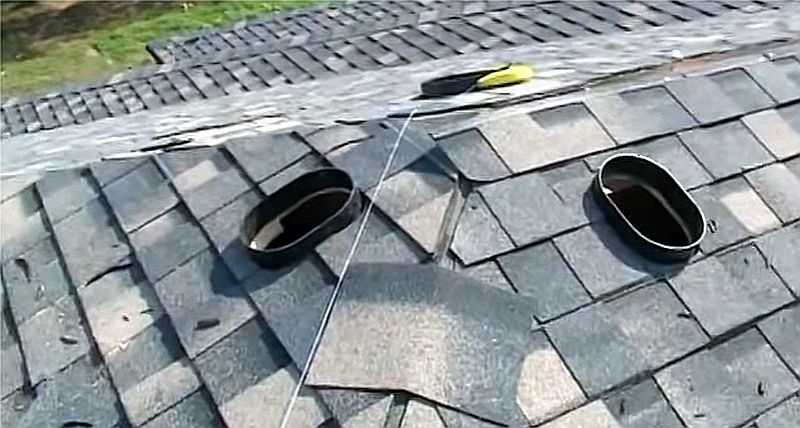
There are special pass-through devices for the passage of ventilation pipes. They are positioned so that the lower edge of the element overlaps the tile by at least 2 cm.
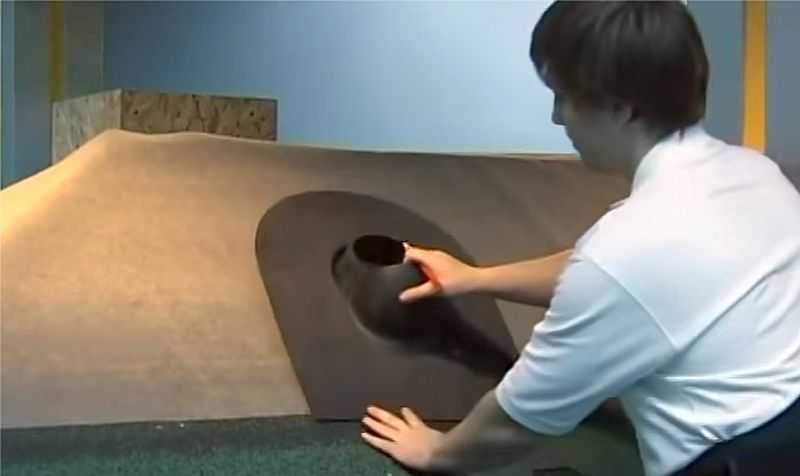
Lay the penetration 2 cm below the edge of the shingles
Attaching the pass-through to the roof, circle its inner hole. A hole is cut out along the applied contour in the substrate, into which the round pipe is drawn.
The back of the skirt of the passage element is coated with bitumen mastic, set in the desired position, and additionally fastened around the perimeter with nails. When installing soft tiles, the penetration skirt is coated with mastic.

The skirt is coated with mastic
The shingle is trimmed as close as possible to the ledge of the penetration, the gap is then filled with mastic, which is covered with a special dressing that protects against ultraviolet radiation.
Starting strip
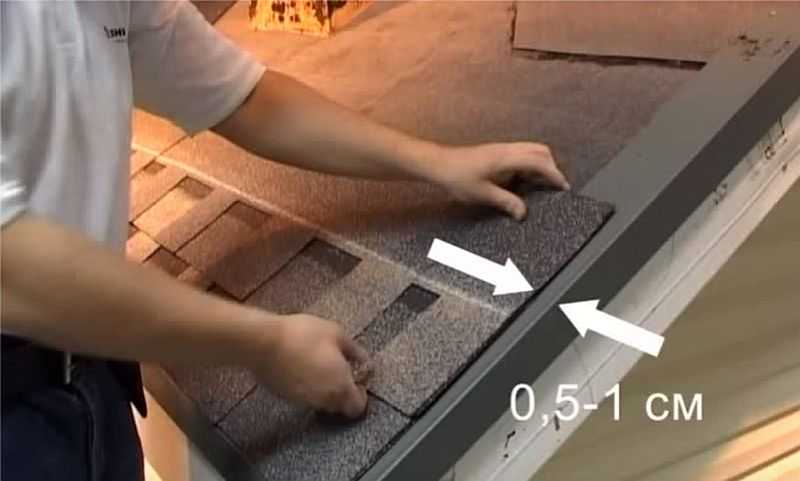
Installation of soft tiles begins with laying the starting strip. Usually these are ridge-cornice tiles or ordinary ones with cut petals. The first element is laid on one of the edges of the slope, with the edge going onto the pediment bar. The lower edge of the starting strip is laid on the drip, leaving 1.5 cm from its fold.

Start lane markings
Before installation, the protective film is removed from the rear, the shingle is leveled and laid. Each section of bituminous shingles is fastened with four nails - at the corners of each fragment, departing from the edge or perforation line of 2-3 cm.
Attaching the starting strip
If a cut from an ordinary tile is used as a starting strip, some part of it will be devoid of adhesive composition. In these places, the substrate is coated with bitumen mastic.
Installation of soft ordinary tiles
There is a flexible tile with an applied adhesive mass protected by a film, and there is a composition that does not require a protective film, although it also fixes elements well on the roof. When using the material of the first type, the film is removed immediately before installation.

The first row of soft bituminous tiles is laid, stepping back from the starting strip 10 mm
Before laying bituminous tiles on the roof, several packs are opened - 5-6 pieces. Laying is carried out from all the packs at the same time, taking one shingle one by one from each. Otherwise, there will be pronounced spots on the roof that differ in color.
The first shingle is laid so that its edge does not reach the edge of the starting strip by 1 cm. In addition to the adhesive composition, the tiles are also fixed with roofing nails. The number of fasteners depends on the angle of the ramp:
- With a slope of 12 ° to 45 °, each shingle is nailed with 4 nails. The nails are driven in 2.5 cm away from the visible part of the shingles. The extreme fasteners are also 2.5 cm from the shingle cut, the rest between the "tiles". It turns out that one nail "holds" two tiles.
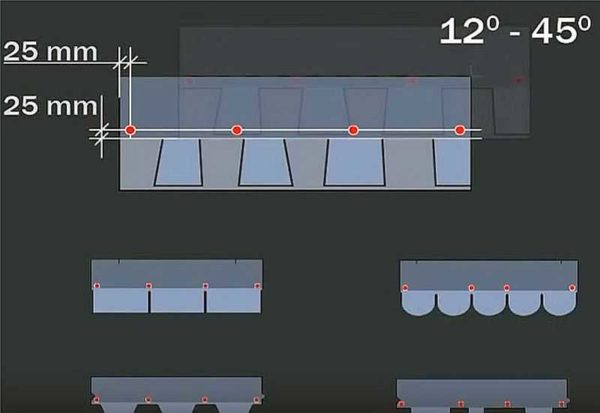
Fastening scheme for soft tiles
- If the slope is more than 45 °, nails are driven into each shingle. The exact layout of the fasteners depends on the cut shape.
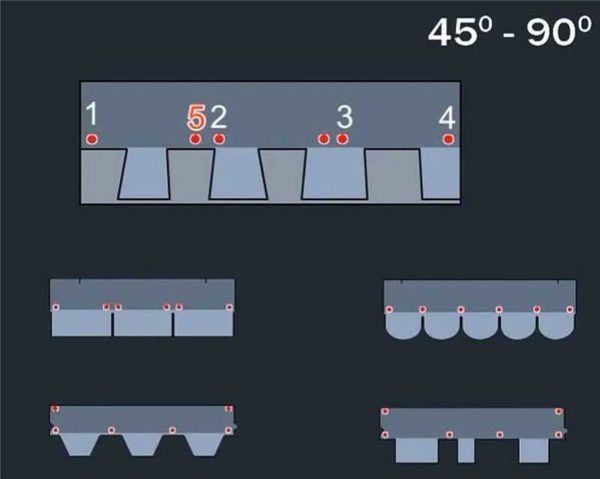
Location of fasteners on steep slopes


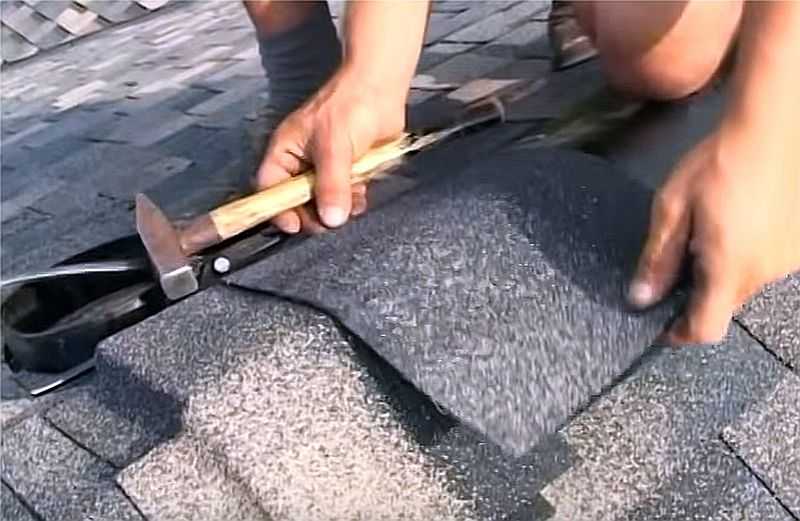
When installing soft tiles, it is important to drive in the nails correctly. The hats should press against the shingle, but not break through its surface.
Valley decoration
With the help of a paint cord, a zone is marked in the valley into which nails cannot be driven in - this is 30 cm from the middle of the valley. Then mark the borders of the gutter. They can be from 5 to 15 cm in both directions.
The upper corner, which is turned towards the valley, is cut
When laying ordinary shingles, nails are hammered as close as possible to the line, outside of which nails cannot be hit, and the shingle is cut off the floor of the gutter line. To prevent water from flowing under the material, the upper corner of the tile is cut obliquely, cutting off about 4-5 cm. The loose edge of the tile is lubricated with bitumen mastic and fixed with nails.
What should turn out
Pediment decoration
On the sides of the slope, the tiles are cut so that 1 cm remains to the edge (ledge) of the end strip. The upper corner of the shingle is cut in the same way as in the valley - a piece of 4-5 cm obliquely. The edge of the tile is coated with mastic. The strip of mastic is at least 10 cm. Then it is fixed with nails, like the rest of the elements.
The tiles on the pediment are cut, stepping back 1 cm from the ledge of the pediment bar
Skate installation
If the flooring in the area of the ridge is made continuous, a hole is cut along the ridge, which should not reach the end of the rib 30 cm. Bituminous tiles are laid before the beginning of the hole, after which a special ridge profile with ventilation holes is installed.

Skate installation
It is fixed with long roofing nails. On a long skate, several elements can be used, they are joined end-to-end. The installed metal ridge is covered with ridge tiles. The protective film is removed from it, then the fragment is fixed with four nails (two on each side). Installation of soft tiles on the ridge goes towards the prevailing winds, one piece overlaps another by 3-5 cm.
Installation of ridge soft tiles
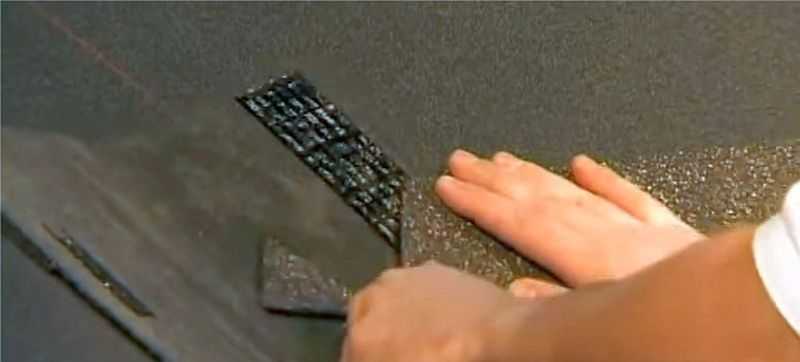
The ridge tile is a ridge-cornice divided into three parts. A perforation is applied on it, along it a fragment is torn off (first bend, press the fold, then tear off).
The same elements can be cut from ordinary tiles. It is divided into three parts, regardless of the drawing. A corner is cut off from the resulting tiles - about 2-3 cm on each side. The middle of the fragment is warmed up with a construction hairdryer on both sides, laid in the middle on a block and, gently pressing, bend it.
Ribs and kinks
The ribs are covered with ridge tiles. A line is bounced along the bend at the required distance with a paint cord. The edge of the tile is aligned along it.Laying of shingles on the edge goes from bottom to top, each piece is glued, then 2 cm back from the top edge, is fixed with nails - two on each side. The next fragment comes on the laid by 3-5 cm.
Roofing ribs made of soft tiles