How to make a gable roof: step-by-step instructions in photos and videos
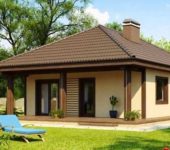
When building private houses, the roof is most often made gable. There are reasons for this. The first is that it is reliable. Copes well with wind and snow loads. Second, it is compatible with any roof covering. The third is relatively inexpensive. The fourth is an uncomplicated design that is difficult to spoil. Fifth - it looks attractive. All this, and also the fact that a gable roof is built with our own hands without special knowledge, determines its popularity.
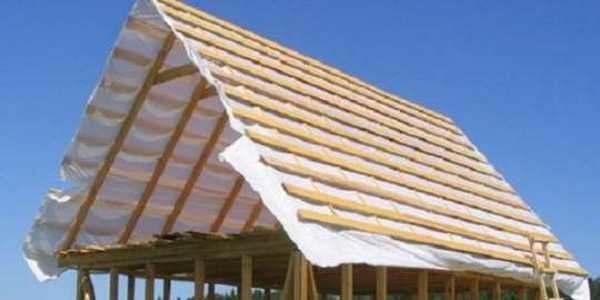
The assembled gable roof with your own hands is ready for the installation of roofing
The content of the article
Gable roof installation step by step
As you saw above, there are a lot of rafter systems. Accordingly, each assembly has its own characteristics, but in general the order is the same. It is necessary to say about the general step: preliminary drying and processing of wood. This step is required if you bought fresh lumber, not dried.
The use of raw wood of natural moisture in the construction of the roof will lead to problems: the beams will bend, they will dry out, and the geometry will change. All this will lead to the emergence of stress points and at the slightest sign of overload (a lot of snow, strong wind or rain) negative processes will begin. Eliminating them is a complex and costly undertaking. Therefore, either buy dry wood (no more than 20%, ideally chamber drying 8-12%), or buy the material in a couple of months, put it in ventilated piles. After that, treat with the necessary impregnations (against fungal attack and to reduce flammability) and only after that use in the installation of the rafter system.
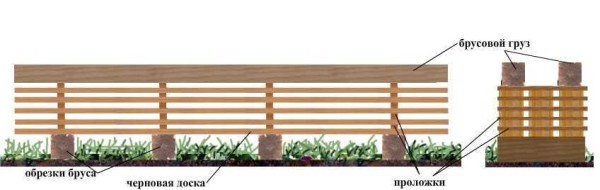
Dry lumber in ventilated stacks. To do this, they are laid with short pieces of boards. They are placed a meter from the edges and then every meter. Under the bottom, be sure to install spacers
We will tell you about the main stages of assembly, how to make a gable roof with your own hands in this section.
Mauerlat
The assembly of the gable roof truss system begins with the installation of the Mauerlat. It should be placed strictly horizontally, therefore, before starting the installation, the horizontalness of the wall to which it is attached is carefully checked, if necessary, it is leveled with cement mortar. You can continue to work after the solution has gained 50% strength.
Depending on the system, this is a bar with a section of 150 * 150 mm or a board with dimensions of 50 * 150 mm. It is attached to the top row of the wall masonry. If the house is wooden, the upper crown plays its role. If the walls are made of lightweight building blocks - foam concrete or aerated concrete and others - their rigidity is not enough to redistribute the load. In this case, a reinforced concrete belt is made on top of the last row of masonry, into which embedded fasteners are embedded - wire or studs. A bar or board is then placed on them.
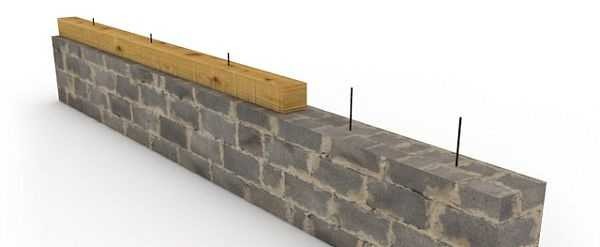
Mounting the Mauerlat on studs
There are several ways to connect the walls and Mauerlat:
- In the masonry (in a reinforced concrete belt), a smooth rolled wire of large diameter is fixed (two ends stick up). Holes are then made in the board in the necessary places into which the wire is threaded. She then curls and bends.
- Studs of at least 12 mm in diameter are walled in the wall.Holes are made under them in the Mauerlat, a beam / board is inserted) and tightened with nuts with wide washers.
- Having aligned the timber or board along the outer or inner edge of the wall, take a drill with a diameter of 12 mm and make holes for the anchor bolts. They (of the same diameter 12 mm) are hammered into the very cap, then tightened with a wrench.
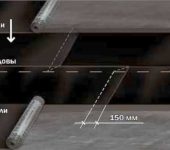
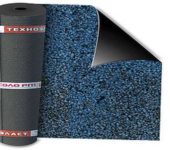
The distance between the pins (wire) should not be more than 120 cm. Cut-off waterproofing must be installed on the wall (belt) under the Mauerlat. It can be rolled roofing material or waterproofing material in two layers, it can be smeared with bituminous mastic.
Installation of rafters
There are more than a dozen types of gable roof truss systems. First of all, you need to choose how yours will look like. Further, in order to make it easier to work, a template is made from thin boards for all cuts, cuts and other similar details. To do this, you may need to assemble the first mold on the roof, and then make templates for ready-made ones.
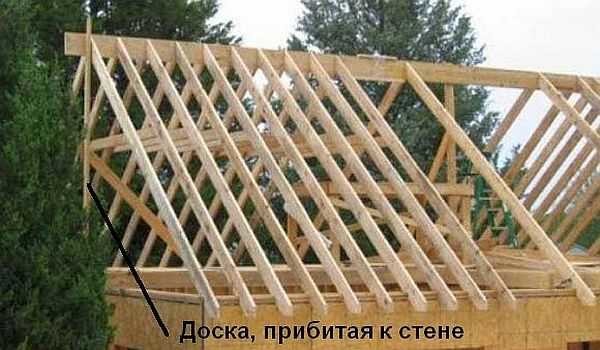
How to properly position the rafter system
Method of fastening the truss system of a village house
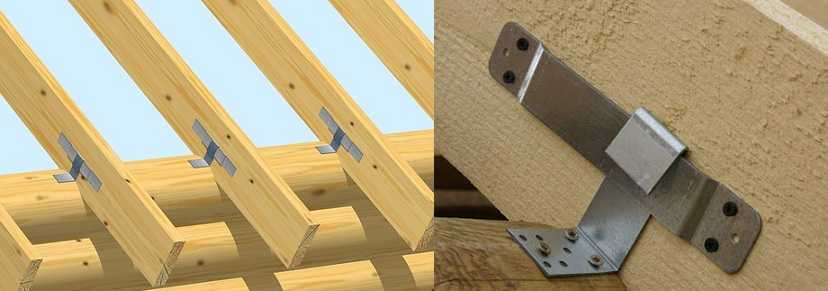
In order for the rafter to move freely during shrinkage, its long part is fixed strictly parallel to its edge, the support is placed strictly perpendicularly. If necessary, a site is cut out for it. Mark the attachment so that the hook is in the lowest position or near it. They are mounted on special screws that come with the kit (the usual ones are not suitable). If installation is carried out on a log, so that the rafter leg does not slip along it, a semicircular hole is cut out in the lower part on which it will rest.
Such fasteners are sold in any construction market, it is called "sliding". See the video for how to attach the slide to the timber.
Video on the assembly and installation of the gable roof truss system
It is not easy to build a gable roof with your own hands: there are a lot of subtleties and nuances, there are different ways of fastening, building. To describe in words their work is thankless. This is the best time to see. Below we offer you a selection of videos that may be useful to you.
Video report on how the gable roof was made
The story of the owner of the house about the stages of construction. There are some interesting technical points that can be helpful.
Two types of rafter connection: rigid and sliding
Video on the two most problematic types of connections.
How to determine the angle of inclination of the rafters
Full video report on the assembly of the rafter system
This film takes just under an hour, but the whole process is shown from start to finish with many details. They put the roof on frame house, but when installed on buildings of a different type (except for wooden houses), there is no difference.