Roof drainage systems
To prevent water from the roof from undermining the foundation, a drainage system is made. They are made from different materials, more or less expensive, but in general, the costs are solid. You can save a little if you collect the drain with your own hands. The features and installation procedure will be discussed further.
The content of the article
Types of drainage systems
The most famous and common roof weirs are made of galvanized metal. They may not be as attractive as more modern options, but they are reliable and inexpensive. And this is important. What else is good - if you have the skill of a tinsmith, or simply having "straight" hands, you can make a drain from galvanized steel with your own hands.

General view of the drain (storm drain, roof drainage system)
If we talk about other metal systems, then two of them belong to the category of elite - copper and from an alloy of zinc and titanium. They are certainly durable, but the price is very high. There is a more democratic option - metal gutter systems with polymer spraying. At the price they are quite affordable, in appearance - you can't find fault, in terms of durability - it depends on the manufacturer. If the technology is observed, they will happen for many years.
There is another type of drainage from the roof - made of polymers. They normally tolerate ultraviolet light, frost and heat, are highly durable, and look good. The disadvantage can be considered a rather high price, especially from European manufacturers. However, there are good options in the low-cost system category as well.
Composition of drainage systems
There are gutters under the eaves of the roof. They are mounted on special brackets that hold the system. Since the storm drain is located around the entire perimeter of the roof, there are corners - internal and external. All these elements must be connected tightly, for this there are gutter connectors with rubber seals. These elements are often considered redundant. Then the gutters are overlapped with an overlap of at least 30 cm, connected with self-tapping screws.

What elements does water stock consist of?
To drain water, holes are made in the gutter, into which funnels are inserted. Downpipes are attached to the funnels. If the overhang of the roof is large, it is required to make the pipe curved. For this, there are maple or universal rings (some manufacturers have). The downpipe is attached to the wall of the house using special clamps, which are the same color as the entire system.
A system of the required configuration is assembled from all these elements. If you decide to buy ready-made elements, and then assemble the gutter with your own hands, the best solution is to have a house plan with dimensions in hand. Using it, you will quickly determine the composition of the system and calculate the required number of elements.
Installation features
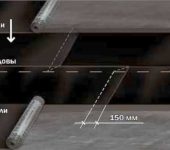
Most of the questions arise about the fastening of the gutter brackets. I must say right away that they are installed taking into account the fact that the gutters should have a slight slope towards the funnels. The minimum recommended slope is 3 mm. If you want the water to drain faster, you can make it larger - up to 10 mm.
If the length of the roof gable is less than 10 meters, the slope is made to one side. If there is more, either an additional funnel (and a drainpipe) is placed in the middle and a drain is formed to it, or the gutter in the middle of the pediment has the highest point and the slope goes from the middle to both sides.
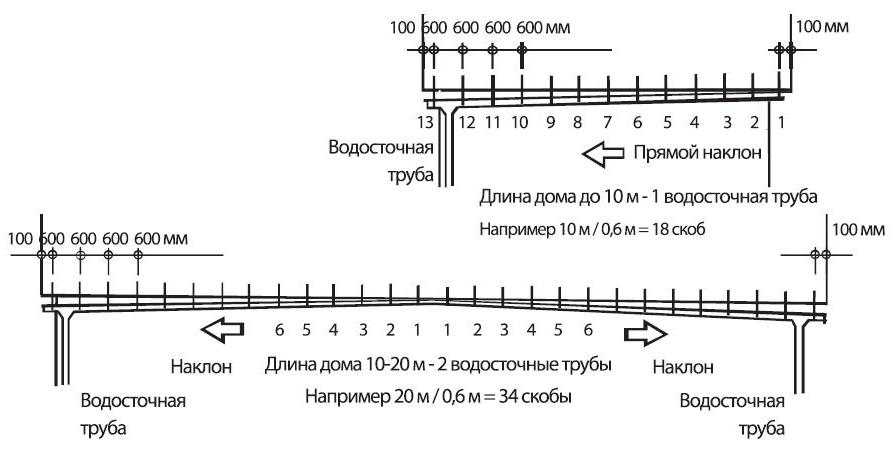
Organization of the slope of the drain
When assembling the drain with your own hands, they usually do this: nail the bracket at the highest point. Then the lowest one is nailed - taking into account the planned slope.A twine is pulled between them, along which all the others are attached. One recommendation is to check the horizontalness of the line you are targeting before forming the slope. Usually it is either a frontal (wind) board. Unfortunately, it is not always perfectly level. So check the verticality, and preferably a hydro level or level, in an extreme case, a bubble is also suitable, but a large length - at least a meter. For shorter lengths, you will not find your way around.
Number of brackets and methods of their fastening
The number of brackets for installing a drain is considered simple: the distance between two adjacent ones should be 50-60 cm. We divide the total length of the wall by this distance. Add a unit (extreme bracket) to the resulting figure and get the required amount for one wall. All others are calculated similarly. If the building has a non-linear shape, it will have to be counted by the piece - the corner elements must be supported on both sides.
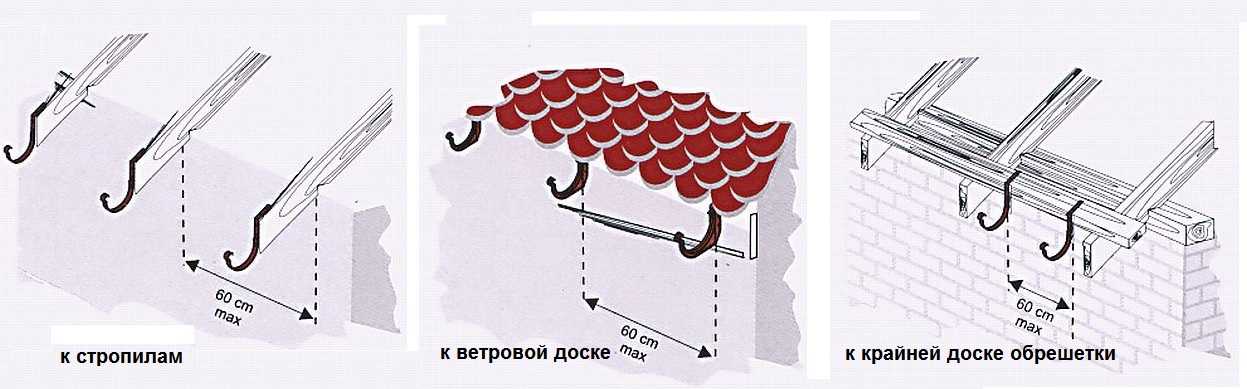
Methods for attaching brackets for roof gutters
Now directly about the methods of mounting brackets. There are three possibilities:
- Nail to the roof rafters. The option is good if the roofing material has not yet been laid - there are no problems with fasteners.
- Install on a wind board. If plastic drips are chosen, this is the only option. In other systems, one of the possible.
- To the extreme board of the sheathing or flooring under the roofing material (if it is solid). This method is also used before the roofing material began to be laid.

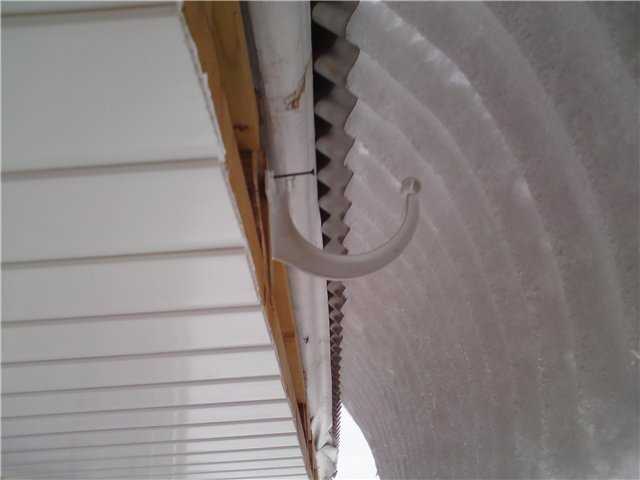
It looks like a massive snow melt. As you can see, the storm drain bracket does not interfere (this is a fitting)
Installing the gutter
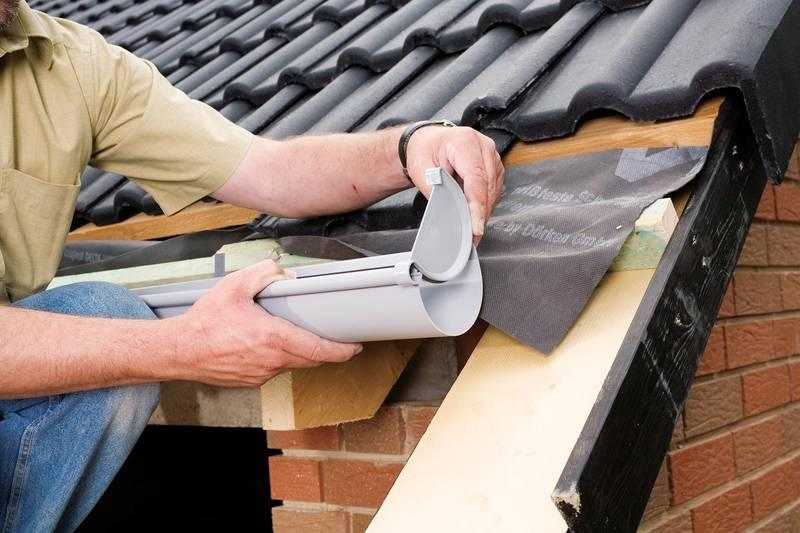
The gutters are placed in the fixed brackets. There are two systems with a different sequence of actions. The first has a specially formed groove at the edge of the groove. The ends of the brackets are threaded into this groove, then the chute is turned into place, fixing with special tongues on the brackets. If you look at the photo, it will become clearer.
Installation of the gutter from the outside
In the second system, installation starts from the side of the gable board. The distal edge of the gutter is inserted into the locks located there, then pressed in turn into the locks on the front of the brackets.

Installation of gutters according to the second system
The two pieces of the gutter must be connected with a special connecting element with rubber seals. But their cost is quite high, so that the two gutters are simply laid with an overlap with an entry of 30 cm (make sure that the joint is located along the water flow). For greater tightness between the two grooves, you can lay a strip of rubber, and connect them with ordinary self-tapping screws (or with washers and rubber gaskets). After installing the gutter, its edges are closed with plugs.

Plugs are installed on the edges of the gutter
Mount funnels
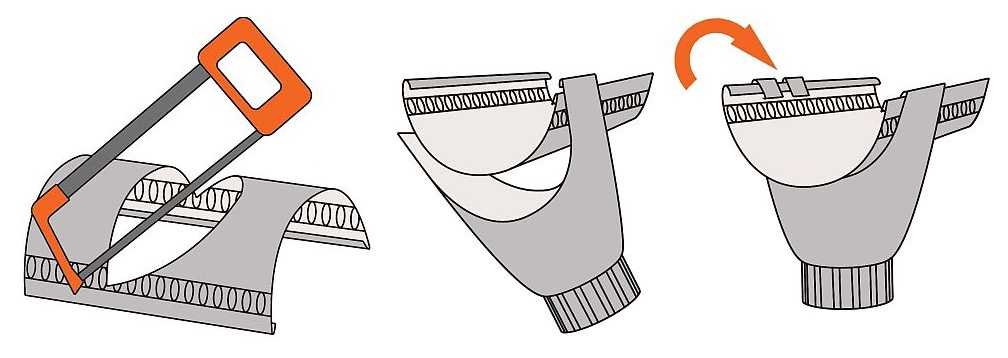
Having assembled and installed the gutter on the brackets, the gutter installation is continued by installing the funnels. They are placed in the lowest areas. If the funnels are located close to the corners, stepping back from the edge of the gutter about 20 cm, a hole is cut out with a hand saw. It is better not to use a jigsaw or a grinder - there is a high probability that your cutout will be too large.

Installing a funnel for a drain
A funnel is attached to this cutout, clinging to the outer edge of the gutter. Then it is wound up to the second edge and fixed there with special clamps.
Installation of drainpipes
Downpipes are attached to the funnels. If the roof overhang is large, a swivel element is attached directly to the funnel, which allows the pipes to be brought closer to the wall and fixed there. For fastening there are special clamps, painted in the same color as the entire system. There are they of different designs, but mostly they have a latch, so that it is possible to dismantle without removing the screws that secure the pipe to the wall.

Two ways to assemble downspouts
Clamps are installed at a distance of at least 1.8-2 m from each other. At the bottom, the drain can be led directly into the drainage system (if it is located nearby). If around the foundation is done simply blind area, the drain pipe ends with a swivel element that diverts water from the foundation at a distance of at least 20 cm.
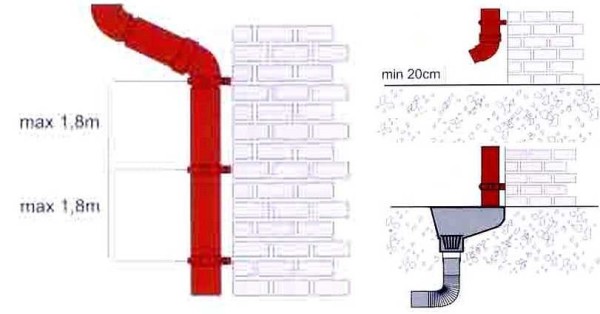
Rules for fixing drain pipes
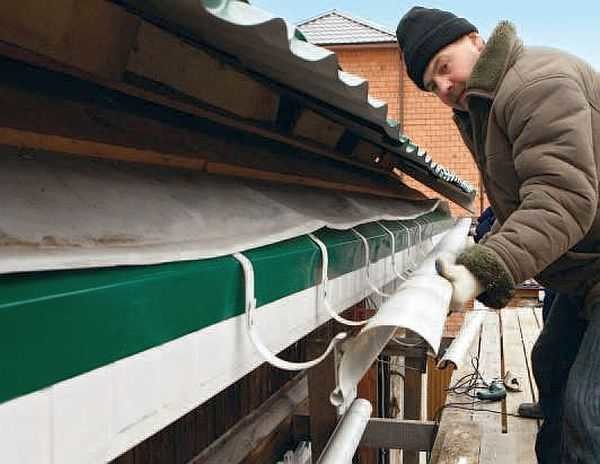
In principle, the gutter is installed with your own hands, but there is one more detail that will greatly facilitate operation. A metal (preferably stainless) mesh is laid on the gutter. It prevents leaves and other large debris from entering the system.
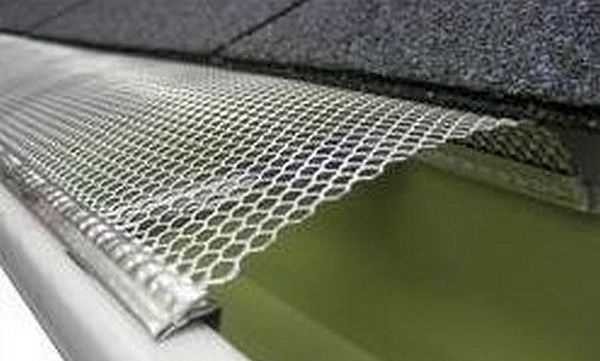
When collecting the gutter with your own hands, place the mesh on the gutter. She will not let foliage and branches clog the stormwater
Installing a grid will allow less frequent system maintenance. This is especially true on tall buildings.
Homemade gutter
Ready-made gutter systems are good, but not cheap. What if the drainage needs to be done in the country and spend the minimum for this? There are some very budget options. The first is to make a drain from plastic sewer pipes. They take pipes of large diameter (110 mm and more), good quality with a thick wall, cut them in half and use them as gutters. For downspouts, you can use the same diameter or slightly less. It is more convenient to buy brackets ready-made, but in principle, you can do it yourself. For more information on how to make a drain with your own hands from sewer pipes, see the video.
An even more budgetary option is drainpipes made from plastic bottles. The gutter from them cannot be made normal, and the funnels of the pipes work normally.


Useful article. With your help, I decided on the choice of a drain.