How to update furniture with your own hands: changing the design
Soviet-era furniture - walls, wardrobes, dressers - is not distinguished by its beauty, but it is reliable and strong. Well, just a hand does not rise to carry it to the landfill. And rightly so. It is very easy to update it, giving it a completely new sound and modern look. Alteration of cabinet-type furniture may not be very difficult: there are materials that allow you to significantly change the appearance with a little effort. The easiest way is to change the color and fittings. With the fittings, everything is clear - you will choose what is more suitable in style, and the color changes in two ways - paint and glue the film (or wallpaper).
The content of the article
Alteration of the old wall: changing the design
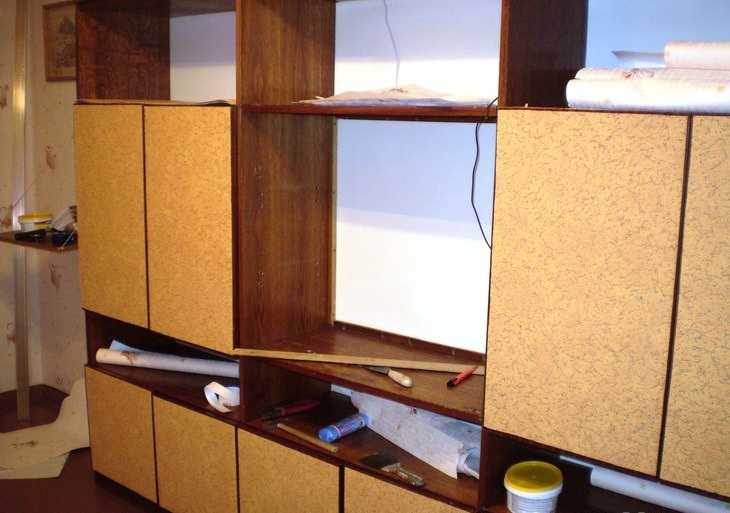
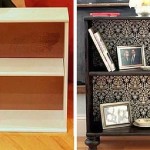
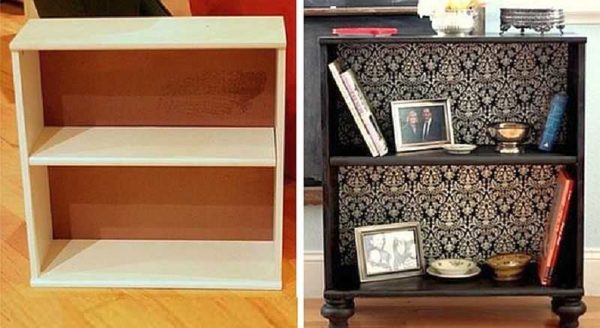
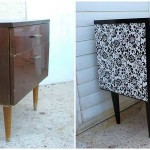
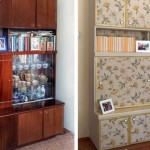
Covering old furniture with self-adhesive tape is the easiest way to change the decor. The film is today both monochromatic and colored, of different colors, textures and shades. It makes no sense to glue a film with a pattern under a tree: not that is in trend today. But plain or patterned - this is what can turn an old wall into new furniture. The actions are simple, but the work requires accuracy. But the result is excellent. See two photos. On the first is an old Soviet wall made of Chipboard before the update, on the second - after.

Renovation of an old furniture wall - before and after
Now about how it was updated. We used a compacted self-adhesive furniture film, cream color, matte surface. The open part of the old wall was closed with glass doors, and a translucent matte film was used for the glass. Edging - furniture layout (also self-adhesive) chrome color. The order of work is as follows:
- All that can be removed, removed, disassembled. Take off your old hardware.
- The surfaces must be clean and free from grease. This is easier to achieve with a soft cloth soaked in dish detergent. Then everything is washed off with warm water with a little vinegar. Wipe clean with a dry cloth.
- Cut out the details. It is better to cut the film 8-10 mm more. The remains are then cut off with a paper knife.
- Spray the part to be pasted with water from a spray bottle. On a wet surface, the film can be moved if something goes wrong. You can even peel it off without damaging it.
- After removing the protective layer from the film, carefully lay it out. Once aligned, begin to smooth with a soft cloth from the middle to the edges. Try to avoid bubbles. To do this, you need to move gradually, without jumping from place to place.
- If there is a bubble, it can be pierced with a thin needle approximately in the middle. Then, expel air from the edges of the bubble to the hole and wipe the puncture site.
- After gluing the film, take a clean thin cotton cloth, spread it on top and iron it with a warm iron (medium heating).
- We glue the trim, install new handles.
This is the sequence of work with every detail. Everything is the same with glass, only you need to glue it on the inner surface. After assembly, you have an updated wall. This technique can be used for any items: chest of drawers, bedside tables, wardrobe, kitchen set etc.
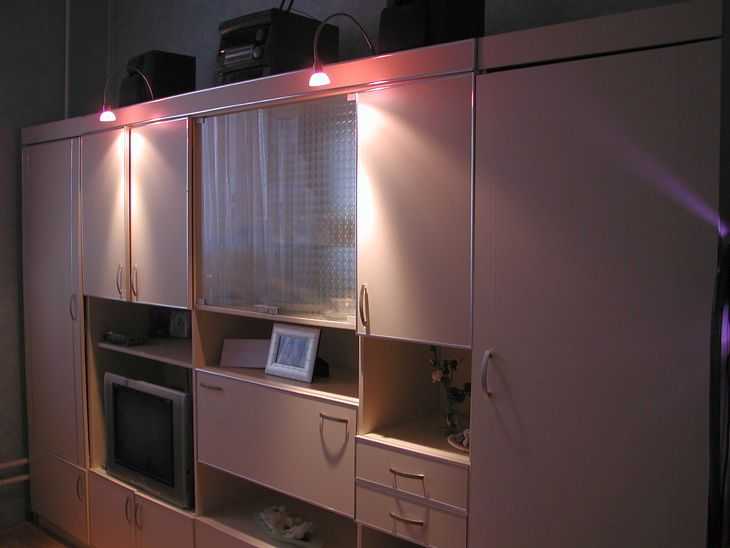
The updated wall looks magical when illuminated
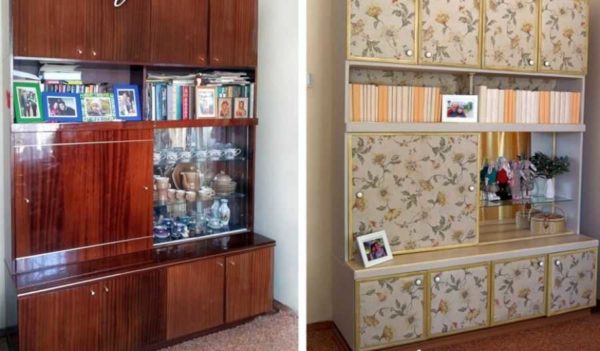
For example, after a successful experiment with a wall, the old cabinet was remade in the same way and added to the right. The entire wall is now occupied. Similarly, you can update the kitchen set: glue the self-adhesive film and replace the handles.
There is a second way. It is a modification of the proposed method, but simpler and not so laborious. Only the doors are pasted over and not with foil, but with wallpaper on a non-woven base. Wallpaper is glued on PVA glue. To prevent the edges from tearing, the parts are cut 5 mm less on all sides. It turns out a kind of edging. Everything looks good (example in the photo below).
Simple alteration of the old wall of the Soviet era: glue suitable non-woven wallpaper on the doors
Why this method is good: it is easy to change the decor. Tired of the old look, cut off the wallpaper, pasted on the new one. Despite the fact that the method seems frivolous, the appearance persists for several years. Its author even tried it on a kitchen set. Only the top is covered twice with PVA glue. In this case, the cabinets can be washed. It is important to apply a layer of varnish evenly, without sagging, there are no other difficulties.
Sometimes the wallpaper is varnished. But before you do this, try to do it on the unnecessary piece: see how they react to it.
When choosing a varnish, you need to remember that acrylic and cellulose varnishes remain transparent after drying, polyurethane ones turn yellow over time. Also, polyurethane almost does not soften with solvents: it can only be removed mechanically (from wood - cleaned with sandpaper).
You may be interested in reading how to make a bar counter in the kitchen yourself (several options)
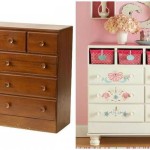
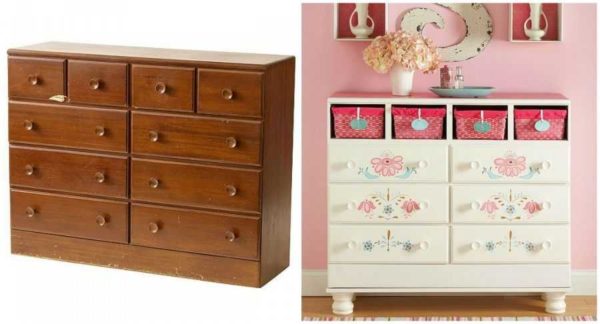
Dresser update
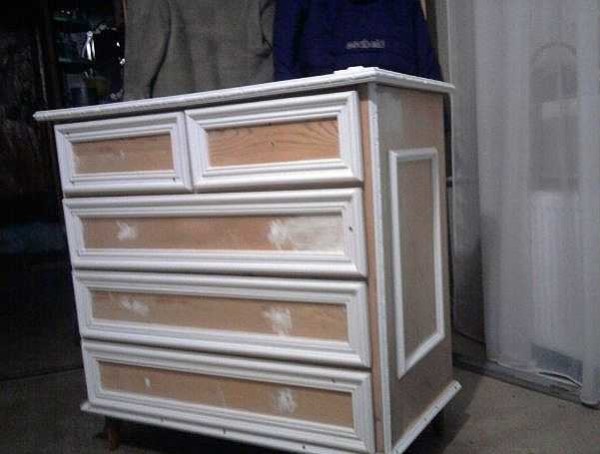
The old chest of drawers stood for an unknown number of years in the attic, but it is very strong and reliable, not a single gram of cracked, only the polish is cracked. In terms of strength, it is much superior to modern products. This is a feature that is inherent in old, still Soviet times, furniture. It is not very detailed (to put it mildly), but after standing for several decades in poor conditions, it remains strong. Alteration of the chest of drawers is more complex: two techniques were used: painting, and then decorating using polyurethane moldings and wallpaper.
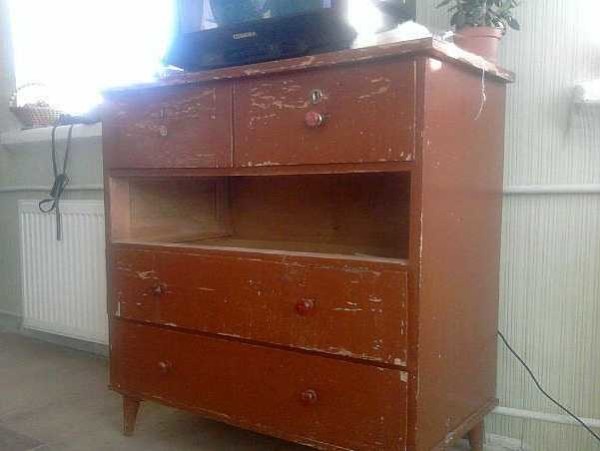
This is what it was at the beginning: an old thing that has been gathering dust for a long time in the attic
Step 1. We remove the fittings, remove the old coating. In places, the polishing was scraped, in places it was sanded with sandpaper. Chips were covered with putty on wood, waited until it dries. At the final stage, everything was sanded with fine grain sandpaper. At the same time, the chest of drawers is steel as in the photo below.
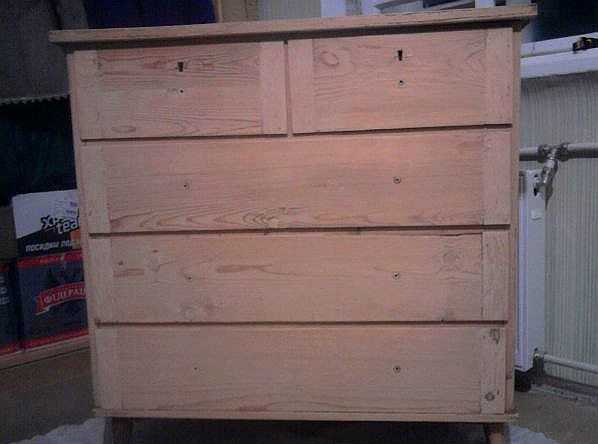
This is after it was putty and leveled with sandpaper
Step 2... Installation of polyurethane moldings. When choosing moldings, make sure they are not bulky: too thick on a small chest of drawers will look very rough. They should be no wider than 5 cm and as narrow as possible when viewed in profile.
Purchased polyurethane moldings are neatly cut, the corners are sawn at 45 °. (How to properly file the corners of moldings read here). The pattern must match perfectly. We glue them on PVA. For reliability, it can be additionally fixed to self-tapping screws with wide heads. A small depression is made under them, after the self-tapping screw is screwed in, the hole is covered with putty. Try to make the putty lay down perfectly right away (you can touch up with a wet finger), since it is problematic to clean off the dried one.
The moldings are glued and set on self-tapping screws
Step 3. Everything is treated with a primer. You can use PVA glue diluted with water in a ratio of 1: 2. After the primer is dry, paint (two layers). For this case, water-based acrylic paint was chosen. The color is coffee with milk, although it looks very different in the photo. Color reproduction is inaccurate.
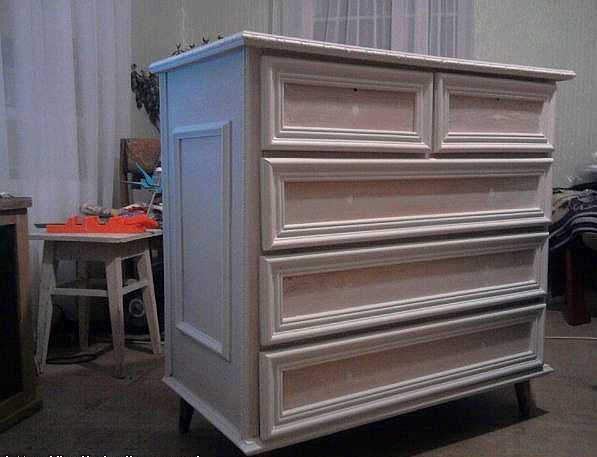
This is after the second paint application. Pretty
Step 4. For decoration, we chose wallpaper with a covering made using the silk-screen printing technique. Pieces are cut to the size of the inner part of the frames from moldings, glued to PVA. After the glue has dried, the entire dresser is twice covered with water-based varnish.
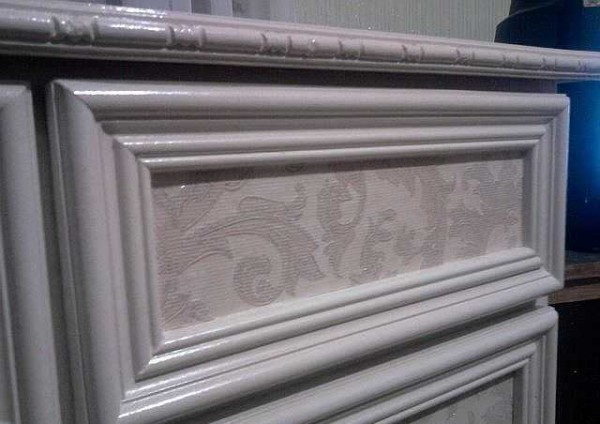
Here is a decor for a dresser
Step 5. And the last to be installed are new legs (furniture wheels) and handles.
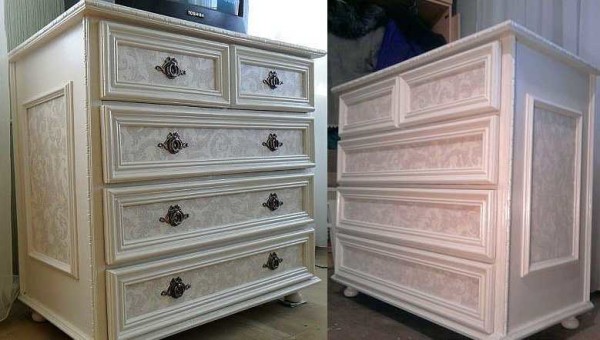
We install handles and legs)) The updated chest of drawers is not at all like the one you saw in the first photo.
As you can see, there are no complicated jobs. Everything is really elementary. But all processes require accuracy - the appearance depends on it. You can also update the old wardrobe in the same way. You get a kit for the room. Stylish and original.
When renovating furniture, it is worst of all if the surface is varnished. It takes a long and difficult time to clean off the varnish. If the surface is smooth and the polish is intact, you can apply a primer for difficult surfaces and paint after drying. This greatly speeds up the process of painting lacquered furniture.
If you have children and a summer cottage or yard, you may be interested in reading how to make a playground with a lot of photos. And about making a sandbox can be found here.
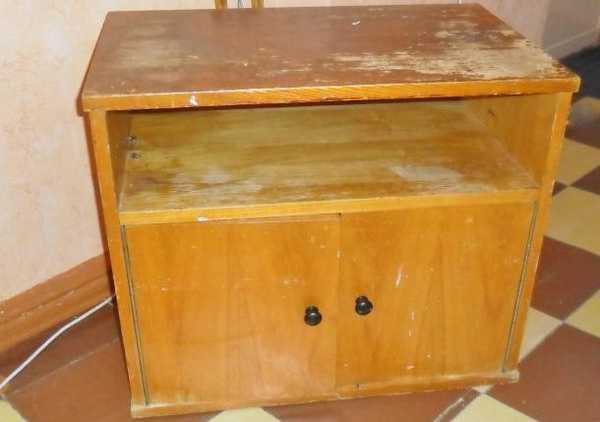
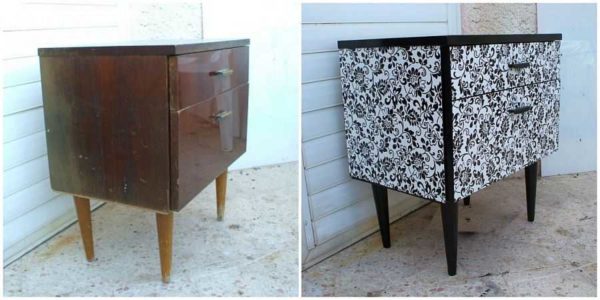
How to update an old nightstand
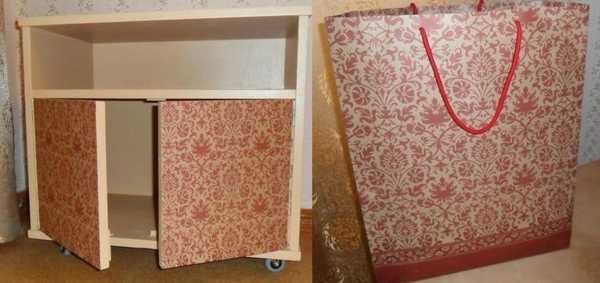
In the photo gallery below, you can see the restoration of an old polished bedside table. First, the old polish was removed from it, putty, sanded and after processing it was painted twice with acrylic paint. Then paper with an interesting pattern was glued to the doors (it was a gift paper bag). After drying, the whole was covered with two coats of semi-gloss acrylic varnish.
The sequence of work is simple, if you know how to do it. All processes will repeat the sequence of actions that you saw on the example of updating the dresser. The result is impressive too.
More about how to restore furniture (how to remove varnish from the surface) read here.
-
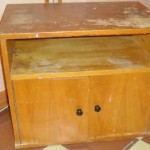
- This is an old bedside table. We will limit it
-
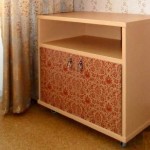
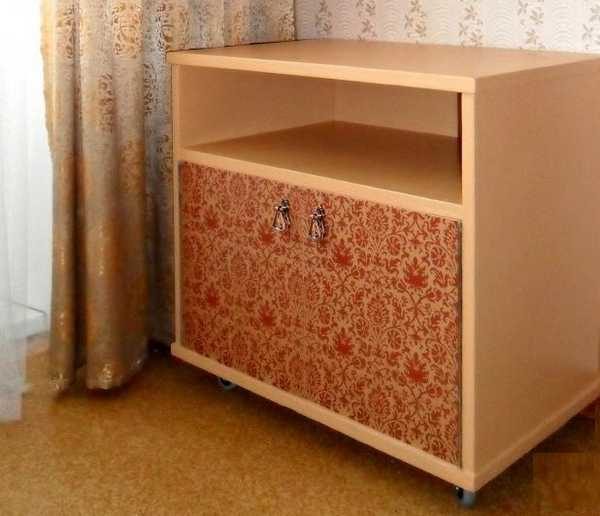
- This is the result of the update: the bedside table has changed
-

- After the varnish was removed (the grinder helped to cope faster), they covered it with a layer of putty, repairing chips and cracks, then sanded to smoothness

-
- The surface, brought to a normal state, was covered with primer, then painted twice with acrylic paint
-
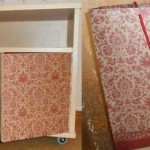
- This package made a great decor for the derets
Do-it-yourself furniture alteration is painstaking, but the result is worth it. Below is a photo of a bedside table restored using a simple technique: it is pasted over with embossed wallpaper, and varnish is applied twice on top.
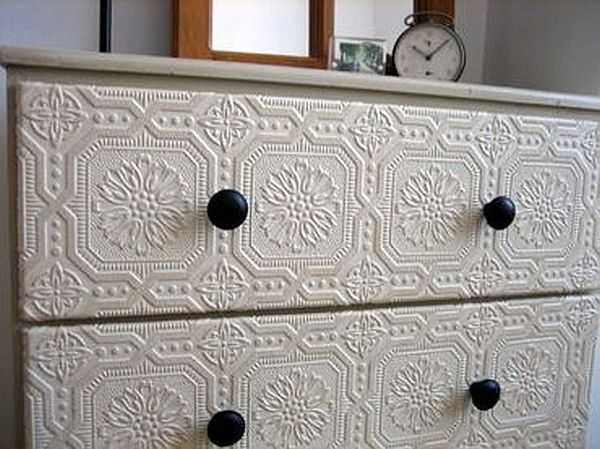
You can glue the embossed wallpaper, and to get dirty, cover it twice with a layer of transparent varnish
how you can read about making a table fountain here.
Redesigning the table
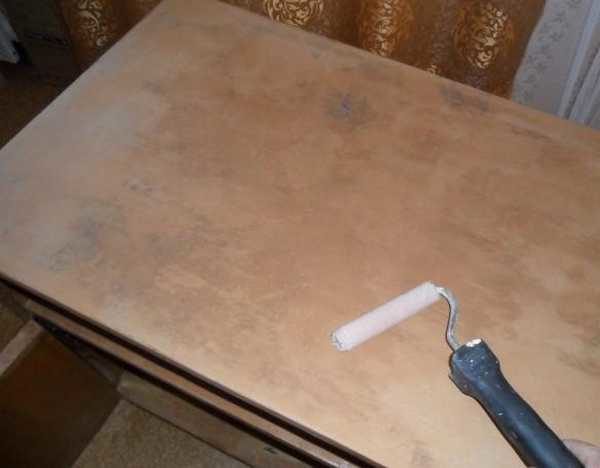
Using the same technology, a banal coffee table can be turned into a modern piece of furniture. In this case, wrapping paper was pasted over it. It is dense, adheres well and does not sag when applying varnish.
Before starting work on the decoration of the table top, the legs of the old table and the edges of the table top were painted in a light color: this way it suits the new design style more. Then the process of its transformation began.
When pasting, the panel is cut out much more than the dimensions of the tabletop. It is so necessary. The paper is glued on PVA, rolled with a roller so that there are no lumps and swellings. The surface must be absolutely smooth.
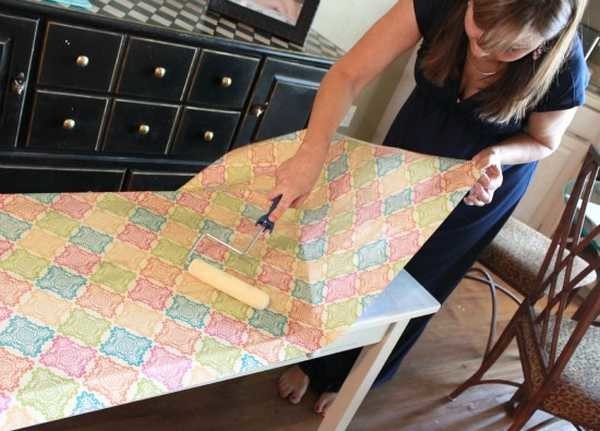
The paper is glued gradually, roll it with a roller so that there are no bubbles
After they have been glued, they take sandpaper with a fine grain (it is more convenient to work if it is attached to the bar). Passing it along the edge, fold it over and at the same time separate the excess paper.
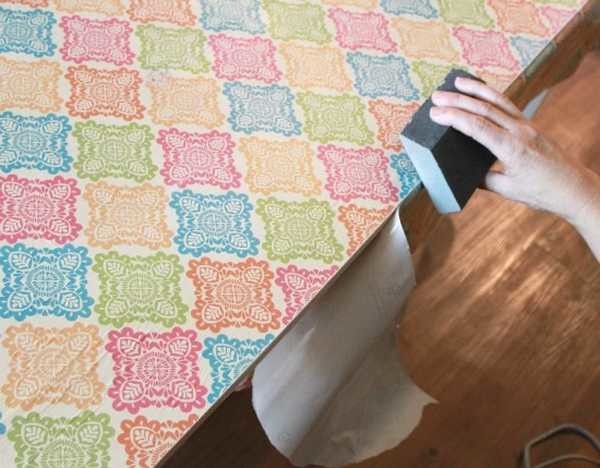
How to make a beautiful edge
Even with a guillotine cut, you will not get a sufficiently straight edge. And with this method, it turns out to be professionally decorated. It doesn't smell like amateur performance.
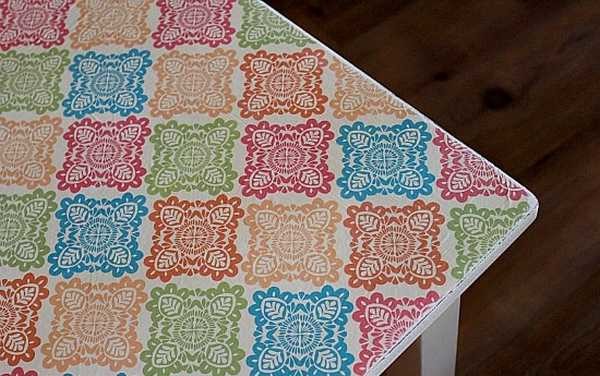
This is what the edge looks like when all the excess has been removed.
After the glue has dried, the surface is covered twice with a thin layer of varnish. You need to apply it with a soft brush in a small amount. The layers are applied in different directions: first along the long side, then across.
What are shelves and DIY drawings can be found in this article.
Alteration of furniture: photo ideas
-
- Magic transformation of an old boring shelf
-
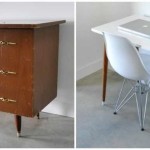
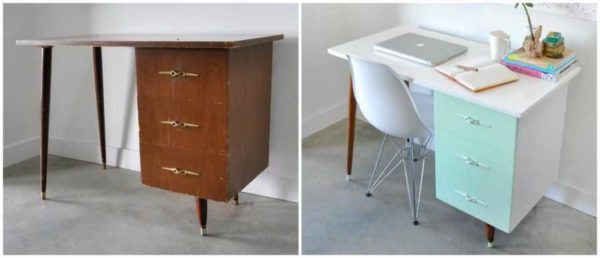
- Redesign of the desk: new design and a completely different look
-
- Another bedside table. When decorating it, contrasting wallpapers with a contrasting pattern were used
-
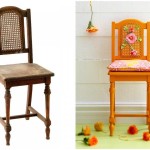
- Alteration of an old chair
-
- Chest of drawers decorated with floral designs
-
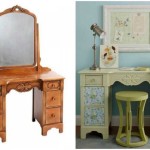
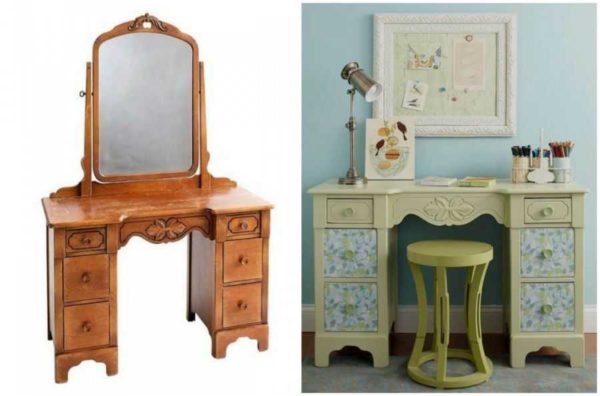
- An old dressing table made an excellent desk
-
- Refurbishment of chipboard furniture: the wall has acquired a modern look
Do-it-yourself furniture alteration is a creative business. Even from boring shelves you can do a great thing. And it is not at all necessary to repeat exactly what you saw. Many useful ideas come during the execution of a "project". The only pity is that some of the plans are not as attractive as they seemed. Try it, experiment. Fortunately, modern technologies make it possible to do this at minimal cost.


I liked it very much. Beautifully and quickly, cheap!
Thank you for rating))
In one article, I found all the alterations that are needed. Thanks to the author! Available, great photos, I'll try to start from the bookshelf.
Thank you for your feedback. If you find something new from the techniques for updating old furniture, share it if it's not difficult. Something new is not found yet ((
White chest of drawers - above all praise! Let's embody the idea at home. Thanks for the tip!
I have been looking for information for a long time: how to update polished furniture. The advice to remove the varnish mechanically or with a blowtorch made the desire to restore the furniture numb. Thank you for your advice, saving both effort and money, and most importantly time.
Very urgent. What wallpaper? Furniture or wall-mounted? That is, self-adhesive or not?
Thank you! Everything is very affordable! I'm going to remodel the wardrobe from the wall, and the desk. Tell me, will non-woven wallpaper, wallpaper on a varnished surface, sit normally on PVA glue?
Thanks for your feedback. We are trying ... And the wallpaper will stick well, though not firmly. But you probably don't need it.
I can't find any advice on restoring chipboard furniture (grandmother's sideboard of the 60s), in which the board itself is peeling. I understand that this is much more difficult than surface restoration, but still? Maybe there are such technologies?
Delight, full of delight! In a white chest of drawers I found food for creativity. Gracefully, with dignity, with taste! And the bedside table is embossed in the style of tiles! Thanks for the ideas - the wall is very nice too.
I plan to embody a hybrid of three ideas with my own notion :) - I just couldn't find a ready-made solution to fit the interior. And then you can remake the existing one - shine! The thought hovered around this topic, but could not form in any way.
The only question remains, why iron the glued film with an iron? Although, recently I heard that the modern film keeps bad - is that the case? Many years ago, kitchen furniture was pasted over, a set turned out, nothing was ironed with an iron, it has been holding for 20 years already. And, if ironed with an iron, the film glued to the polymer varnish will be removed later?
Thank you!
The Chinese inexpensive film does not hold well. And ironing is not necessary. They do this for a tighter fit, especially in places of folds, or if the film is dense, glued at a low temperature. If your restored furniture looks perfect without it, you can do it without an iron))
Hello) I wanted to make a crib out of an old locked sideboard there is an idea, but the question is whether my husband will help with this) if we start doing everything step by step in the photo, I will send you ideas interesting and you liked everything very much.
I was very inspired by your article. I want to convert an old lacquered sideboard into a children's bed. Let's start taking all the detailed photos I will send to you.