How to build a house from a bar: technology + photo report + video
The decision to build a house from a bar is not made immediately and not suddenly. It's just that this technology, with a simpler assembly of walls, allows you to get excellent characteristics for housing: for the Moscow region, a 195 mm thick bar is enough. With such a thickness of the outer walls, it will be warm, but to save on heating it is better to insulate it (outside with 10 mm of mineral wool) and make a reclaimable facade. Then there will also be savings on heating.
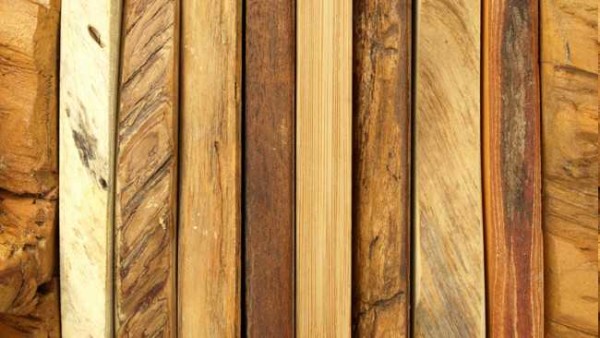
Plasticity in processing is one of the advantages of wood
The content of the article
Which wood to choose
For the construction of a house, coniferous wood is usually used. There are several reasons. First, the high content of resins, which are natural preservatives and antiseptics. Due to their presence, wood is not destroyed for a long time. Secondly, the affordable price. You can, of course, build a house from beech or oak timber, but the price will be simply exorbitant. Thirdly, the wood is soft and easy to process.
Of all the conifers, most often they put a house from a pine bar. With good performance, it is relatively inexpensive. Houses made of larch and cedar are rarely installed: they are too expensive. Spruce is even less common, but for a different reason: it is destroyed the fastest of all, and even difficult to process. So with regard to the type of wood, there is actually no choice. 95% is pine. But it is necessary to understand the type of timber.
By the method of processing, the timber can be:
- Plain or solid, non-planed timber. Sawed out of a solid log, the section is a quadrangle (square or rectangle).
- Profiled timber. It is also cut out from a solid log, but after that it is processed: spikes and grooves are formed by cutters - profiles, with the help of which one bar is joined to another. The side faces are also processed. They come out of the machine already planed. Section - complex shape. The side faces can be smooth, rounded, curly - with chamfers, the shape of the "lock" - numerous barbs and grooves.
- Glued laminated timber. Outwardly similar to profiled, but assembled (glued) from several boards.
Let's analyze the features of each type of timber, regarding the construction of a house.
House made of ordinary timber
If earlier they said that they decided to build a house from a bar, then they definitely understood an ordinary rectangular bar. There was simply no other, or it was too expensive: it was brought from abroad. Ordinary timber is the most affordable price per cubic meter. But, as a result of all the required measures, the cost of construction may turn out to be higher than from the profiled one. It's all about the features of the material. They lead to significant additional costs even at the construction stage: when building a house from unplaned timber, a mezhventsovy heater is necessarily used. Its geometry is imperfect, and if this is not done, blowing through the gaps between the crowns will be sooooo strong. The second feature is that the surface of the walls turns out to be uneven and you cannot do without finishing inside and out.
This is what a regular timber looks like.
In addition to laying the inter-crown layer, the delivered log house is caulked, additionally sealing the seams. Caulking is needed not one, but at least two, sometimes more. And all because it is made from wood of natural moisture. In practice, this has the following consequences:
- A folded house must stand for a long time without finishing. The desired holding time is about two years. Moreover, the roof is not installed for the first year or a rafter system is erected, covered with a membrane and left in this form. In the second year, roofing material is laid.During this time, the wood will dry out, the walls will "sit down" and you can start finishing work.
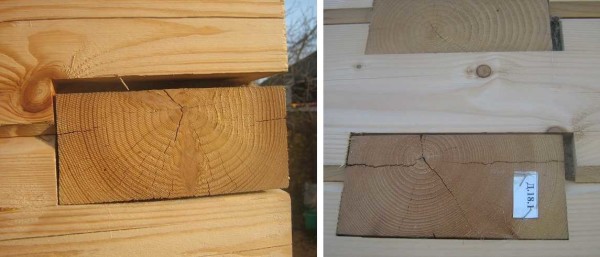
- When dry, the timber of natural moisture cracks strongly. Sometimes very deep and wide cracks are formed, which then also have to be caulked. In the worst case, end-to-end may appear. There is also one more nuisance: the timber can "lead": twist in some direction. All these processes are natural for wood, but they must be borne in mind.
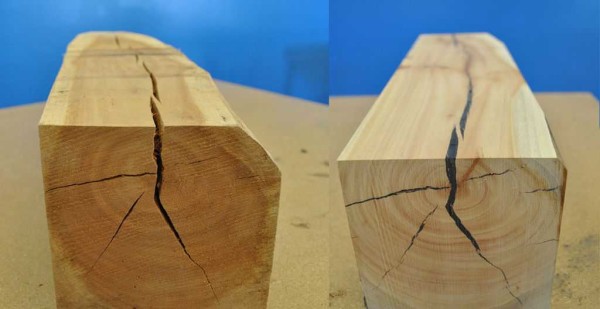
The cracks can be deep
- Lumber of natural moisture is highly susceptible to rotting and blue discoloration. During delivery, the wood darkening process may begin. Therefore, the timber must be folded into ventilated piles, and linings must be laid under the lower rows. In addition, before laying in a blockhouse, wood must be treated with protective impregnations (antiseptics) and fire retardants. It is necessary for all wood, it is just that high humidity places high demands on the quality of processing.
Another feature of a house made of ordinary timber: the walls are uneven. To give them a "decent" look, they are either sheathed with finishing materials or polished. But grinding is a controversial undertaking: the inter-lead seal makes it almost impossible. Even if you manage to grind the timber, what to do with the seams?
So it turns out that the cost of the house as a result may be higher: add to the cost of the timber an inter-crown insulation, caulking material and the work itself (and it is not cheap), the cost of external and internal finishing. Please also note that moldings are brought to your site - bars of the ordered length. The bowls are cut out on the spot. This means that the qualifications of the carpenters must be high. How warm the corners will be depends on how the cut is made. And in a log house, it is the corners that are the most problematic place.
Read about the technical features of finishing a wooden house here.
Features of the profiled bar
Considering the profiled timber, the first thing that catches your eye is the almost perfect geometry and smooth surfaces. In any case, it should be so. With good workmanship, finishing is not needed: the wall immediately turns out to be even and smooth, even if immediately for painting.
The second, also quite obvious feature, is due to the fact that the edges that join two profiled beams have recesses and protrusions (locks) of through slots cannot be. Producers of profiled beams say that walls can be laid without inter-row insulation: it will be warm anyway. But few listen to them. They put at least thin, but insulation. Someone uses a thin substrate under the laminate, someone uses self-expanding tape for mounting plastic windows, as well as jute tape and similar materials.
Laminate backing is laid between the timber
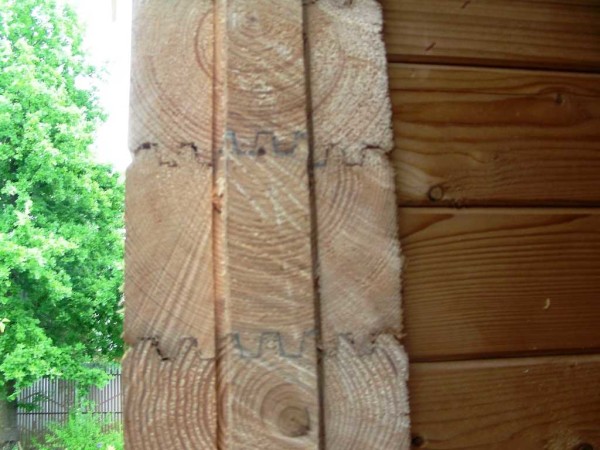
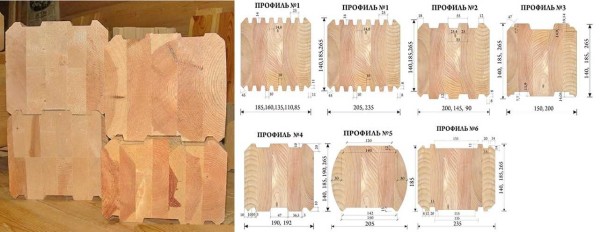
In the photo, by the way, the most widespread profile among developers lately is “comb”. It can have a "tooth" of different heights and widths, and is loved by everyone because, in theory, it is impossible to "blow" it. Nevertheless, here they are insured by laying insulation.

Several typical timber profiles (the two extreme ones on the right in the picture are glued timber, but the same profile is made from the solid wood)
In general, there are a lot of profiles. Some of them are in the photo. When choosing a supplier, it is necessary to pay attention not only to the shape of the locks, but also to how they are made. The match in any pair should be maximum.
Having made the decision to build a house from a bar with a profile, you need to determine its moisture content. Profiled timber can be of natural moisture (cheaper), sometimes it is chamber drying with a moisture content of no more than 14-16%. The features of lumber of natural moisture have already been considered, now let's talk about chamber drying. The company installs large drying ovens into which ready-made profiled timber is loaded. There, in conditions of high temperatures, it loses excess moisture.At the same time, all processes occur in the chamber that usually accompany the drying of wood: it bursts, it twists. Accordingly, part of it goes to waste, and the rest is sold at a higher price. The reasons seem to be clear.
If you decide to build a house from a kiln-dried bar, you can start finishing earlier. The blockhouse must still stand, but it will take 9-12 months. At the same time, new cracks rarely form, only existing ones expand. But it should be borne in mind that due to the high costs of drying, most often they only reduce the humidity to operational - 16-18%, while wood is considered to be 8-12% for chamber drying.
In any case, gaps will need to be sealed. Caulking is needed in very limited quantities: first of all, you will have to look through all the corners and cuts, if any (this is the name of the attachment points of the walls). Even a well-made bowl can dry out unevenly when it comes to gaps. Also, the timber can be turned out, which will also lead to the appearance or expansion of the gap. So periodic revision of the corners is also required during operation. Wood is a living material, and something will change all the time. Also, after a year of sludge, too large cracks in the timber will have to be repaired (without fanaticism, so that the tow does not open the crack).
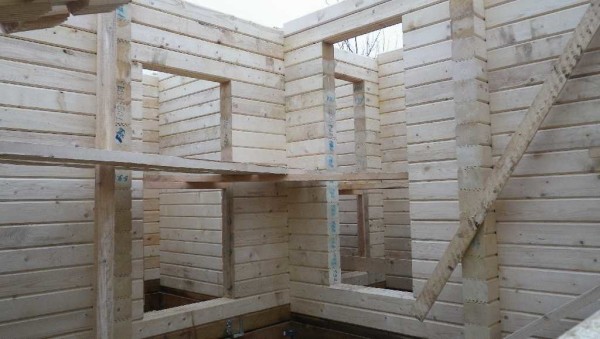
The blockhouse is assembled from numbered blanks with a molded bowl (numbers in blue at the ends)
It may be easier with the assembly. If you just order lumber, you can cut corners from a profiled bar, as from a usual one, on the site. But many enterprises, if there is a project, offer to take on part of the work. With the help of a special program, they make a layout on the timber: they make a list of "spare parts" from which the house will be assembled. Then, according to this list, blanks are cut, and with molded thickets. The blanks are numbered and brought ready-made to the site, where it remains to fold the house, like a designer: folding the bars according to the numbers marked on the plan.
This is convenient, especially if you are going to build a house with your own hands without construction experience. It is clear that the service is not free, but you can save on paying for carpenters: assembling such a highly qualified designer is not required. Only in this case, whether your home will be warm or not depends on how exactly the bowls are made in the production. Sometimes there are firms that make very low-quality cuts. You can see several of these in the photo.
Poorly made bowls - the blowing will be incredible, and caulking will badly save
In general, there are disadvantages and advantages, but compared to a conventional bar, a profiled one is more convenient in construction, and at a price it can also come out cheaper if you count with finishing.
Read about the features of laying wiring in wooden houses here.
Glued laminated timber
As the name suggests, it consists of glued parts. First, lamellas are cut out, they are treated with antiseptics, dried to a certain humidity, and then glued. Due to the complex manufacturing process, the price tag of this material is about 2.5-3 times higher than that of a conventional material and 80-90% higher than that of a profiled one.
What are its advantages? Correctly made, it does not crack, does not lead to it: dry material cannot have shrinkage, and glued beads should have a moisture content of no higher than 12-15%. Therefore, the finishing process, with a beam width sufficient to compensate for heat loss, can only be used for painting or varnishing, since protective impregnation is also carried out at the enterprise (it should, in any case).
How glued laminated timber and its profiles look like
Another consequence of the lack of shrinkage is that the folded log house can be immediately put under the roof after a few weeks, and after a few more weeks, you can start finishing. This time is necessary for the bowls to shrink, and the geometric dimensions of the laminated veneer lumber should not change. That is, a significant time saving is obtained - everything, including finishing work, can be done in one season.
But is glued bead so good? In terms of construction speed, yes. But it has serious drawbacks. First: it is glued. This negates one of the main advantages of wood - environmental friendliness. Second, it has low vapor permeability. Many people put up wooden houses precisely because of their ability to naturally regulate indoor humidity. Glued laminated timber is deprived of this due to the presence of layers of glue. Of all the advantages of wood, only an attractive appearance remains, but aerated concrete house, trimmed with clapboard of the corresponding profile or block house, looks exactly the same. Therefore, the use of glued beams for building a house is a very controversial issue.
The development of the design of a wooden house is described here.
Stages of building a house from a bar
A log house has several advantages:
- The walls are lightweight, which is why the load on the foundation is low, which means that the costs of its construction will be lower.
- Wood is an elastic material and it compensates for small movements of the foundation without compromising the integrity of the building. And this, again, allows making shallow foundations on well-draining soils.
The choice of the type of foundation depends largely on the soil, but most often they do strip foundation, if there is no need for a basement, you can put a columnar one (for small buildings of temporary residence - summer cottages, baths, etc.) or pile (with grillage or without). The choice should preferably be based on the results of geological studies. The process is described in more detail here.
While the foundation is "seized", prepare the wood. All timber and dowels are treated with antiseptics and fire retardants. Compositions are used that do not form a film on the surface of the log. They will not interfere with the drying process. After the preparation of the timber, the actual construction of the house begins:
- Cut-off waterproofing. To prevent the wood from the foundation from pulling moisture, it is necessary to lay a layer of hydrophobic material. Previously, two layers of roofing material were laid under the first crown. Today there are more modern materials - coating and roll. You can use them, and in combination: coat, stick roll.
- Laying the flap. The beam is chosen without signs of blue, with a minimum number of knots. Desirable - from the middle part of the tree - with the maximum density of annual rings. It is additionally treated with impregnations intended for wood in direct contact with the ground. In order to ensure the best preservation of the first crown, there is a trick: a wide board impregnated with bitumen mastic with working off is laid on the waterproofing. Another layer of waterproofing is placed on it, and on top is already the first crown. All these layers are connected to the foundation by pins, which are embedded in the foundation.
- Rough floor. Floor logs are attached to the first crown - a bar with a section of 150 * 100 mm. They are laid with a step of at least 70 cm. To make it more convenient to work, boards of the subfloor are laid out on the logs, without nailing them.
- Assembly of walls from a bar. If a wall kit with ready-made bowls is not ordered, they are "slaughtered". Saw out the pattern. A template is drawn from a piece of plywood, outlined, then cut out. A chainsaw is used more often, but a fairly high degree of tool ownership is required: how warm the house will be depends on the accuracy of the saw. The joint shapes of the timber are shown in the picture.
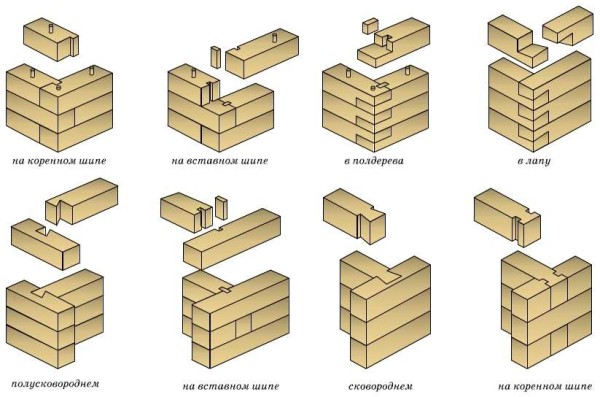
Methods for joining timber
We have already spoken about laying the mezhventsovy insulation: when using a regular bar, it is mandatory, under profiled - it is desirable in bowls, the rest is optional. The crowns are interconnected by pins - long round bars carved from a solid piece of wood, dowels - rectangular or hairpins - metal rods. In any case, a hole is drilled under the connection into which the connecting element is hammered.
- Assembling the rafter system. The order of work depends on the type of roof chosen. When the device is idle gable roofinstall rafter legs, with the device of the attic floor the order is different. The windproof membrane is rolled out and fixed onto the assembled rafter system. In this form, the house is left for a long time to dry out.
- Door and window openings. For speedy shrinkage and shrinkage, you can cut out window and door openings, put a window or fixing strips. Door and window blocks are not placed until the end of the main shrinkage.
After a year or two, you can start finishing work. All the time, while the frame is being settled, it is necessary to monitor the processes taking place in the wood. It is immediately necessary to inspect the corners and, if necessary, drill them. Then monitor their condition, as well as the joints of the bar. If the pins were driven in with great effort, during shrinkage, the timber may hang on them, which causes cracks to form. You can solve the problem by rambling around: they take a huge wooden hammer and knock on the walls, causing faster shrinkage. The same technique is used if the house sits down too slowly.
The video shows the main steps on how to build a house from a bar. Despite the lyrical digressions, there is a lot of valuable information.
How to build a house from a bar: photo report
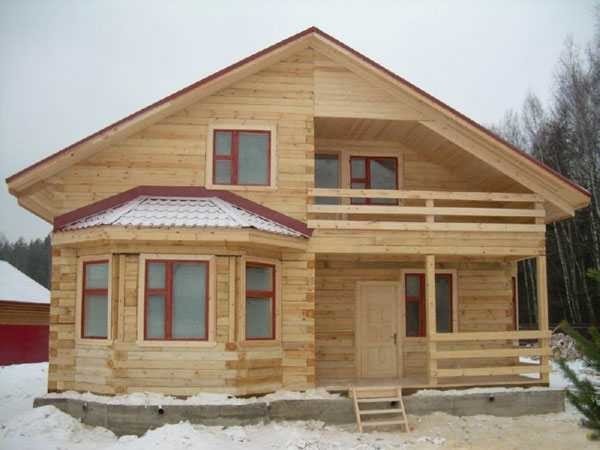
They built such a house.

Almost ready
We ordered a wall kit according to the project, a strip foundation was poured under it.
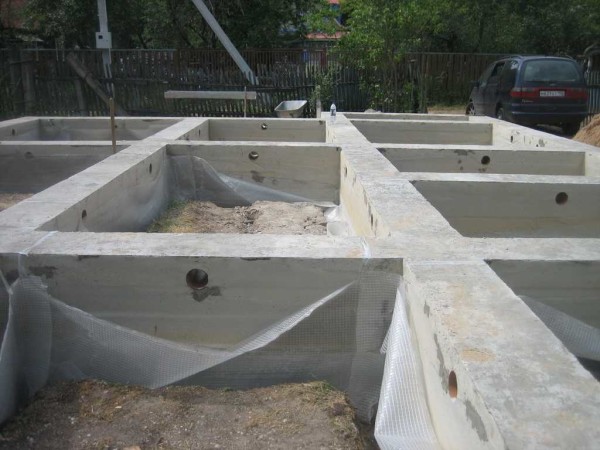
Finished foundation with air vents
They brought blanks with washed down bowls. They were carefully unloaded, while inspecting for flaws. One beam turned out to be problematic - it was in the middle of the ligament and suffocated - it became covered with a fungus. It was postponed for a separate "treatment". The rest were covered with impregnation (Valti Pohjusta) and piled up.
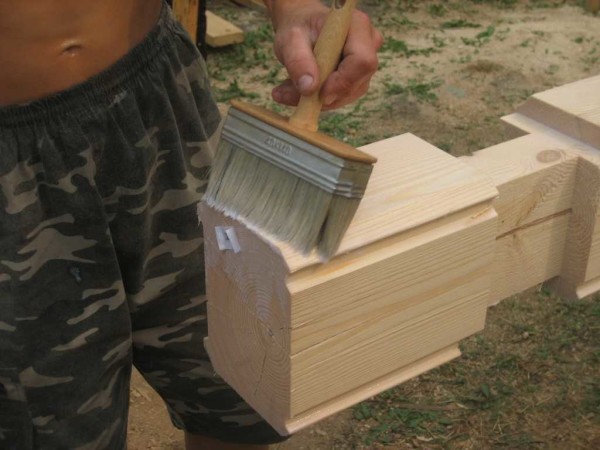
It is more convenient to work with a wide brush
So that there are no problems with the fungus, a gasket is laid under each - boards lying across.
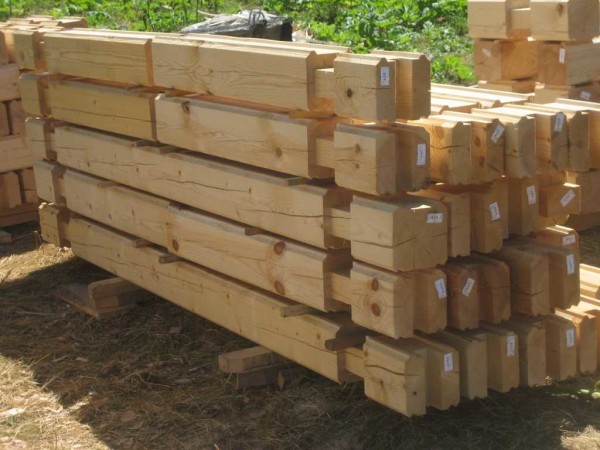
The timber is folded into ventilated piles so that it dries along the way
Also, rolls of insulation and dowels were purchased. Nagels were sent to swim in the impregnation. They poured impregnation into the old bathtub and left them for half a day, then they took out and dried them.
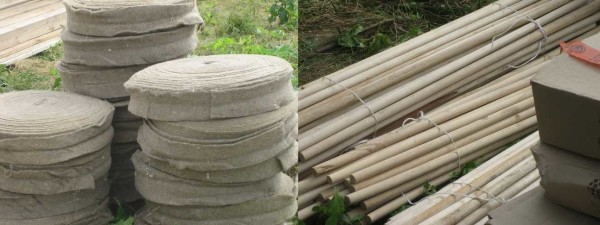
Insulation in bays and pins
The first crown was laid out on the waterproofing laid on the foundation - a half-beam. It has no grooves at the bottom.
Laying and aligning the first crown
It was pulled to the foundation with anchors to studs poured into concrete.
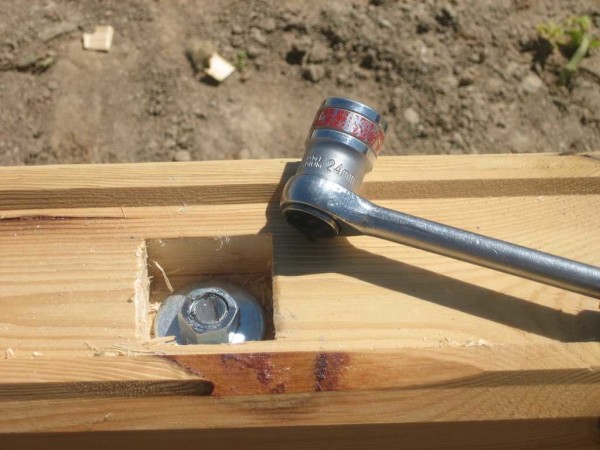
Cut out shallow holes for the nuts
The first crown was laid. The one that was previously fixed on the foundation is often called "zero".
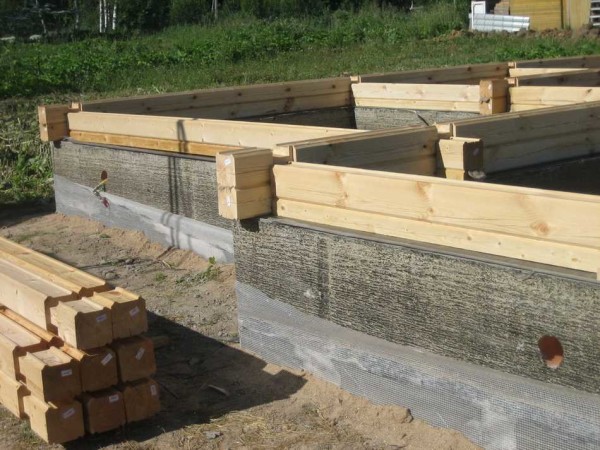
At zero, the first crown is laid
We measure the diagonals. In order for the cups to fit without problems and there is no distortion, they must be equal. Allowable misalignment is a couple of millimeters.
We measure the diagonals, move if necessary
Having aligned the diagonals, we drill holes for the dowels. So that there are no holes larger / smaller than necessary in length, a limiter tree was planted on the drill.
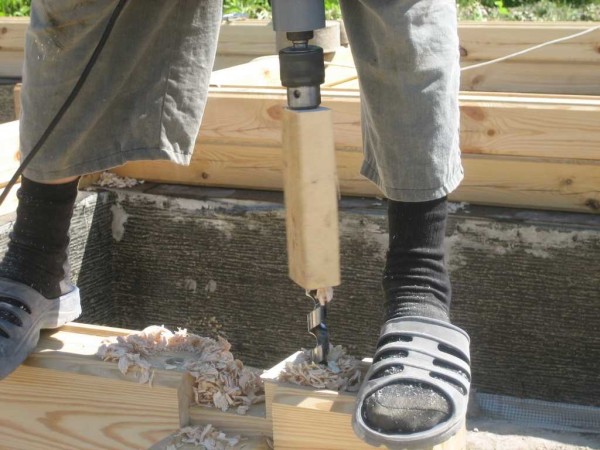
Drill length stop))
We put insulation under the timber, but on the recommendation of the Finns its edges “do not reach” the edge of the timber. So it will not pull moisture from the street.
The insulation is narrower than the timber itself
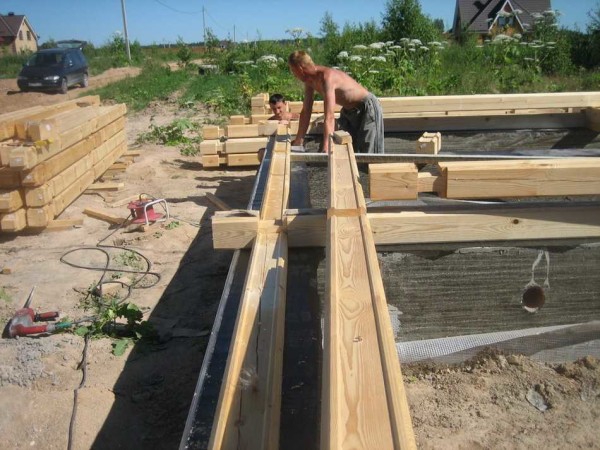
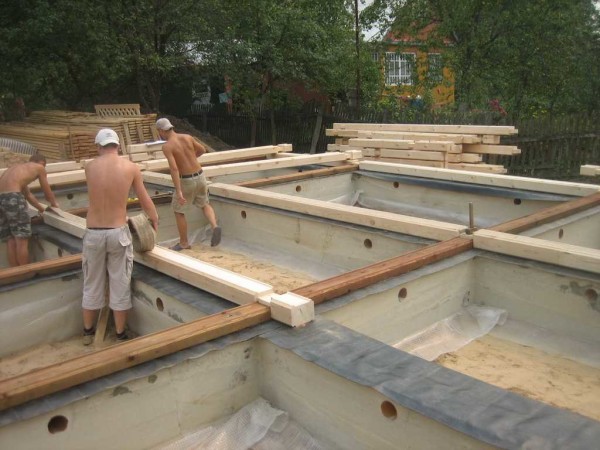
The walls are gradually growing. We fasten them with pins in a checkerboard pattern.
We fold the walls
In general, the timber is more or less normal, but there are problems with incorrectly washed down cups. When laying the timber, we get a huge gap. The fight against this is only to manually adjust the cups so that everything lies flat.

There should be no gaps. One bar should fit on the second without a gap
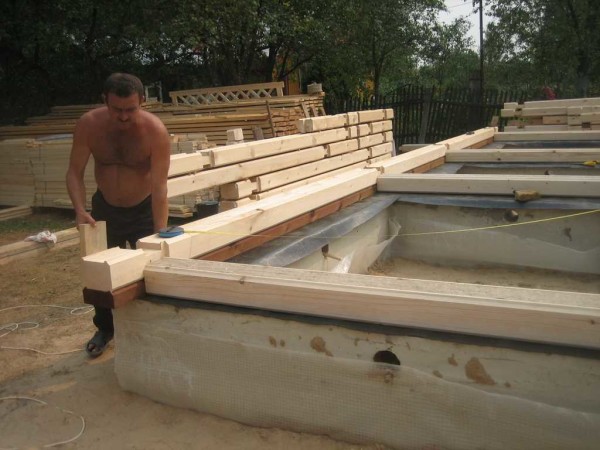
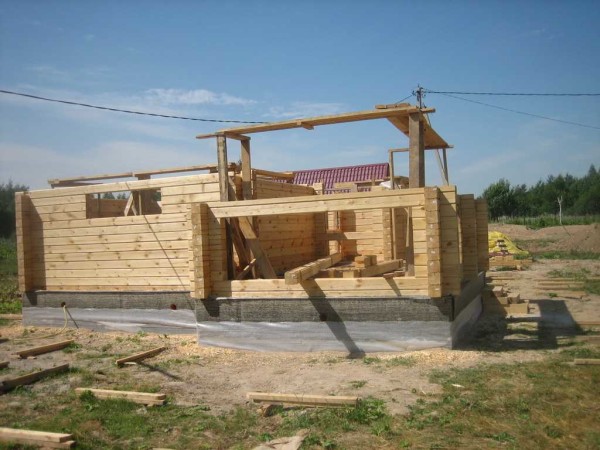
It takes a long time to eliminate these discrepancies, but gradually all the walls are laid out.
Profiled timber walls kicked out
We start assembling the rafter system. First, as is customary, the two extreme farms are installed, then - everything else, according to the project.
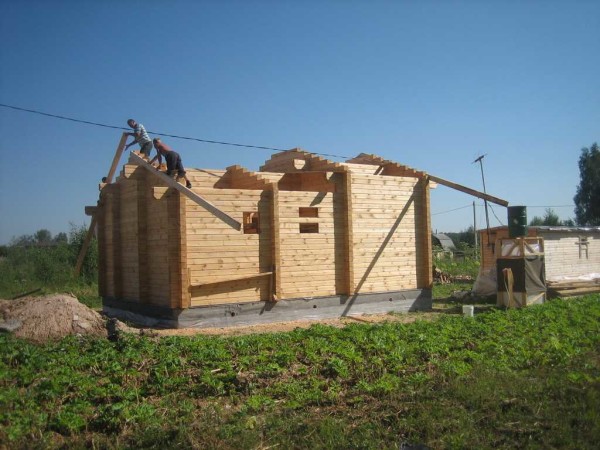
Assembling the rafter system
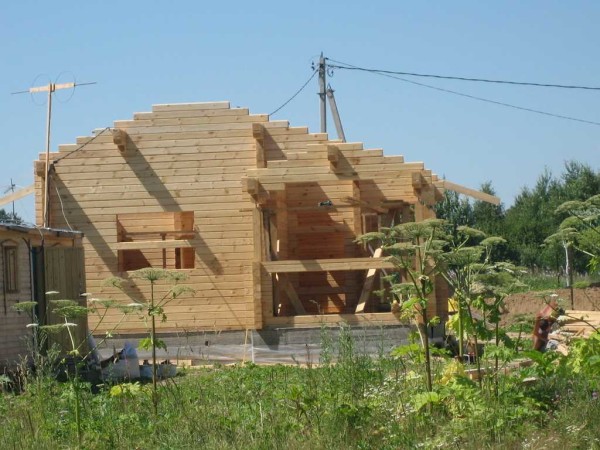
The finished crate was sheathed with roofing felt. So let's leave the house to dry.
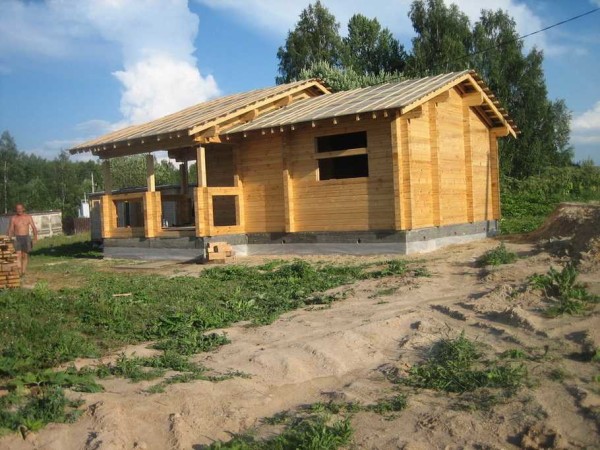
Almost ready
Inside we lay out the boards of the subfloor, nailing every fifth one. They will dry with the house.
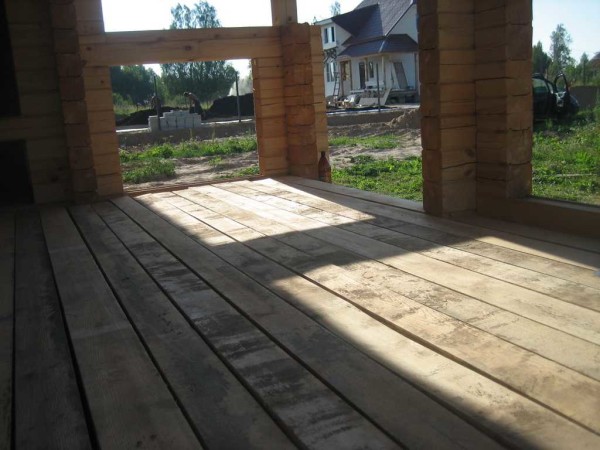
Subfloor just laid
Related Videos
The mistakes that are made when building houses from profiled timber are described in detail and discussed in this video. Very helpful. Take a look.
-
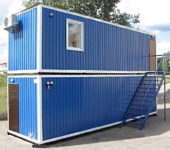 Modular houses from block containers: types, manufacturing features and layout options
-
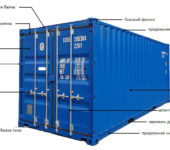 Houses from shipping containers: construction options, layout
-
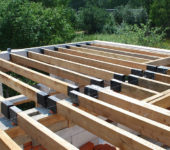 Types of wooden beams for floors, length calculation, installation
-
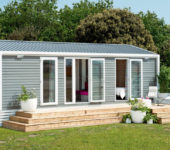 Mobile homes for year-round use
-
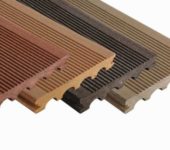 Polymer / composite decking (WPC decking): types, sizes, installation


Thank you so much. Just for the goofy like me. After I got a well-ooooooo problematic everyday life through the company (I had already invested almost its own cost in it), I decided to build a house “by myself” and prepare well. Everything is clear. Ideal. It remains to find those who do a good job with this, and control. control .... Here's another video I'll watch and - hold on, bunglers!
We build a house in the summer, in good weather. I did not notice a particularly strong shrinkage near my house from a bar.