Houses made of aerated concrete and gas silicate blocks: construction features
Aerated concrete and gas silicate are essentially the same material - autoclaved aerated concrete. In Russia, blocks are mainly produced using a mixed binder of cement + lime. We practically do not produce purely silicate concrete. Speaking "gas silicate", as a rule, they mean autoclaved aerated concrete.
Cellular concrete has been used for a long time, but with the development of technology, the scope is expanding. If earlier a house from aerated concrete was built infrequently, today this material is used already in 15-20% of new buildings. They build both summer cottages and capital houses. Everything is explained by the availability of material at a price, good thermal performance, easy and fast installation.
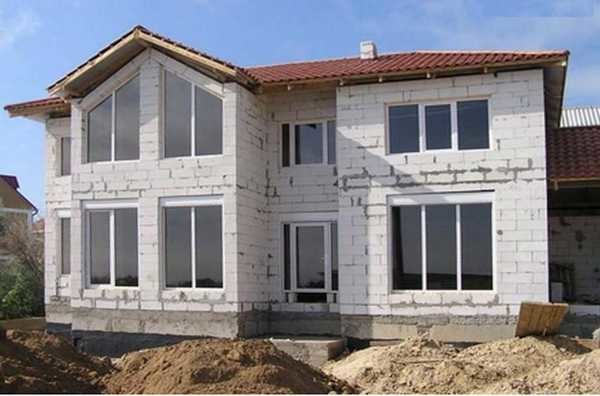
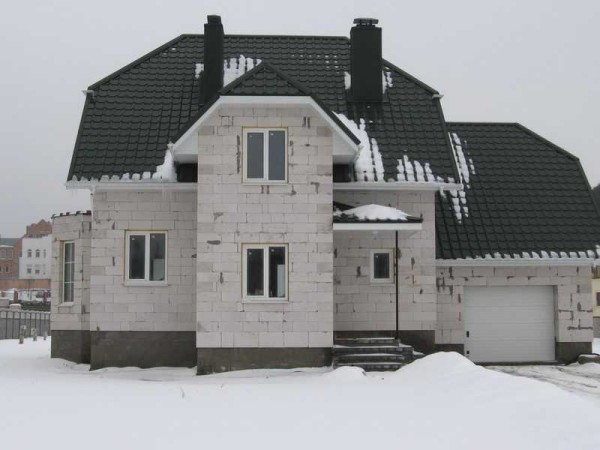
Aerated concrete house is built with a small number of floors: up to 3
The content of the article
The foundation for a house made of foam blocks
As you know, foam concrete blocks are lightweight. On the one hand, this is good: it is easier to work and the foundation for such a building is required with a lower bearing capacity, and, therefore, cheaper. But, on the other hand, when the foundation shifts, the walls due to their low weight cannot "press down" the processes, like a heavier brick, or compensate them like wood. Which means that the requirements for the foundation for an aerated concrete house are increased: even minor miscalculations lead to cracks, which are very expensive to "heal". Therefore, it is better not to save on the project: it will turn out more expensive.
What type of foundation to use
What kind of foundations are made for a house from aerated concrete? On soils that are not prone to heaving, they usually do monolithic strip foundation... The depth is below the level of freezing of the soil and nothing else. By virtue of its design, the tape reinforcement will compensate for all heaving loads that occur.
If the depth of soil freezing is 2 meters or more, the strip foundation becomes too expensive. In this case, when soils with normal bearing capacity lie at this level, they make aerated concrete under the house pile-grillage foundation... In this case, one cannot do without a grillage: it compensates for uneven movements that often occur on the pile foundation: one pile rose more, the other less. Without a grillage, this will lead to cracks, because its device for walls made of this material is mandatory.
What foundation is needed for a house made of aerated concrete is decided depending on the soils on the site
The most expensive, but also the most resistant to damage - foundation in the form of a monolithic slab... It is placed on soils with a low bearing capacity - peat bogs, fine-grained loose sands. It may turn out that it is cheaper than a strip foundation, with a depth of more than 2 meters. In this case, the slab is more expedient if, due to geological features, it is impossible to make a pile foundation.
Precast foundations are not recommended for this type of material. Most of the problems arise with houses made of aerated concrete on foundations made of FBS, building blocks or bricks. Due to the fact that they themselves have a tendency to form cracks, in tandem with aerated concrete this turns into a serious problem: too many and often cracks occur. Therefore, do not use prefabricated foundations.
And once we draw attention to it, only a designer with the results of geological studies of the site can answer with a 100% guarantee what foundation is needed for a house made of aerated concrete.
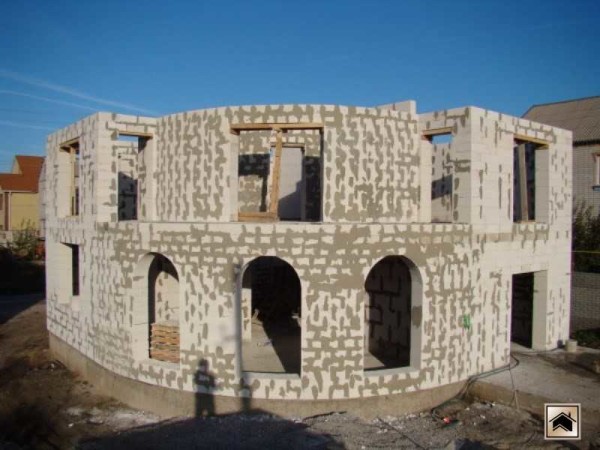
Aerated concrete is easy to process, which allows you to build houses of complex configuration
With or without plinth
Another feature of aerated concrete is its high hygroscopicity. With increasing humidity, it loses its heat-insulating properties, and prolonged exposure to water can lead to partial destruction of the material. Therefore, a house made of aerated concrete is necessarily placed on a plinth, making several layers of cut-off waterproofing. And this is in addition to all measures for waterproofing the foundation, which are also determined by geology and the level of groundwater.
Aerated concrete house: block stacking
It all starts with preparatory activities:
- Checking the horizontal foundation. If there are deviations of more than 30 mm, it must be eliminated. If there are small humps, it is easier to cut them off and fill the holes with mortar. If the surface is too uneven, additional formwork is installed, the surface is poured with concrete and leveled. Just keep in mind that the minimum thickness of the concrete layer is at least 3 cm, and for leveling you need to either add plasticizers that improve spreading, or treat the mortar with a vibrator for concrete. Work can be continued when the concrete gains 50% strength, which is 7-9 days at a temperature of + 20 ° C, and 14-20 days at lower temperatures.
- Cut-off waterproofing is being laid. First, it is coated with bitumen mastic, rolled waterproofing is rolled out on top. And better not roofing material. It is, of course, cheap, but in its modern design it is ineffective and very short-lived. At the junction of the tapes, one over the other goes at least 15 cm.
At the preparatory stage, it is necessary to do everything with maximum diligence. The smoother the base, the easier the laying will go. The importance of waterproofing has already been written: if you want a house made of aerated concrete to be warm, make sure that it is dry.
Rules for laying aerated concrete blocks
On top of the shut-off waterproofing, you can start laying aerated concrete. It is conducted according to the same rules as a brick: with horizontal banding of rows. This means that the vertical seam of the bottom block is overlapped by the body of the block on top. The wall looks more beautiful if the seam is in the middle of the block, but the minimum indent is 10 cm.
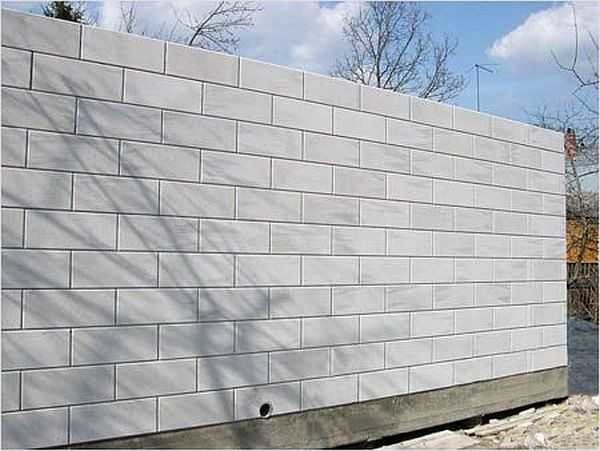
The principle of laying blocks of aerated concrete
For laying gas blocks, special glue is used. It is called that - for aerated concrete. It is applied in a thin layer of 1-2 mm using a special tool - a carriage with a serrated edge. Why is it desirable to lay such a layer? Firstly, the glue is expensive, and secondly, it is a cold bridge, since it has a much higher thermal conductivity than that of the aerated block. Therefore, the specified thickness is optimal: it provides a strong joint and minimal heat loss.
Tool
There are branded carriages for even glue laying. They represent a box into which up to a bucket of mortar is loaded. Laying aerated concrete blocks with your own hands using a carriage is shown in the following video.
Carrying it up and down the walls is a dubious pleasure and is justified only for large volumes, when the whole bucket can be rolled along the wall at one time. Therefore, when self-building an aerated concrete house, they often use simpler devices - small manual carriages (see the photo). As you can see, it looks like a scoop and is easy to make with your own hands from a piece of galvanized steel. The width is equal to the width of your block (exactly up to a millimeter, maybe 1-2 mm less). Cloves are cut along the edge (you can use a grinder), a handle is attached. In principle, you can get by with a trowel and a large notched trowel, but the work will not be so convenient.
The second tool you need is a saw. It also has a special one, but foam concrete is perfectly cut with an ordinary hand saw with a well-sharpened tooth.
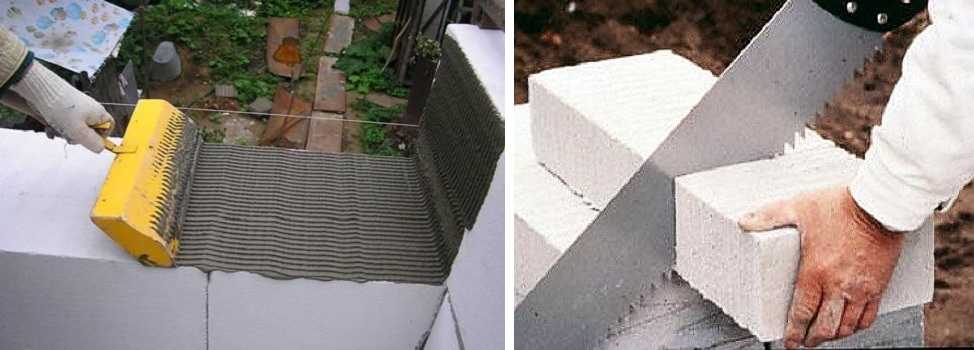
Carriage and Saw - Basic Tools
You also need a device for chiseling. According to the construction technology of aerated concrete, fittings are laid in every 4th row. For these rods, strobes are made in the body of the block. There is a special tool for this - a cutting edge on the handle with a stop for the second hand. You can also do something like this yourself.

Two models of wall chaser for aerated block
You also need devices for transferring blocks. There are blocks with cutouts for the arms, but they are more expensive, and then the voids will have to be sealed with mortar. For the transfer of blocks with straight edges, there are special pliers that work by gravity.
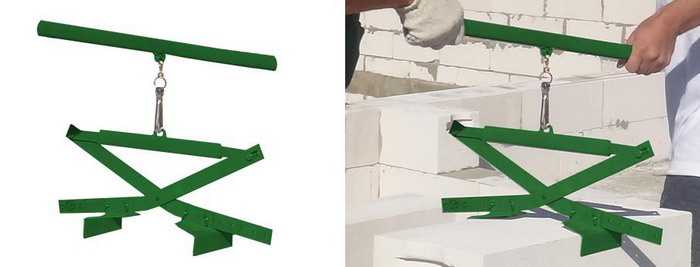
Block transfer device
In addition to all this, you need a container for kneading glue, a painting bucket, a mallet - to level blocks, a brush - to clean off dust, a building level, a cord, a set of skins or a special grater - to level surfaces. That's all the tool you need. There is another interesting device - an angle, which allows you to cut at a right angle. In the photo it is near the helmet, but if you wish, you can do without it.

A set of tools necessary for building a house from aerated concrete
Laying aerated concrete block
Aerated concrete masonry technology is simple: a more or less even layer of glue is applied to the lower surface. The recommended layer thickness is 1-2 mm. With this application with the help of a carriage, there is no excess glue, and it is rarely squeezed out. Also, glue is applied to the side surface of the adjacent block. This can be done with a trowel, spatula, or immediately with a carriage. The surplus is also removed with the notched side of the tool. When applying glue, try not to let it flow out of the block edges: it is difficult to remove it from a white surface.
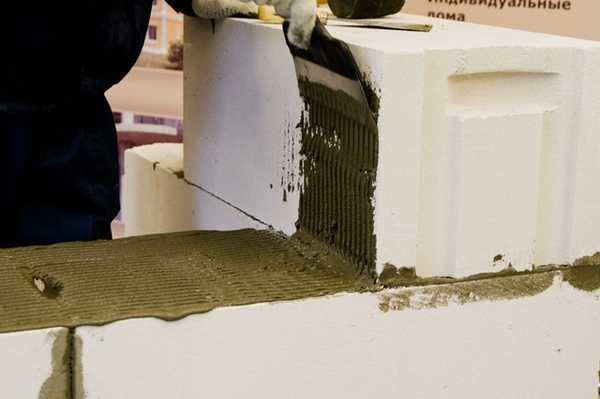
How to apply glue under aerated concrete
All of the above referred to laying on special glue. Some, in order to save money, use a cement-sand mortar. You cannot lay it out in a thin layer, because there will be surpluses. They are removed with the edge of the tool, but the masonry still looks untidy. It is generally better not to talk about the heat engineering parameters of such a wall: the cold bridges are very wide.
Before installation, the unit is dedusted: they take a brush and pass over all surfaces. If the weather is dry and hot, the block is sprayed with water. It can be done with a wide brush, or with a spray bottle. The cleaned and moistened block is lifted and placed on the glue, close to the already installed one. Using a mallet, knocking on the clean side surface of the installed block, achieve the required seam thickness of 1.5-3 mm. Squeezed out excess glue is removed with a spatula.
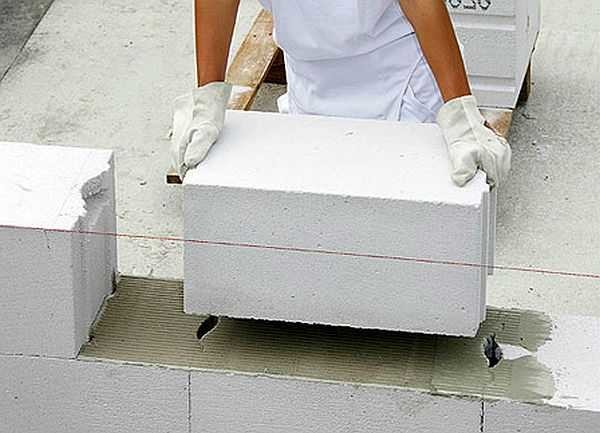
Block installation
Now we take a level and level the block in a vertical and horizontal surface: we knock on the corresponding places with a mallet. Efforts may be required serious. Squeezed out glue, if any, we select.
Aligning the block in all planes
This operation is repeated over and over again. Simple but monotonous work. But you can build a house from aerated concrete with your own hands without any construction skills. The main thing is to comply with the technology.
Useful gadgets and useful refinement of masonry technology in the next video. People with their own hands build a house from aerated concrete for themselves, they do everything efficiently, but quickly with the use of interesting devices. The mortar is applied with a modified notched trowel. Small plates are attached to it from the sides, they do not allow the solution to drain outside the block. The design is obtained in the form of the letter "P", but with short "legs" and a wide "back", a spatula handle sticks out from the middle.
The structure is placed on a block, glue is thrown along the wide side. The edges or the handle are pulled along the block. In this case, glue is squeezed out from under the teeth. It is immediately distributed evenly. Using the same device, glue is applied to the side, but not the installed, but the installed block. The laying speed is high with this method.
A very interesting device for carrying a block. This is a metal bar with two welded handles.She, of course, is screwed on two screws to the block every time, but it is more convenient to carry it than just by grasping the edges. In general, a useful video, just align the blocks "by eye". This "technique" is hardly worth taking into service, but otherwise the method of laying blocks of aerated concrete in the video is very good.
Laying of the first row of aerated concrete
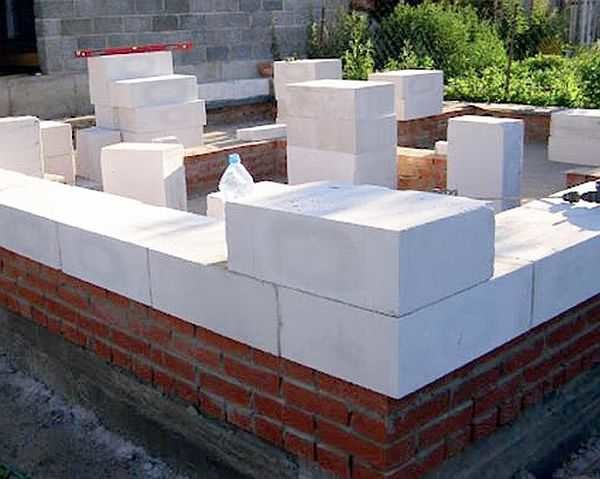
With any construction, it is very important to correctly set the first row: we will then focus on it when erecting walls. Therefore, we do everything very carefully, rechecking several times. We put the first row of aerated concrete blocks on a cement-sand mortar, all the rest - on glue. Attention! The side surface is coated with glue: these seams should be normal - no more than 1-2 mm.
The corner blocks are laid out first. Very often their outer edge protrudes beyond the base. Firstly, the base will then be insulated and finished, and this will significantly increase its thickness. The wall hanging over the basement not only looks more organic, it also reduces the locking of the basement, and first of all, its joint with the wall, and for aerated concrete house this is very important.
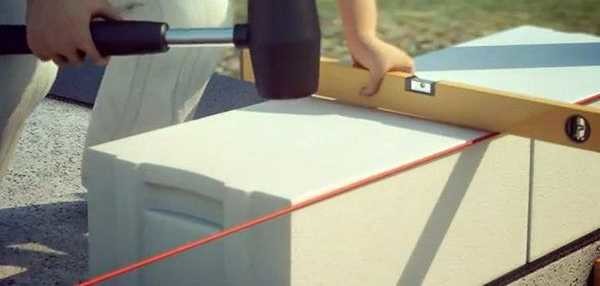
First of all, using a laser plane or water level, we find the highest angle of the base. We start laying with it. The whole point of the first row is to align the blocks in the horizontal plane by varying the thickness of the mortar. During the preparation phase, the largest differences were eliminated, but the surface was still unlikely to be perfect. In order to later lay aerated concrete blocks it was easier, and the surface is leveled.
How to find the highest corner of the foundation, see the video.
Therefore, at the highest angle of the solution, we put the minimum amount. We spread it with a layer of 0.5-1 cm, level it. We put the first block so that its outer edges protrude at least 50 cm beyond the base. As they wrote, this ledge is not necessary, but it solves many problems, and, most importantly, it closes the joint with the base.

we expose the first block, knock with a mallet, leveling
We take a level and, tapping with a mallet, align it in the horizontal and vertical planes. At the adjacent corner, we do the same operation, only the height of the block is adjusted according to the first and for this we use the water level. To make it easier to work, the level flasks can be fixed on even boards of the same thickness. By installing one flask on one corner block, the second one can adjust the height of the other.
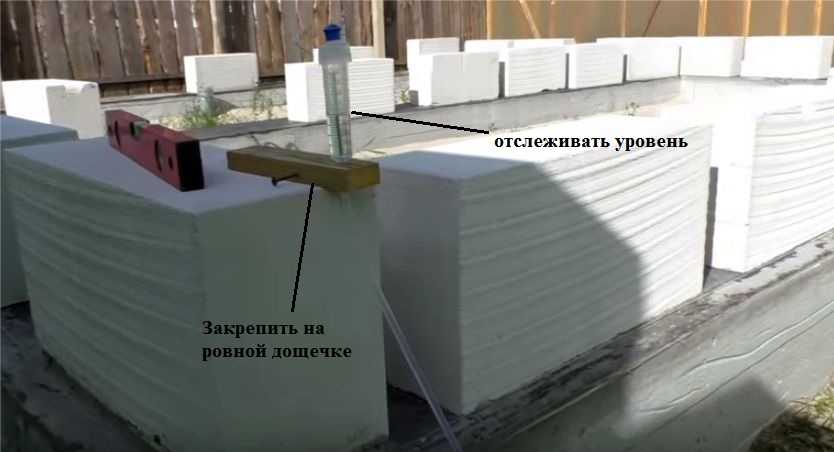
Convenient fixture
We repeat the same operation on the remaining blocks. One subtlety: we transfer the level only from the first block. This will reduce the error. After all the corner blocks are exposed (they are called beacons), a cord is pulled along their outer edge. Moreover, the cord marks the upper edge of the block and all the others are aligned along it. Pull the self-tapping screw screwed into the block: it turns easily, but it keeps well. You can screw the strips into which the self-tapping screws are screwed to the blocks.
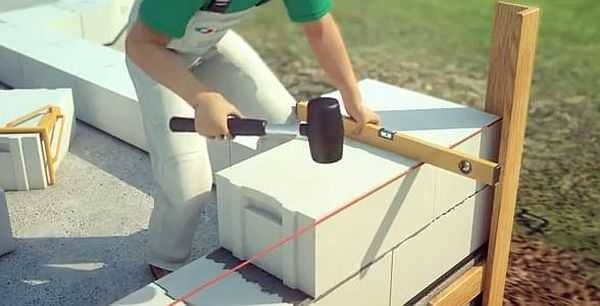
Two strips are nailed to the side, to which a lace is already attached to beat the row level
It is advisable to lay the masonry from two corners, moving to the middle. So there is a greater chance of avoiding distortions, which then have to be leveled, tearing off already installed blocks.
Second and subsequent rows
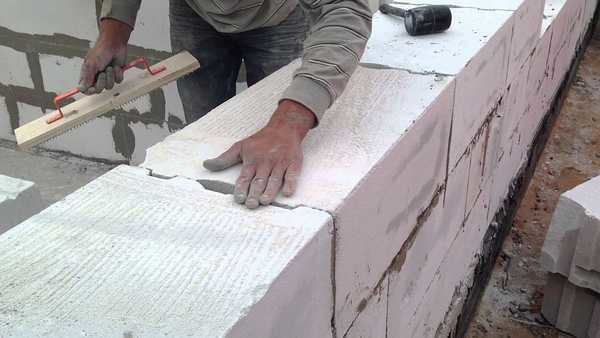
At the end of the laying of the row, they take sandpaper, a plane, a building level and go around the entire perimeter, removing too large differences in height. This is an important point that allows you to use a minimum of glue. But a minimal seam isn't everything. If you do not equalize the height of each row, places of local stresses are formed in the wall, which, with minimal loads, can cause cracks. Therefore, do not skip this stage.
It is not very convenient to work with emery; there is a special grater for this purpose. It doesn't clog that way. So, everything levels out. Then they take a brush and walk around the perimeter again, sweeping away the dust. This step cannot be skipped either: the presence of dust significantly reduces the adhesion of the glue to the blocks.
The height difference is checked by touch))
All this in order to withstand the recommended layer of glue of 1-2 mm. The geometry of even the best blocks still has a run. Let the difference be 1 mm, but with this amount of glue it is significant. Therefore, everything is aligned to a complete coincidence.
Hired teams often skip this stage and put glue up to 5 mm or more in violation of the technical process. But such houses turn out to be cold, and the consumption of expensive glue is huge. Average consumption of glue per cube:
- smooth blocks - 1.2 bags;
- with groove and comb - 1 bag.
Laying the second and subsequent rows of aerated concrete blocks also starts from the corner, only the corner block is set so that the seam is displaced. Now an adhesive is applied to all surfaces. Aerated concrete block masonry technology is described above.
How to lay out the second row corner block
Reinforcement of aerated concrete
To increase the degree of resistance of the building to the forces arising from the heaving of the soil, longitudinal reinforcement of the walls is made. For this, longitudinal grooves are grooved in the stacked row of blocks using a special device. For thick outer ones, two grooves are made for two rods, for jumpers up to 200 mm thick, one thread is put. From the edge of the block, they should be at a distance of at least 6 cm. When slitting two grooves, it is more convenient to maintain a distance by placing a board: one strobe on one side, the other on the other.
When the grooves are ready, dust is swept out of them with a brush. Then they take 8 mm reinforcement, pre-laid out in prepared grooves. They guess so that solid bars lie in the corners: they are simply bent in the right place. The reinforcement joints should be located approximately in the middle of the block, but not in the corners of the building and not in the places where the walls meet.
One bar is placed on top of another, stacked side by side. The overlap should be 10-20 cm. So that the ends of the reinforcement bars do not stick out in the openings (door and window), small pieces can be bent by making small grooves under them.
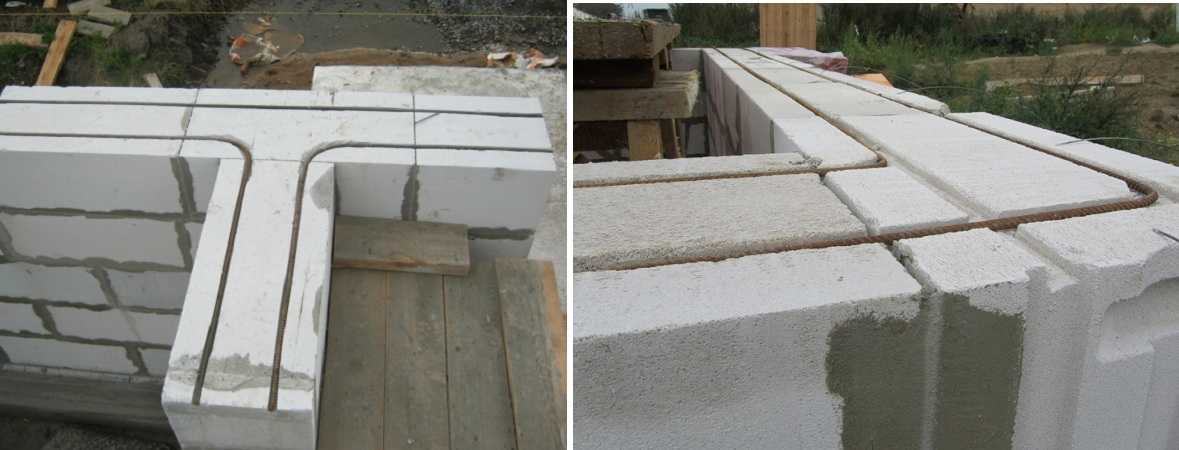
Reinforcement of corners and abutments is made from a solid bar
When everything is laid out, take out the bar, moisten the strobe with water and fill it halfway with glue or concrete mortar. And it is imperative to clean and moisten, otherwise the solution will not adhere to the block material and there will be no sense from the reinforcement. We sink the bar into the glue, then we pass the spatula along the grooves, removing the excess and leveling the layer.
Such reinforcement is carried out in the first row, and then in every fourth row. With regular bandaging, even with an uneven foundation settlement, the aerated concrete house will stand normally.
But this is not all reinforcement. Above the window and door block, as well as in the last row of the floor, more reinforcement elements are required, but more serious ones, with 4 rods connected into a single system. There are special U-shaped blocks for this. They are placed as the last row under the overlap of the second floor or under the roof Mauerlat. One side wall of the block is thick, the other is thinner. With a thick wall it unfolds and the street, a thin wall - into the room.
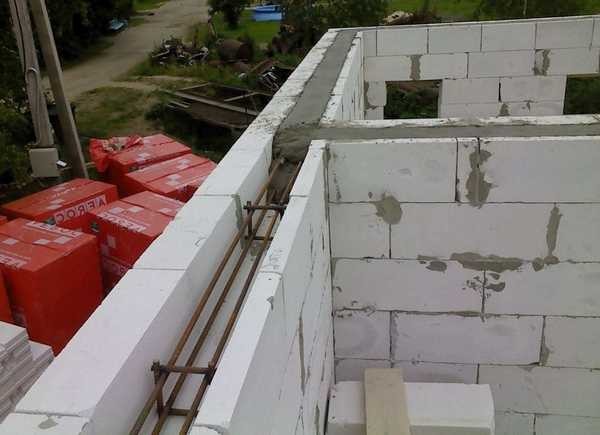
An example of a reinforcing belt device when building a house from foam blocks
A continuous reinforcing belt is knitted from 4 bars of reinforcement with a diameter of 10-12 mm. It is knitted according to the same principle as in the strip foundation (you can read here). An example of a reinforcing frame is in the video.
Finished elements fit into the cavity of the block, are poured concrete grade M200. After the concrete has set 50% strength, you can lay floors or install a roof truss system.
Reinforcement of window openings of aerated concrete houses
According to the technology, if a house made of aerated concrete has a window opening wider than 1.8 meters, the penultimate row of gas blocks is additionally reinforced. To do this, make two longitudinal grooves, which are at least 0.5 m longer than the window opening. For reinsurance, you can make larger protrusions - up to 1 meter, and reinforce for each window opening.
The technology is similar to the wall one: two grooves, into which the bar is placed, will be filled with glue or mortar.The last row of blocks is installed on top of the reinforcement, and then a window frame is placed on it.
The general principles of working with foam concrete blocks are described in the following video, the principles of reinforcing window and door openings are also highlighted.
About features read aerated concrete wall decoration here.
How to winter without heating
Often it is impossible to build a house from aerated concrete in one season, as a result, the box - with or without a roof - goes in the winter without heating. To prevent cracks in the walls after wintering, a whole range of measures is needed:
- If the groundwater is high, it is necessary to make a drainage system before the onset of cold weather.
- Waterproofing and external insulation of the foundation and basement (for the middle strip of EPSP with a thickness of at least 100 mm).
- Insulated blind area around the house.
- Basement floor insulation.
All these measures are designed to prevent freezing of the soil under the foundation and, in particular, under the basement floor. If the soil under the slab freezes, it will begin to bulge out in the most unloaded place - in the middle. If bricks and other heavier materials simply press down on the bulging, then the mass of gas silicate is not enough. Therefore, all of the above measures are required.
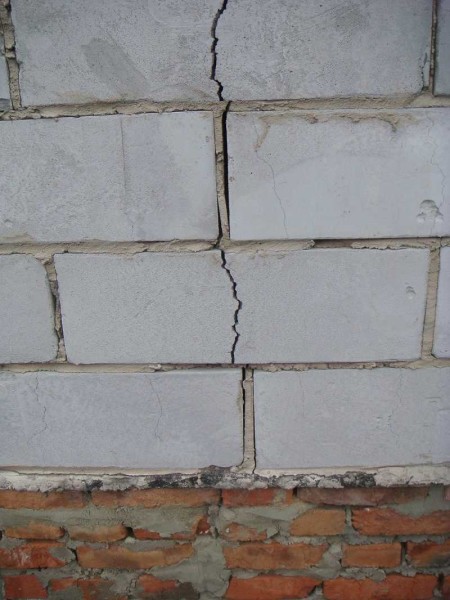
What can be seen after freezing
In addition to them, in cold weather, it is necessary to maintain a positive temperature in the basement - at least to heat a couple of stoves. If there is no way to arrange heating, in the fall it is necessary to load fallen leaves into the basement. The layer is preferably large - at least 20 cm. In conjunction with thermal insulation, it will prevent the slab from freezing. Otherwise, it will bulge, as a result, the walls will crack - under tensile loads, the gas silicate wall cracks not under the seams, like a brick one, but along the "body" of the block. It looks scary, although with a normal foundation (if it remains intact), everything is not so scary and with heating in all subsequent seasons this may not happen again.
-
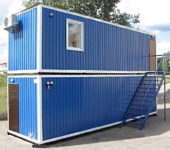 Modular houses from block containers: types, manufacturing features and layout options
-
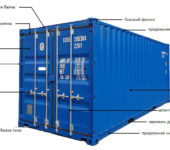 Houses from shipping containers: construction options, layout
-
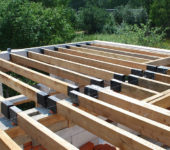 Types of wooden beams for floors, length calculation, installation
-
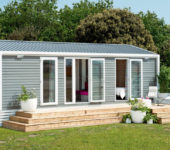 Mobile homes for year-round use
-
 Polymer / composite decking (WPC decking): types, sizes, installation


I still didn't understand anything about reinforcement. The fool understands that the reinforcement works in a loaf, and not in glue. The structure works in compression, not in bending. If the foundation has gone, then the walls cannot be held - useless !!! This is not a monolith. So why fence a garden, it's easier to make a foundation with a margin!
Reinforcement of walls made of aerated concrete is done so that the walls are more stable. The blocks are large, so it can lead them))
In my opinion, the foundation is such a thing that sometimes the stock does not help either. If the foundation bursts, and there is no reinforcement or at least a reinforcing metal mesh between the rows of blocks, then the crack will go along the entire height of the wall.
The guy doing the armopoyas in the last video messed up, the reinforcement should be on special linings so that the cement would hide it everywhere from all sides, but he just has reinforcement on the wall!
I would like to comment on the video on reinforcing aerated concrete masonry. In principle, the entire technology is displayed correctly, with the exception of one moment, namely, in the video, the reinforcement overlap is shown in the order of 40-50 mm. This is a very small overlap! It is necessary to overlap the reinforcement 300 mm. at least this will ensure its correct operation. And you can also replace steel reinforcement with composite in the reinforcement of the masonry, thereby saving on it, and when building a house, every penny counts.