How to build a garage with your own hands
In some areas, the garage appears before the house. You can spend the night in a tent yourself, and put your car under a roof. Therefore, the question of how to build a garage with your own hands is not idle. We start by choosing a place.
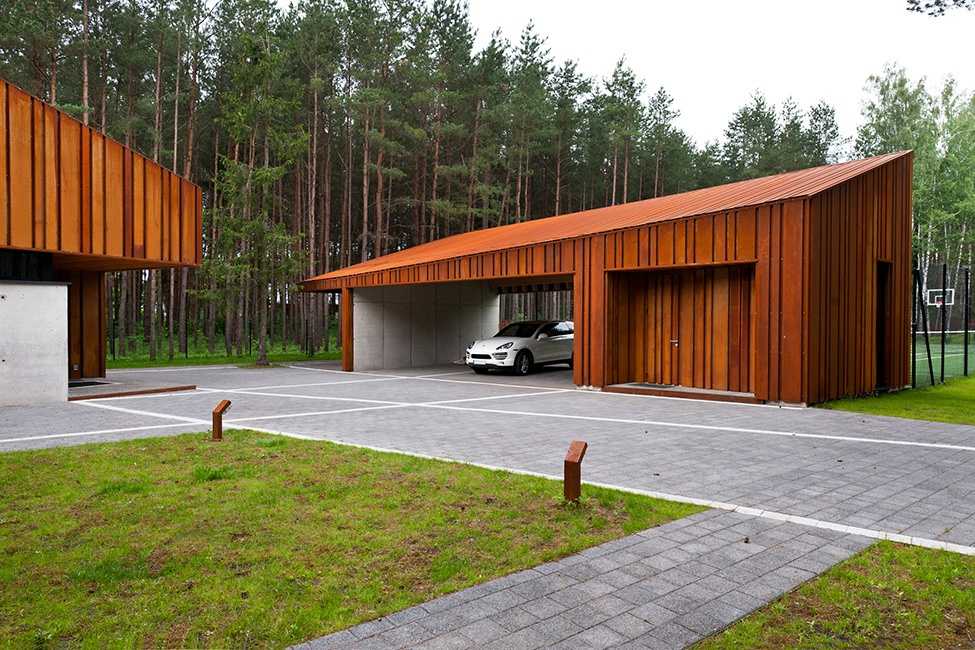
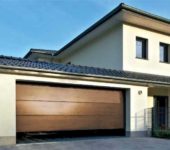
One of the chic options
The content of the article
Seat selection
Choosing a garage location is not an easy task. I really want it to be convenient to use it, but at the same time so that the building does not spoil the appearance of the site. Immediately it is necessary to decide whether it will be detached or attached to a house or other building on the site.
- Standing separately. This option is chosen if the house has already been built and / or the shape of the plot is such that the driveways take up too much space. In this case, it makes sense to move the building closer to the entrance gate, or to make the garage door open directly to the street.
- Part of the building. It can be a house or utility block, and the garage itself can be built together with the building, or added later. Good if the house is built close to the border of the site. It is attractive in that there is no need to think about how to heat it and pull additional communications.
When self-building, the garage is most often placed separately, since an extension to an existing house requires serious measures to strengthen the foundation, and this is definitely not cheap. It will be cheaper to build separately. Only when choosing a place, one must bear in mind that the distance to the neighboring site should be at least 1 m, and the entrance at a distance of at least 10 meters from the neighbor's windows. The distance to the nearest residential building is also normalized. It should be more than 9 meters if the house is made of non-combustible material and 15 meters if the house is fire hazardous.
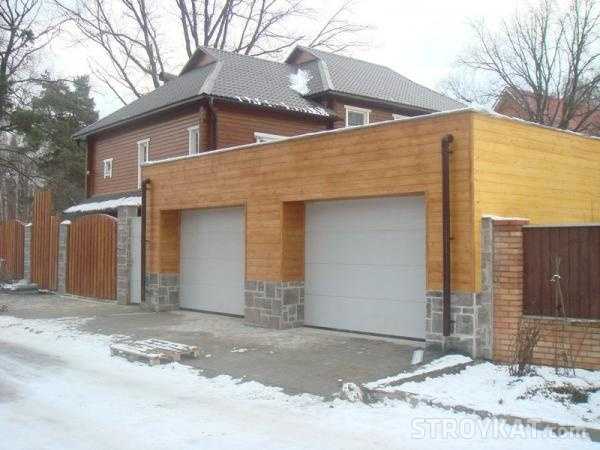
The gate opens directly to the street - one of the good options
Dimensions and designs
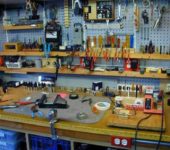
First you need to decide for what purposes the garage will be used. If this is only a parking space, the dimensions can be made end-to-end - add one meter in length and width to the dimensions of the car. This is enough for a parking space. If repair work is also carried out in the garage, you will need a lift or a viewing hole, a bunch of equipment and spare parts, then the dimensions should be larger. It is advisable to leave at least one meter on the sides and the same amount in front. At the back, half a meter is still enough. If the garage is used as a workshop or club, the dimensions can be even larger. Restrictions only in available space and construction budget.
With or without pit
The most important thing is to decide whether to make a hole or not. It depends on how and what kind of foundation you will make. You can make a basement under the garage, and the pit will be the "entrance" or only part of the occupied space. The option is attractive, but expensive and requires large amounts of earthworks.
How to make an inspection pit in the garage, see here.
The second option is more economical: only a pit 1.8-2 meters deep and about 1 meter wide. This width is optimal, but the height depends on the height and it is better to choose this parameter individually: the depth should be 15-20 cm more than your height. The length of the pit is about 2 m. This is enough for inspecting any passenger car.
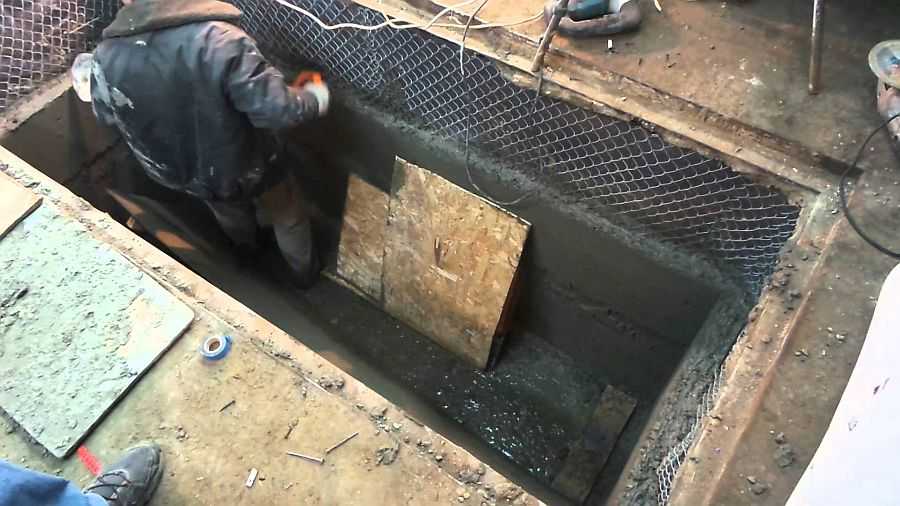
An example of the construction of an inspection pit
It is even easier to implement a floor in a garage without a pit. Then it just floods monolithic slab without any difficulty.
Garage foundation
The foundation for a garage without a pit can be any, even tape, even pile-grillage.Another question is that you still have to fill the floor. And if so, then it is easier to immediately make a monolithic reinforced slab and not do the foundation first, and then the floor.
Belt - monolithic and prefabricated
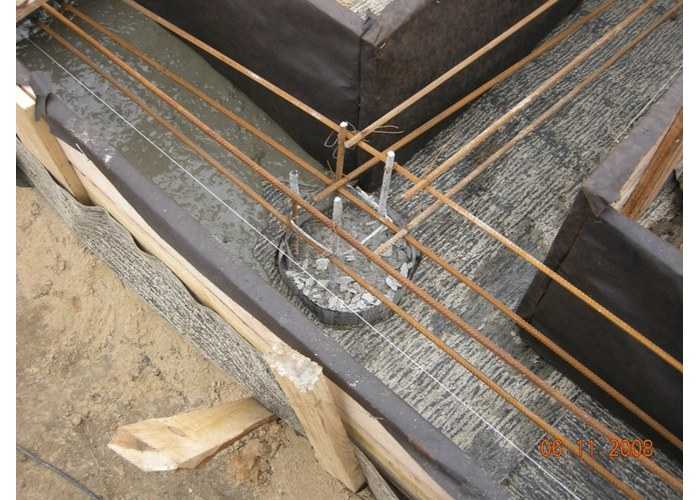
If you decide to do strip foundation, and the soils are heaving and the water table is high, you need to make it below the depth of soil freezing. In the Middle Lane it is about 1.7-1.9 meters. They dig a trench to this depth, put the formwork (the width of the tape is not less than the thickness of the walls). A frame made of reinforcement is laid in it and all this is poured with concrete. After the concrete reaches 50% strength, the formwork is removed and you can start pouring the floor in the garage.
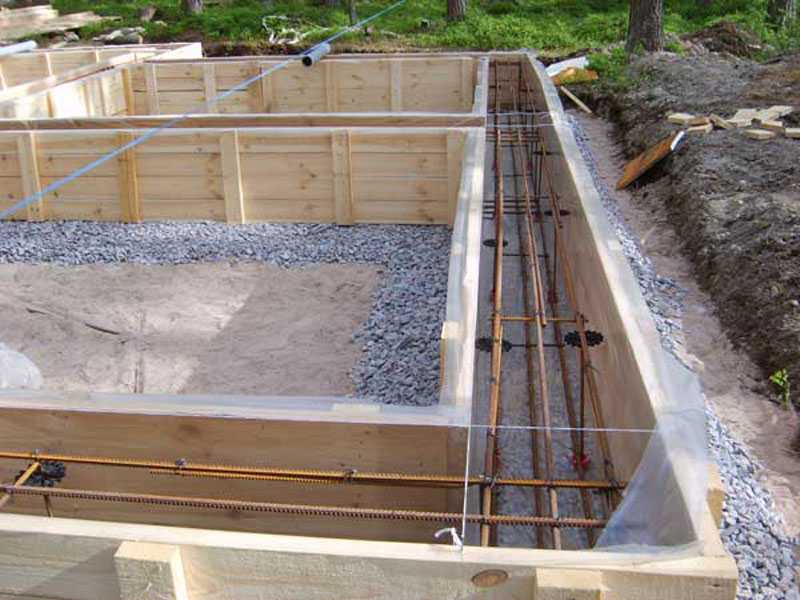
The strip foundation is ready for pouring concrete
In the case of sand and the lack of near groundwater for garages, they do prefabricated strip foundation or shallow tape (tape height about 40-50 cm). The prefabricated foundation is built from ready-made blocks. The blocks are connected with a solution, and the rows are reinforced by laying with rods with a diameter of 10-14 mm (depending on the soil, wall material and the number of storeys of the garage). But such foundations normally stand only on soils that are not prone to heaving: sand and sandy loam, and with a low level of groundwater.
Another option is to make the tape level with the ground and cover it with reinforced concrete slabs. This option is also good on sandy soils.
You can read more about strip foundations and their types here.
Pile or pile-grillage
An economical foundation, which for some reason is rarely used for garages. A pure pile is not very suitable for a garage - the floor is raised above the ground, but if you make a check-in, you can also use it. He and the pile-grillage with a low grillage - an excellent option for heaving soils (clay, loams with a high level of groundwater).
The pile is connected to the grillage - this is a pile-grillage foundation
When making a pile-grillage, a shallow pit in the form of a tape (about 40-50 cm deep) is dug around the perimeter. In it, with a step of 1.5-2 meters, wells are drilled below the depth of freezing of the soil, formwork is inserted into them (a plastic pipe or roofing material rolled into a roll). Three or four reinforcement bars are placed inside the formwork with an outlet of 70 cm and poured with concrete.After that, they put the formwork on the tape and knit the reinforcing cage for the tape, connecting it with the pile reinforcement outlets. And it is also poured with concrete.
More details you can read about pile-roaster foundations here and this article describespiles TISE.
Monolithic slab
Suitable for any type of soil monolithic reinforced concrete slab... Along the perimeter, it is made at least 30 cm larger than the size of the garage. The soil is removed by digging a pit 40-45 cm deep. The bottom is leveled, a layer of gravel is poured. Its thickness is about 20-25 cm. Gravel is well rammed, using a vibrating plate whenever possible.
A formwork is placed around the perimeter, reinforcement is placed on the rammed bedding with a step of 15-20 cm (along and across, getting a cage). Usually they use 10-14 mm in diameter, two tiers of reinforcement, the distance between which is about 20 cm. All this is poured with concrete of the M 250 - M 300 brand.

Immediately and floor and foundation
What to make walls
Most often, walls in a garage are made of building blocks. It could be cellular concrete (foam block and aerated block), or maybe with slag or expanded clay filler. They are good because they are warm by themselves and with subsequent heating of the garage there are no problems: a small stove is enough to heat the air to normal temperatures. True, with this choice, outdoor decoration is necessary. It is usually made the same as on the house or as similar as possible.
The second popular technology for building garage walls is frame. The frame is made of a metal profile pipe or a wooden bar impregnated with fire retardants (additives reducing flammability).The cladding can be any - from sheet metal to siding (on metal), lining, imitation of timber, plywood (moisture resistant) or OSB. Yes, some materials are flammable and you cannot call them reliable, but if you need a cheap garage, for example, for a summer residence, and only as a temporary parking lot, then why not.
Read about timber frame construction here, and this article describes metal frame technologies.
Roof types
The easiest and most economical way to make a flat roof with a slope of several degrees. For the Middle Strip, the minimum slope is 8 °, but at least 10-12 ° is better - the snow melts better.
In the case of a detached garage, the front wall is made higher and all precipitation flows / falls back. This must be borne in mind and not to put any objects there, not to place buildings. If the garage is attached to the wall of an existing building, the slope is made to the side of the house.

An example of a gable roof truss system
The downside of a shed roof for a garage is no attic. Pros - simple device and low cost. Another positive point concerns improvements: then it will be possible to build an attic floor above the garage.
A gable roof is more difficult to implement: an assembly of the rafter system is required and there is more roofing material. But - there is an attic and the appearance is more "civilized". Quite often you can see the attic floor above the garage. The room can be used as a guest house. The cost of arranging the attic, of course, is more than the construction of an ordinary gable roof, but in addition, a decent area is obtained.
The manufacture of a gable roof is described here (photo report), about read the device of attic roofs here.
Goal
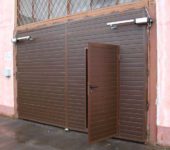
Gates for the garage can be swing, sliding, lifting. Swing ones are the simplest and most familiar to everyone. If desired, they can be automated (how to read here).
Sliding gates can be done if the exit from the garage is in the same plane as the fence, and there is a free section of the wall nearby, 1.5 meters longer than the width of the gate. What they are good about is that it is easier to dig them out in winter.
A gate with a lifting mechanism is perhaps the most convenient, but also the most expensive. In the simplest version, roller shutters can be installed. If you take manual ones, they are unlikely to be too expensive. Roller shutters are made of thicker metal, the color can be any.
If you want automation, they install pneumatic lifters that raise the entire sash. In that case, it is immediately necessary to develop the door opening and the garage structure itself, taking into account the operation of such a mechanism. Sectional models are more convenient in this sense. When folded, they take up less space. But they all cost decently, although they are certainly comfortable.
Interior decoration
The type of wall decoration inside the garage largely depends on the material of the walls. If these are building blocks, then the walls are most often plastered. Some do not pay much attention to beauty and leave it as it is. But in the case of some blocks, it is better to plaster them (non-autoclaved aerated concrete, for example, or shell rock with limestone) to protect them from high humidity.
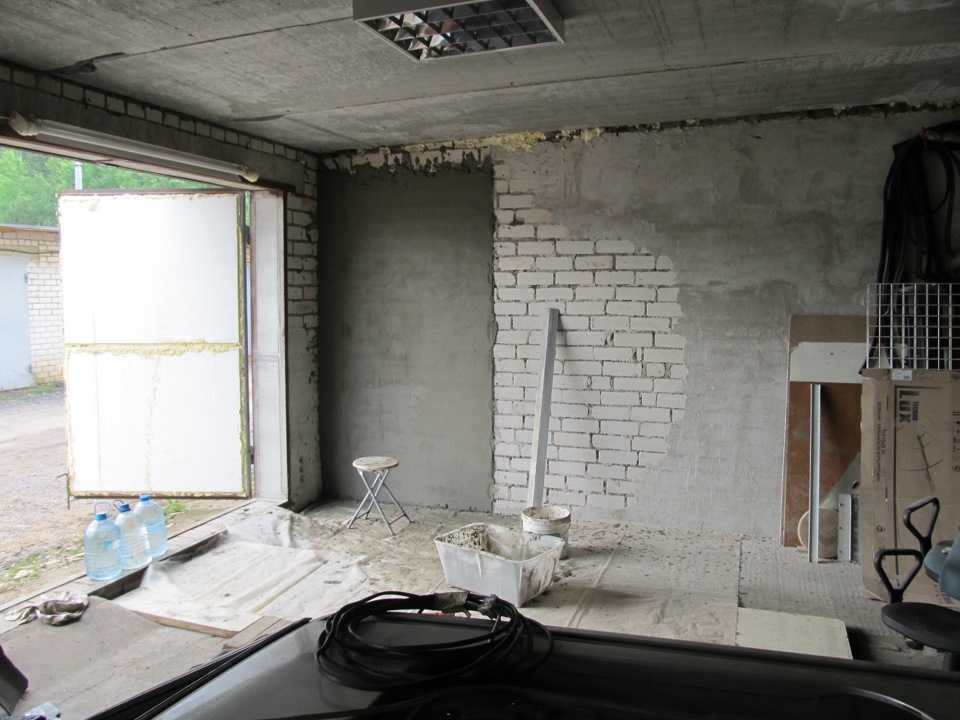
Plaster is the best finish
Frame garages are often sheathed with plywood from the inside. If the garage will have constant heating, you can use any one, if it will be heated from time to time, or not at all - then you need a moisture resistant one. You can make the cladding with any sheet material - gypsum board, for example.
You can read more about frame construction technology here.
Heating and insulation of the garage
If you plan to use the garage all year round, you need to either make the walls warm right away (from blocks with low thermal conductivity) or insulate the ones built using frame technology. Insulation materials are standard: mineral wool, polystyrene (extruded or regular foam).There is also an option of non-combustible insulation, which, in the case of a garage, is just an excellent option - low-density foam concrete. It can be laid between the frame posts. Non-flammable, inexpensive, keeps warm well. The only bad thing is that you can't hang anything on it, but there are frame racks, so you can attach it to them.
There are two types of heating in a garage: continuous and periodic. The constant can be separate or part of the heating of the house. If done separately, this is the same house system, only in a smaller volume. It turns out to be expensive and difficult: a separate boiler, which also needs to be maintained and controlled.
One of the options for organizing heating in the garage is to stretch the branch out of the house. But here it is also not easy: a pipeline that requires good insulation, a large amount of land work for its laying, moreover, preferably not just into the ground, but into the sewer.
Periodic heating - stoves such as stoves and their modifications. They can be heated with wood, all kinds of combustible trash, which is usually sufficient. But the most attractive idea looks like to make a stove for mining - there is a lot of fuel around, and for free (or almost). There are different designs, they are described in the article “Diy waste oil oven«.
This type of heating is the easiest to organize: put a stove and marsh, but also less comfort. Firstly, the heat is mainly near the stove, and secondly, you come to the cold garage and melt it while it starts to warm up ...
Drawings and diagrams
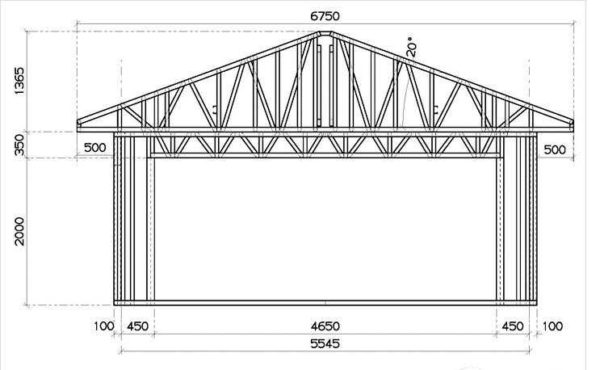
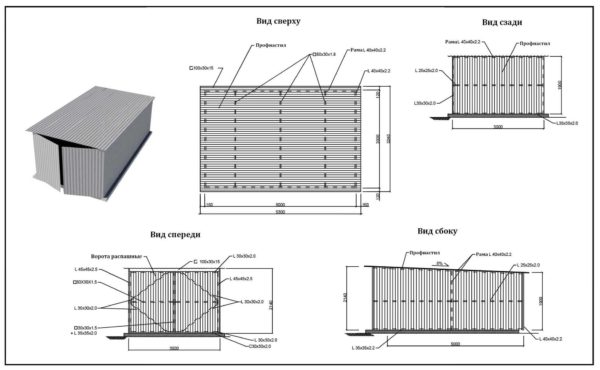

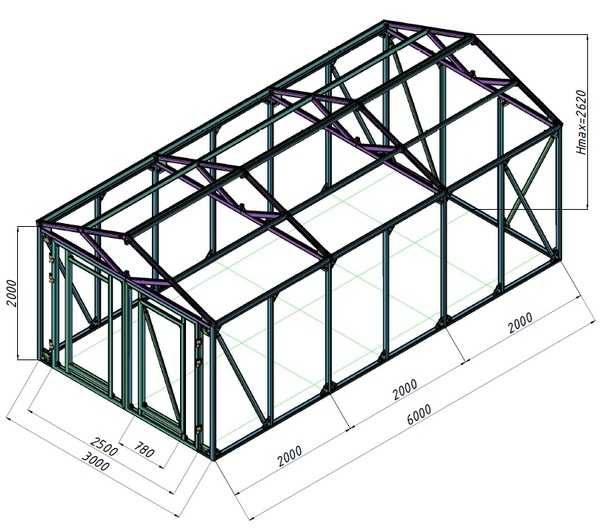
Photo reports from construction
It is often difficult to understand the essence of technological processes by verbal description, but pictures or photos help to put everything in its place. More questions arise about frame garages. They are the cheapest and quickest to build. Below are some examples.
Frame garage made of wood
The garage was under construction 4 * 6.5 m, with a gazebo 4 * 2 m. The timber was delivered ahead of time, impregnated with an antiseptic and stacked in ventilated piles - to dry.
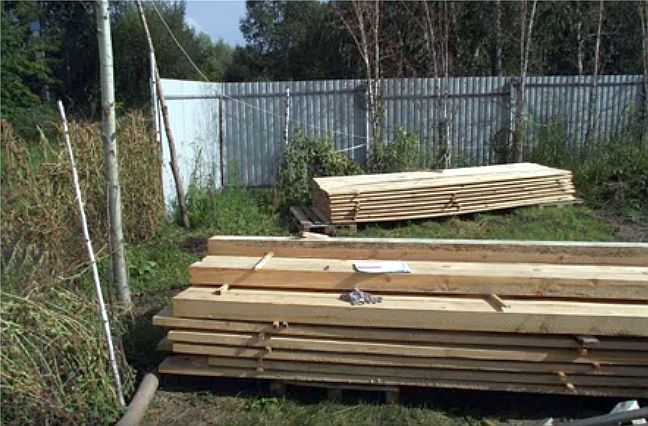
Materials for the construction of a frame garage
The foundation is columnar. A hand drill made wells with a depth of 150 cm, a diameter of 35 cm. In them liners made of roofing material are exposed, three rods of plastic reinforcement are inserted, and they are filled with concrete.
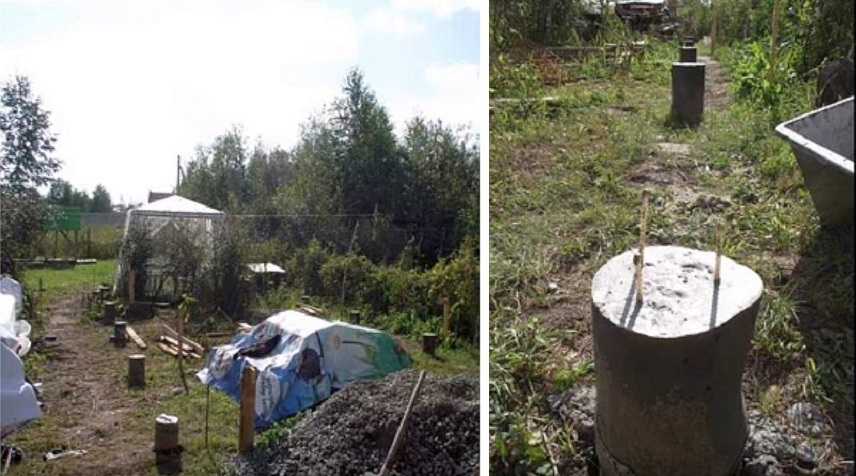
Concrete piles using drill-rammed technology
Two weeks later, when the concrete was almost ready, they began to put up the walls. The bottom harness was assembled first. Used timber 150 * 100 mm. The harness was installed on three sides, the fourth remained open - there will be an entrance.
The connection with plastic fittings turned out to be a problem. Not a particularly good idea: they drilled holes for it, but how to fix it further is unclear. Anchors were fixed in concrete (two per pole), and holes with reinforcement were filled with epoxy. Whether they will help or not is unclear, but we hope to somehow keep it.
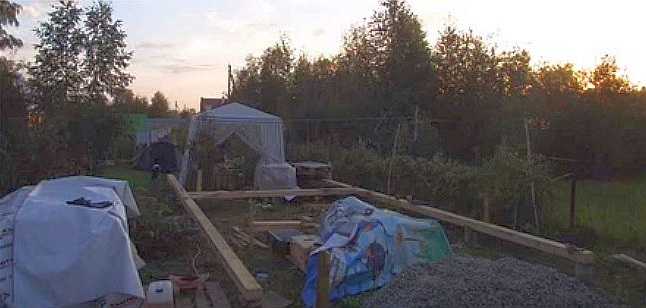
Bottom strapping
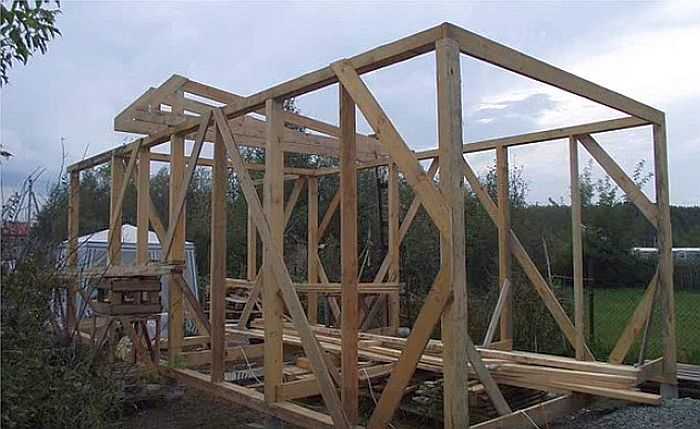
Further, racks were placed over each post (step 1.5 meters). They must be placed straight up, without deviations, otherwise the structure will be unstable - bursting loads will appear. We started from the corners. One was exposed, fixed with temporary jibs, then nailed, moved on to the next. The rest were leveled according to the set angles, not forgetting to check the verticality (with a plumb line, since the level gives an error). Attached to nails, reinforced with metal mounting plates.
So that the free ends of the lower harness did not part, they were temporarily fastened with a board.
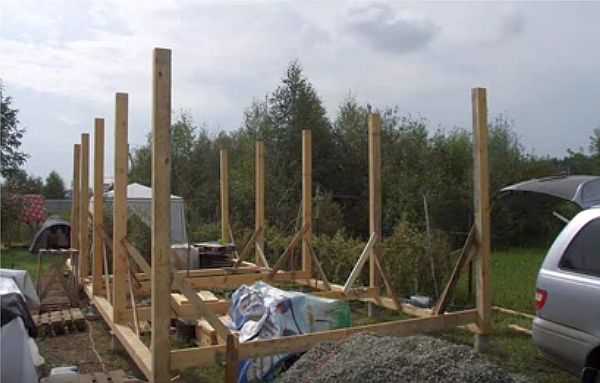
Vertical racks
After installing all the racks, the logs were attached at the bottom. They gave rigidity, and it is needed, since we will climb up and fasten the upper harness.
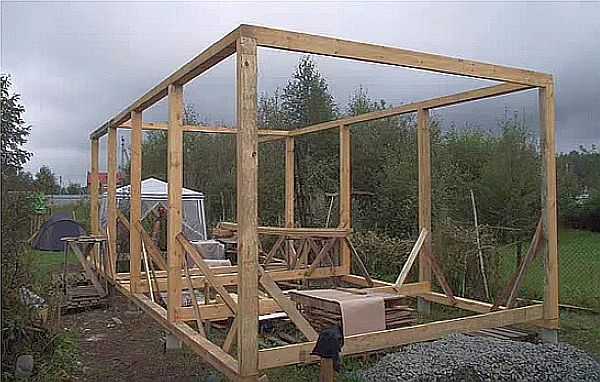
Top rail in place
Further, intermediate racks and jibs were collected. Again for greater rigidity.
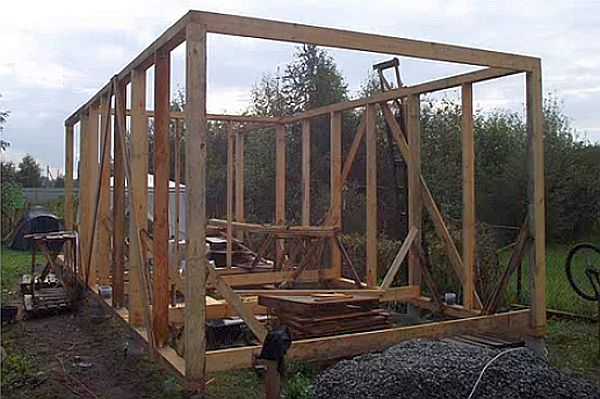
We continue to assemble the garage frame
View from the other side
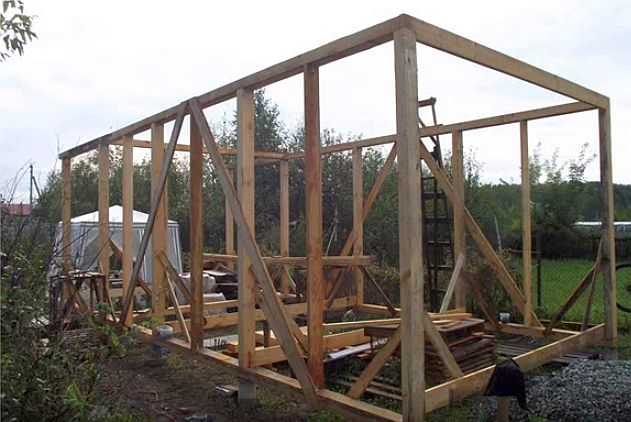
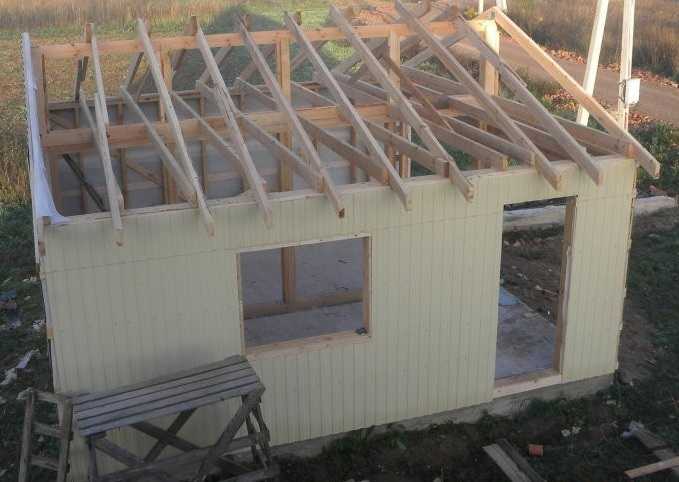
When all the beams are installed and assembled, we begin to assemble the rafter system. It was decided to make the roof sloped, and it is temporary. Subsequently, the garage will be adjacent to the house (this is the first building on the site).

We collect the rafters
Having collected the required number of trusses, they were installed on the upper harness. They were fixed with pieces of boards to the racks from both sides, then they were hammered in with nails, reinforced with corners on self-tapping screws.
Installing the rafters on the roof
The rafters must also be placed exactly upward, otherwise the roof will take away in winter. Therefore, it is often worth checking how correct it is: before you score, and after….
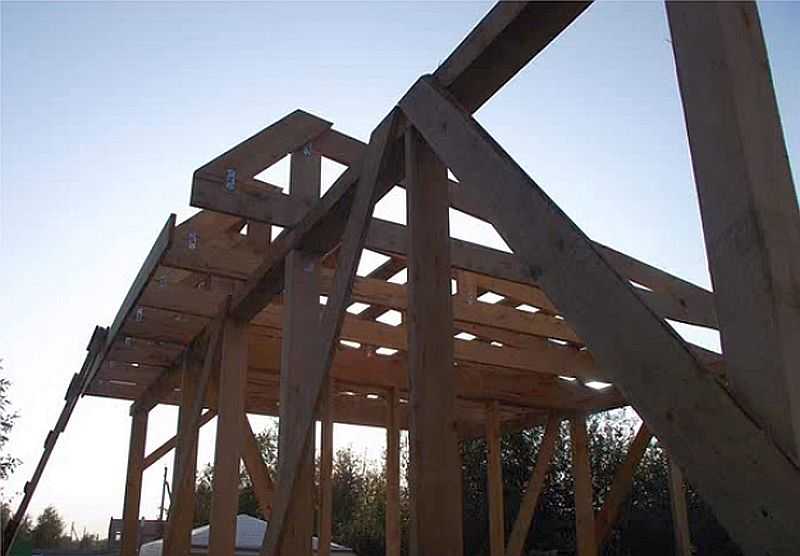
Rafters from below
Everything is in place
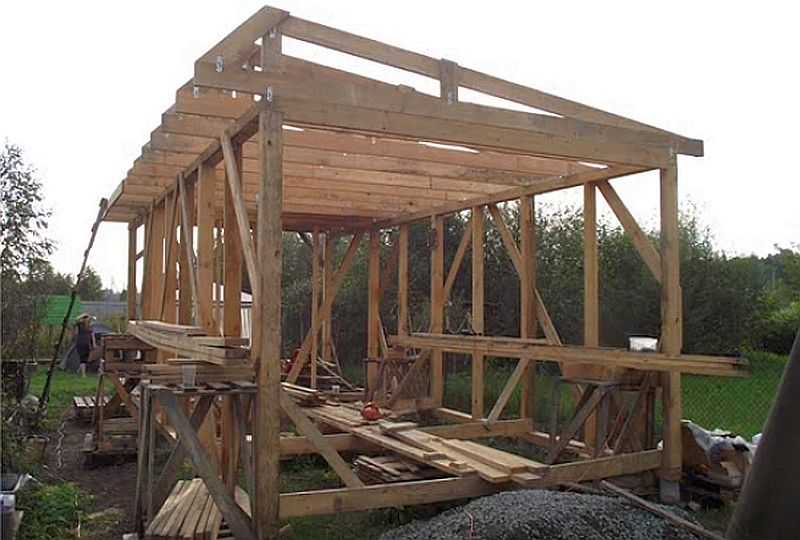
After everything was installed and secured, the crate was laid. A 40 * 150 mm board went to it, laid with a gap of 40 cm.

Sheathing, on non-roofing material
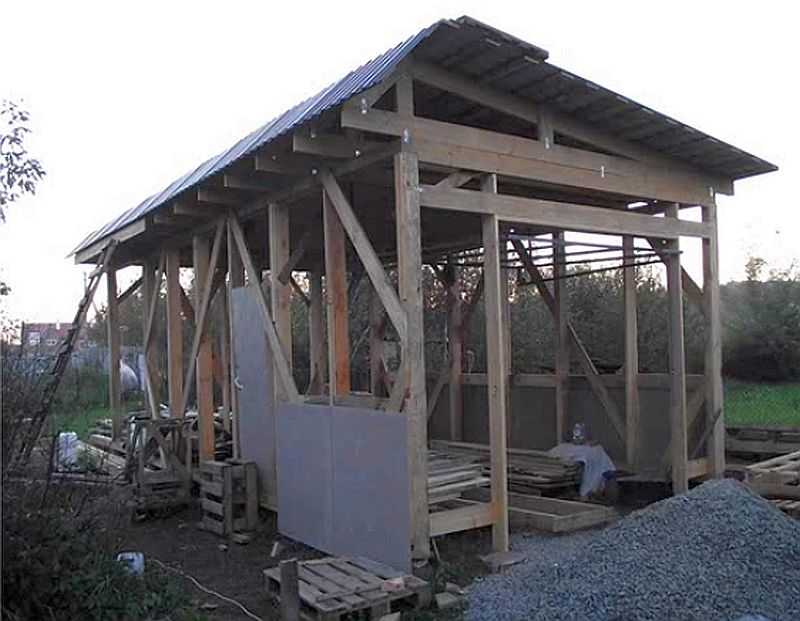
Profiled sheeting was stuffed onto the crate.

Roofing decking on the roof of the garage
We began to make the area for attaching the gate. We installed the beam at the top and sides.
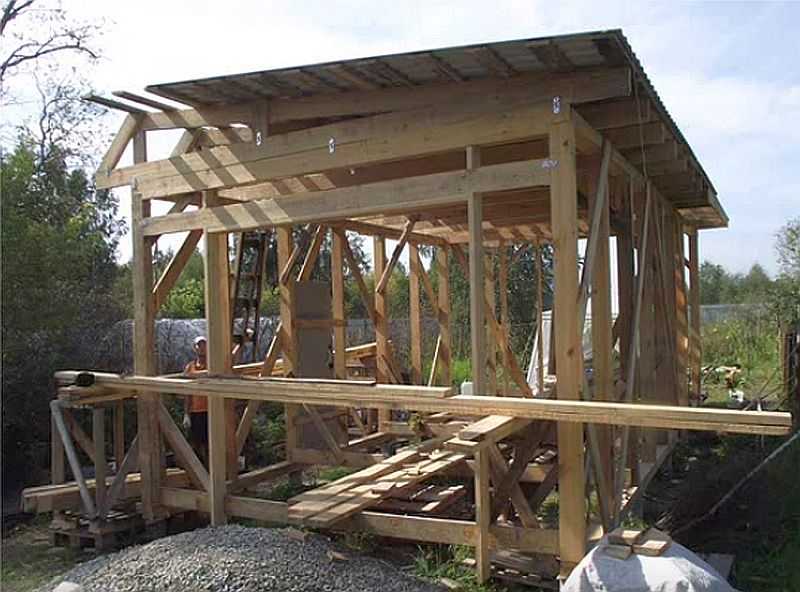
At the same time, they began to draw up the goal area
The gate will be lift-and-turn. Under them, a frame is cooked inside, along which they will drive off. From a profile pipe 25 * 50 mm, the door frame is welded according to the size of the opening (with a small gap).
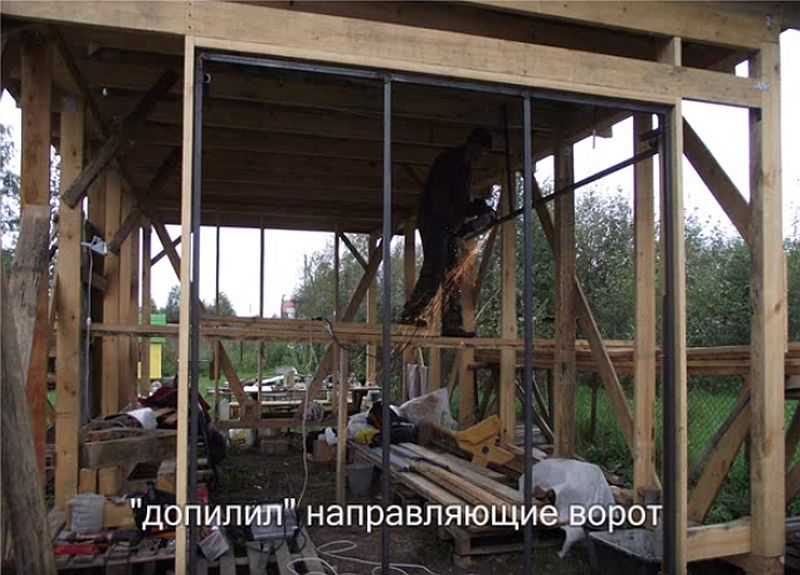
Overhead door frames
Then the cement-bonded particle board was brought, and the frame sheathing began. The sheets were cut with a grinder with a diamond disc. Cuts well, but a lot of dust.
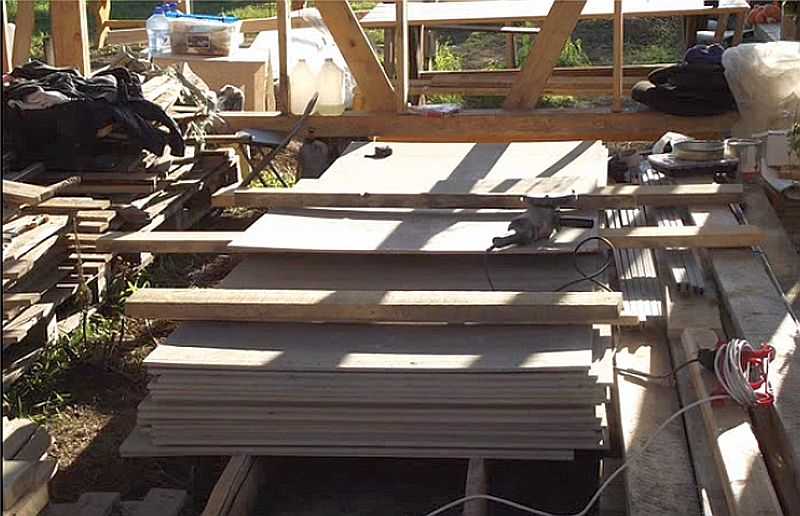
Brought the DSP
It is necessary to fasten the sheets with a gap of about 10 mm. For humidity-temperature expansion.

Sheathing started
Sheathing continues

View from the side of the gazebo
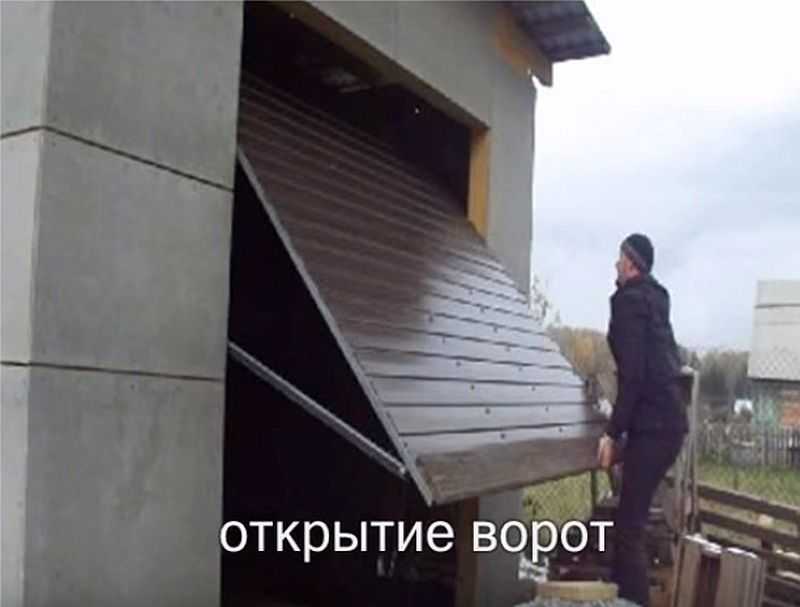
This is the already mounted gate
There is still a lot of work to be done, but basically everything is ready. Crushed stone was poured inside until the floor was poured, but the car can already be parked, as well as drinking tea in the gazebo))
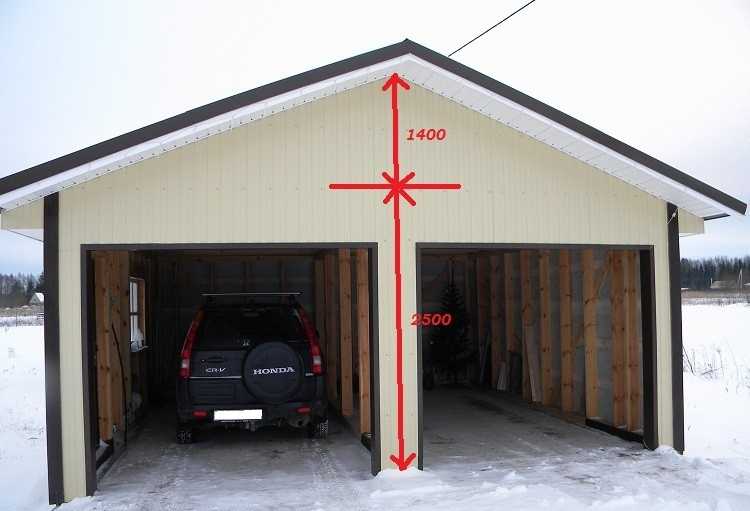
DIY garage on a strip foundation
Garage for two cars (separate boxes), unheated. Built on sandy soil with low groundwater. Therefore, the foundation is shallow. They dug a trench around the perimeter, set up the formwork, tied the reinforcement cage. Everything is as usual. Poured with concrete.

Ribbon ready to pour
Excess soil was taken out inside the tape, the pit was leveled. The bottom is covered geotextile and covered with sand. It was spilled and tamped (with a vibrating plate).
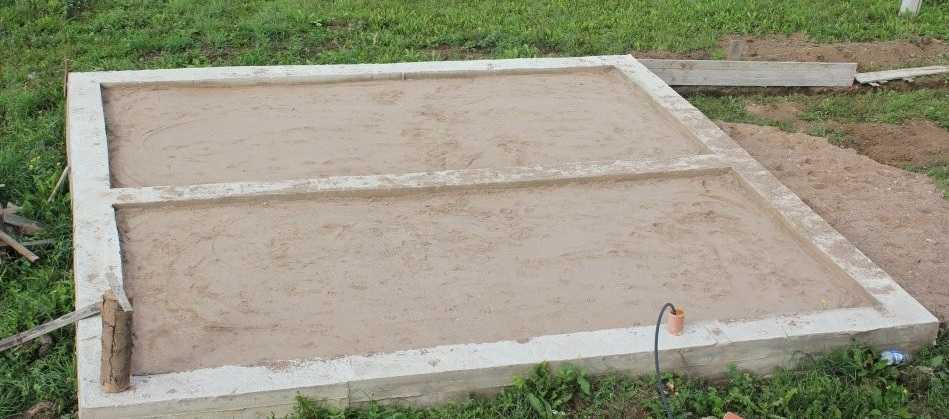
Compacted sand
A polyethylene film was laid on top (for waterproofing), a metal mesh was laid and M300 concrete was poured.
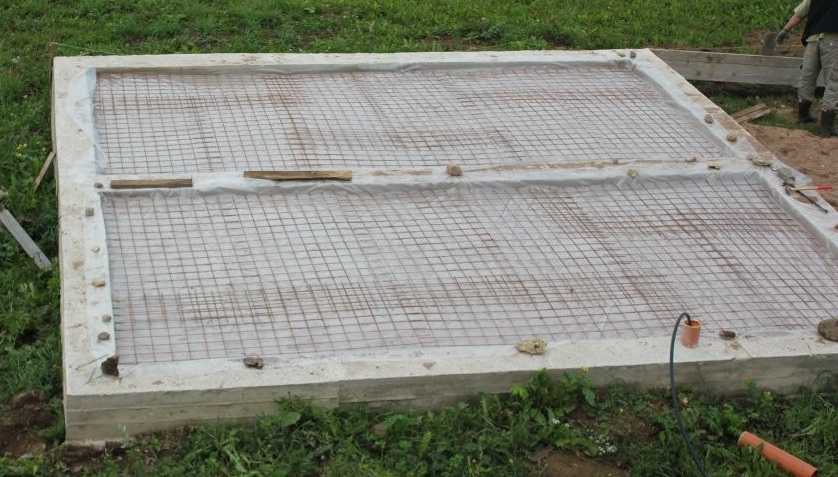
Foil mesh for reinforcement
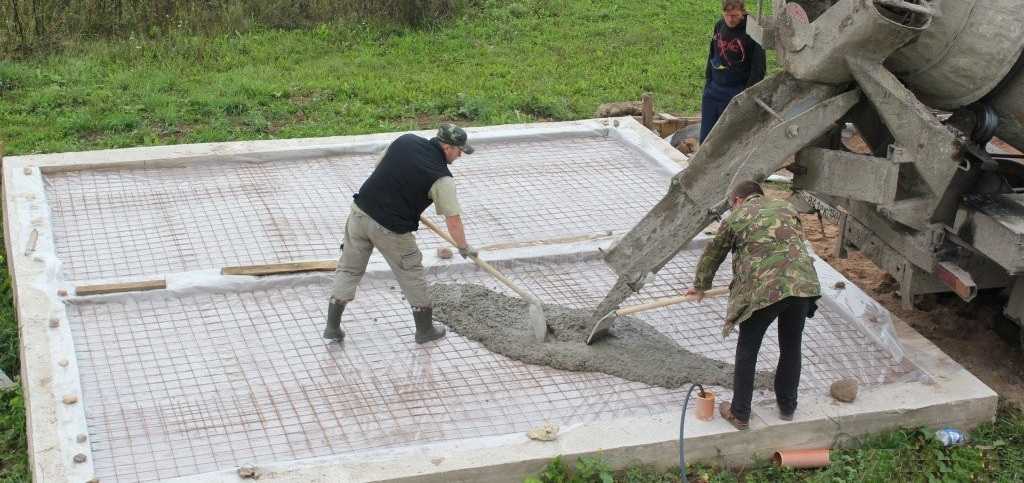
The concrete mixer arrived
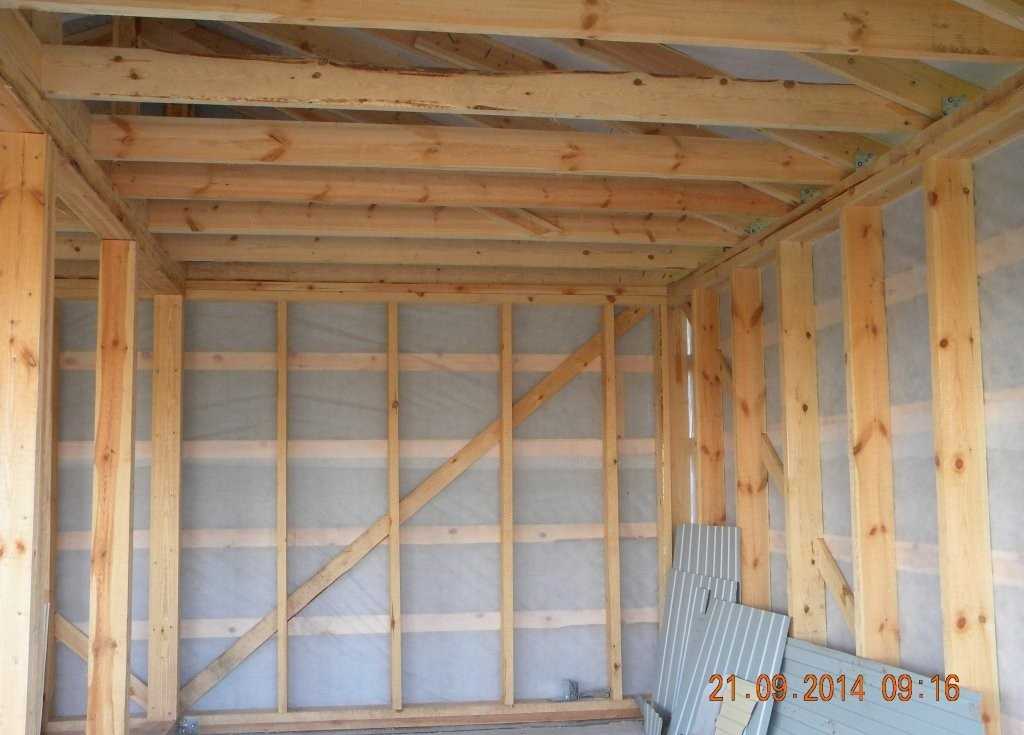
The height of the screed is 10 cm. It was left to set for 2 weeks. Then they began to put the frame. Boards of 50 * 150 mm went to the frame itself and the rafter system, spacers and jibs are made of 100 * 25 mm.
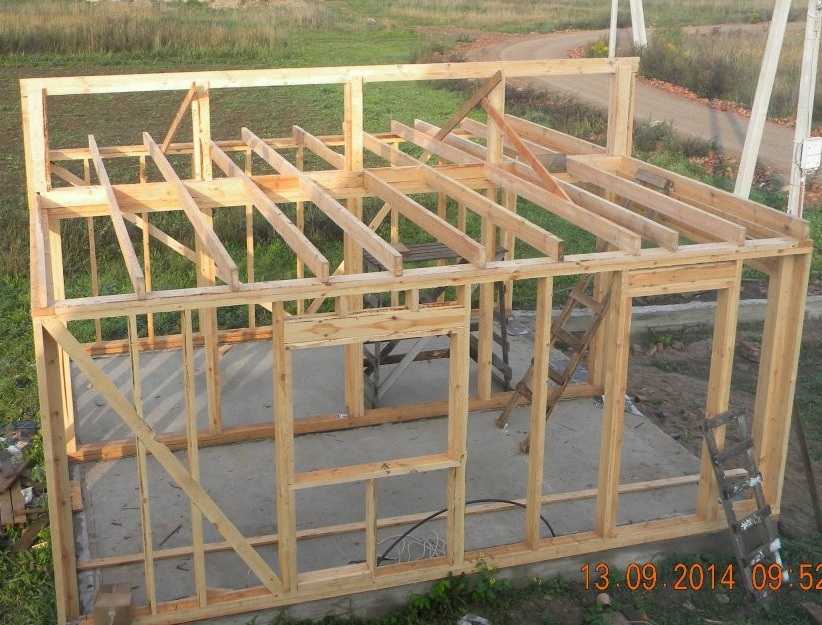
Garage frame made of plank
In the corners, additional boards are placed - for reinforcement. The pillars at the fastening points of doors and windows are also reinforced. Installation step! Walks "- the dimensions are small, but you need to put a door block, then a window block. I divided the rest as it turned out, but did not do more than 60 cm.
The rafter system was immediately assembled. Since the supporting beams passed in the middle, the rafter legs were supported on them. They were placed at a distance of about 50 cm. Mounting plates and corners were used to strengthen the attachment points. They were seated on self-tapping screws, the frame elements were connected with a long nail.
A windproof membrane is stuffed onto the frame from above. On it there is a lathing made of an inch board, the lathing step is about 50 cm.
Windproof membrane over the frame

Truss system nodes
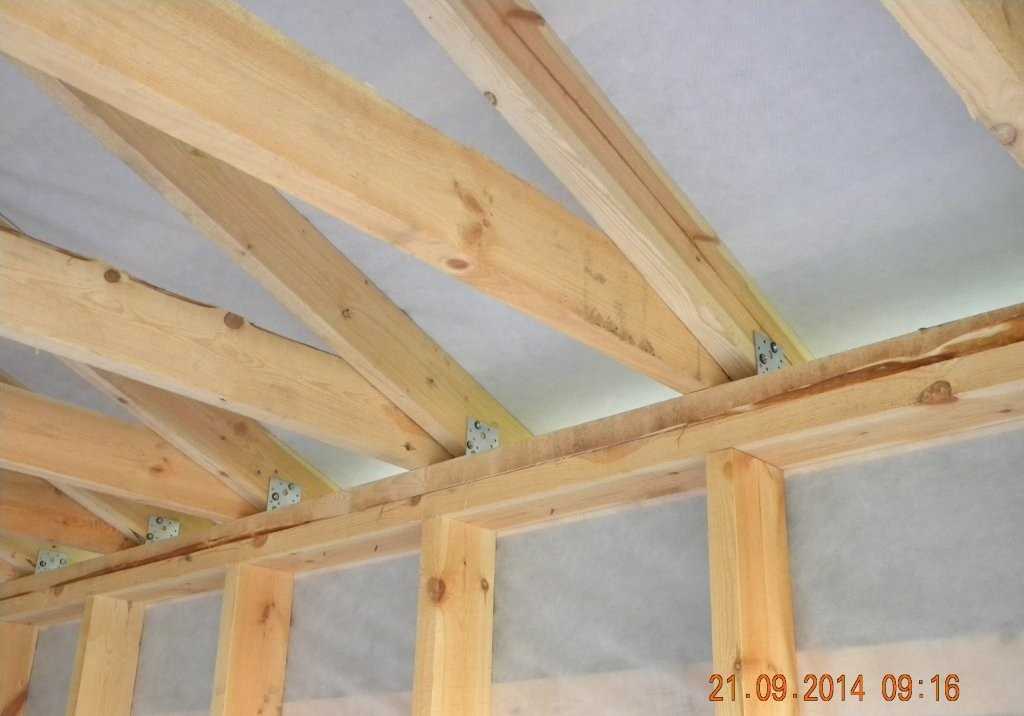
Fastening the rafter legs to the upper frame of the frame
After the membrane and lathing were packed, the installation of the outer skin of the garage began. This is a metal profile on the walls and ondulin on the roof. No difficulties. Cut to size, fasten with self-tapping screws.
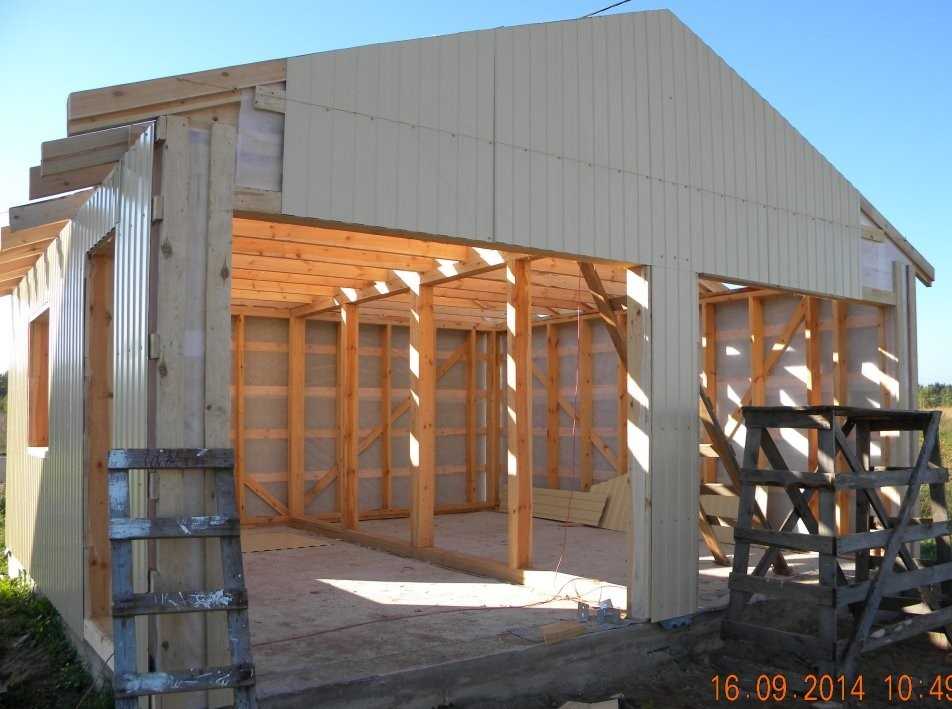
Sheathing with a profiled sheet of walls on a wooden crate is not difficult
The walls are ready, we put the membrane on the roof
Having spread the membrane on the roof (start from the bottom, glue the joints) and nail the crate, mount the ondulin. It should be placed from below, moving up.
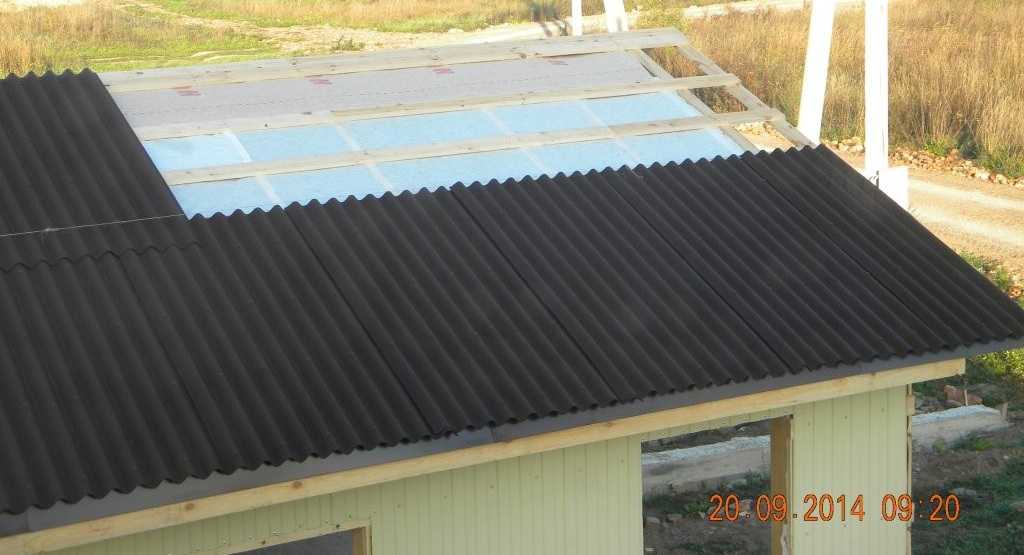
Ondulin is also mounted without any problems
It takes longer to mess around with filing overhangs. They were sewn up with perforated siding (remnants from the construction of the house). Installed a dry wood wind board 145 * 20 mm, painted white.
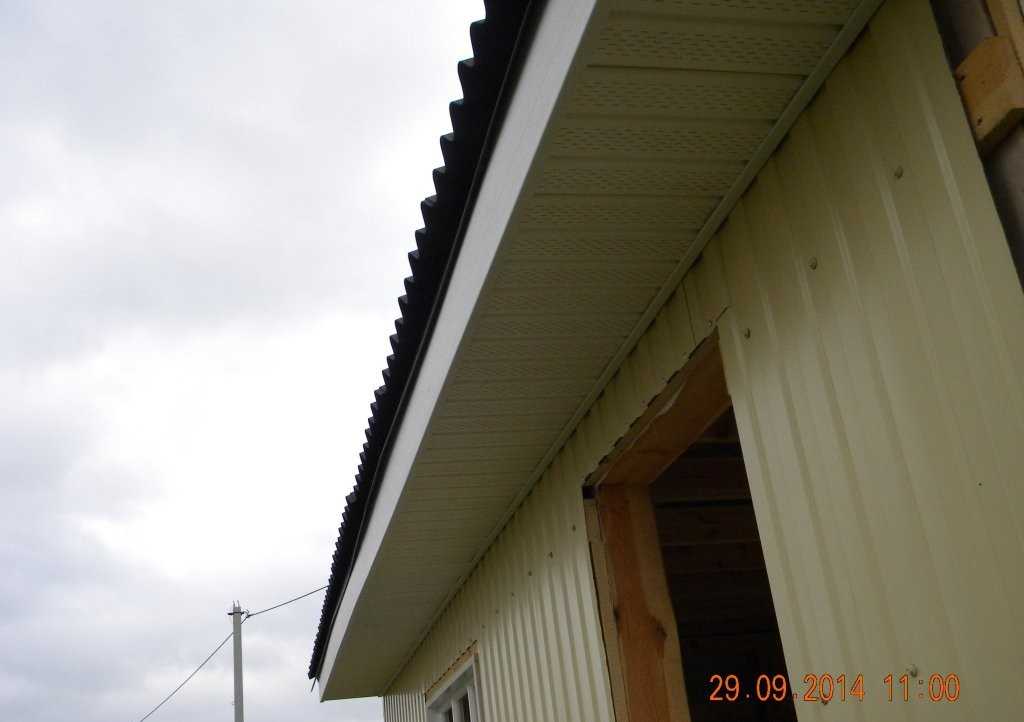
It took a lot of time to hem the overhangs
Installed wooden windows, painted white and a cheap Chinese door, which will then be replaced and put into the barn. The corners are sheathed with a wooden board 145 * 20 mm, painted to match the roofing material.
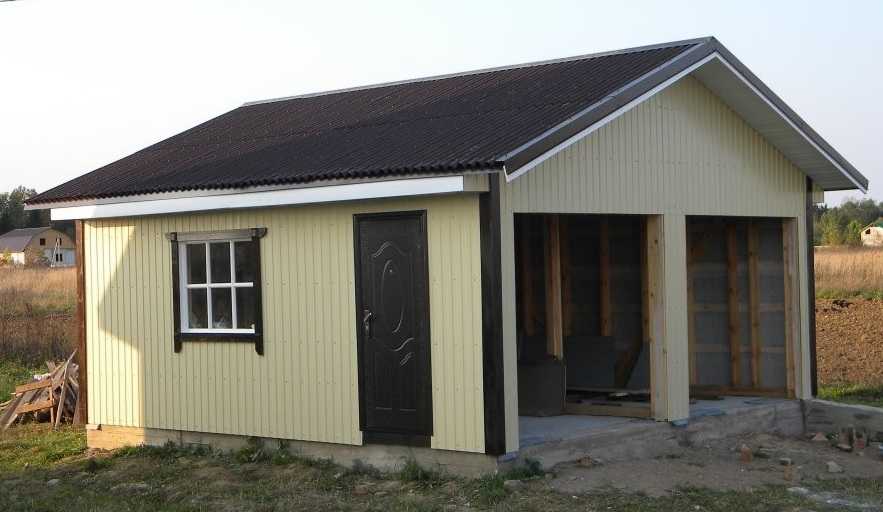
Almost the result: more gates and insulation
An entrance was prepared: on one side, when the foundation was poured, an extended tape was poured (the height difference is greater). On the other side they propped up with a board. They covered it with screenings, tamped it down. The entrance is ready.
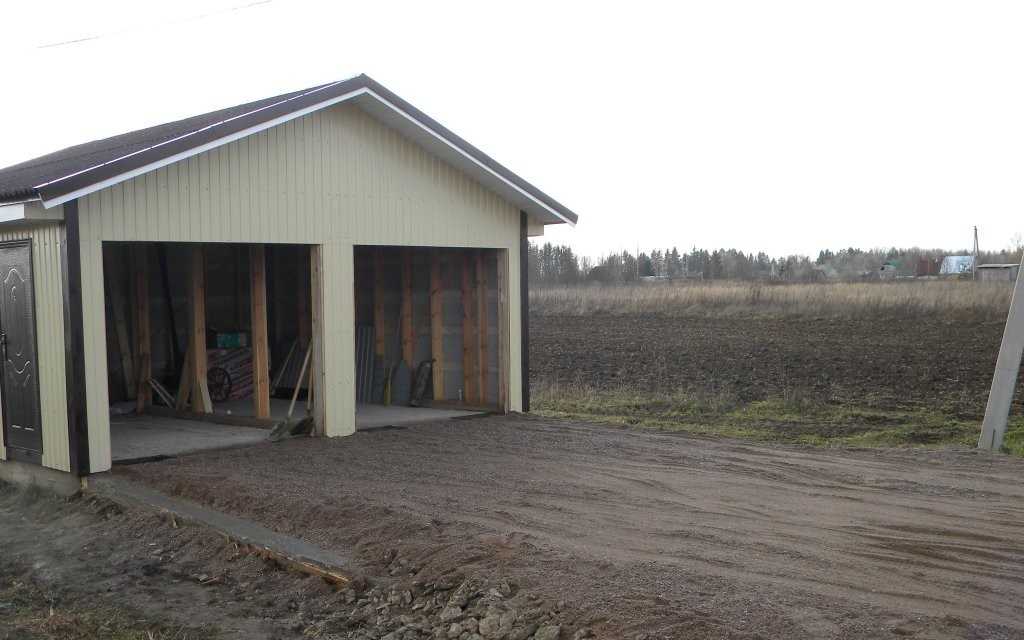
Entry ready
Checked, filling is normal
Rollers were installed last. At first, overhead doors were planned, but the price for them became merciless, therefore a cheaper option was installed.
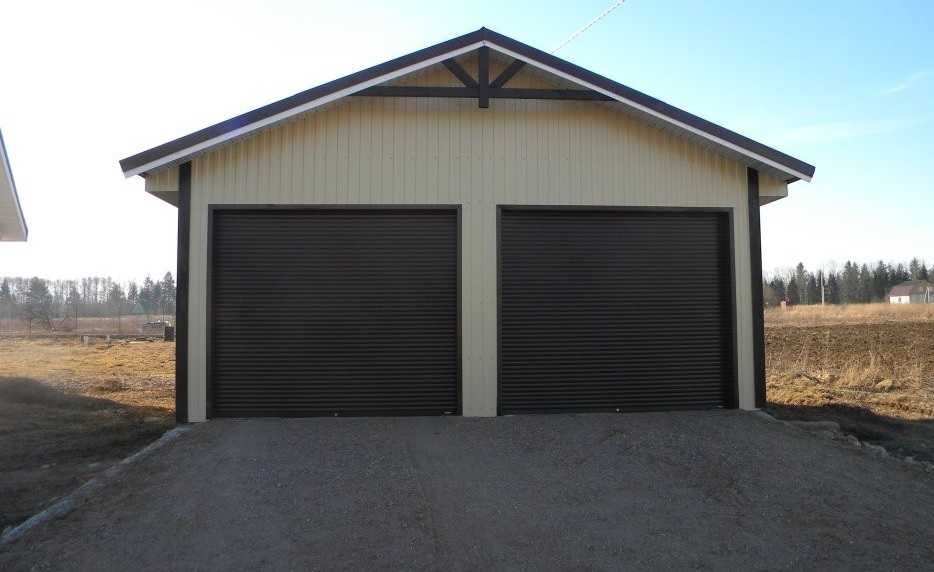
Garage ready